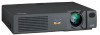
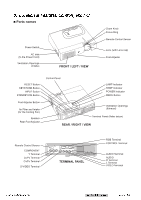
ViewSonic PJ501 Service Manual - Page 8
Adjustment - parts
 |
UPC - 766907692815
View all ViewSonic PJ501 manuals
Add to My Manuals
Save this manual to your list of manuals |
Page 8 highlights
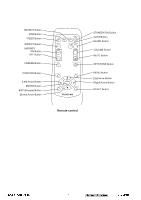
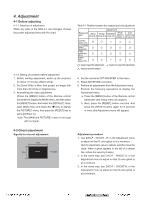
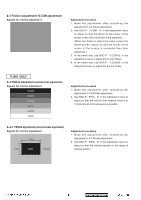
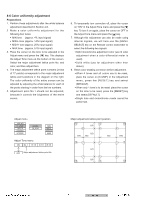
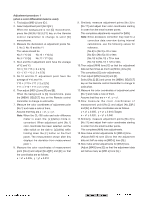
4. Adjustment 4-1 Before adjusting 4-1-1 Selection of adjustment When any parts in the table 4-1 are changed, choose the proffer adjusting items with the chart. 4-1-2 Setting of condition before adjustment 1. Before starting adjustment, warm up the projector for about 10 minutes.(Blank white) 2. Set Zoom Wide to Max. And project an image with more than 40 inches in diagonal size. 3. Normalizing the video adjustment. (Press the [MENU] button of the Remote control transmitter to display the MAIN menu, and then press the [RESET] button. And select the [DEFAULT]. Next, open MAIN menu and press the [ ] key to display the PICTURE1 menu, then press the [RESET] key to set to [DEFAULT].) *note :The MAIN and PICTURE1 menu is not reset with no signal. Table 4-1: Relation between the replaced part and adjustment : means need for adjustment. : means not need for adjustment. : means recommended. 4. Set the normal at OPT-WHISPER in the menu. 5. Reset KEYSTONE correction. 6. Perform all adjustments from the Adjustment menu. Perform the following operations to display the Adjustment menu. a. Press the [MENU] button of the Remote control transmitter (the Setup menu will appear). b. Next, press the [RESET] button one time. And press the [RESET] button again for 5 seconds or more (the Adjustment menu will appear). 4-2 Ghost adjustment Signals for internal adjustment ��� ��� Adjustment procedure 1. Use DAC-P - GHOST - R: in the Adjustment menu to adjust so that R color ghost is at a minimum. (Set the adjustment value to default, and then raise the value. When a ghost appears to the left of a vertical line, reduce the value by 2 steps.) 2. In the same way, use DAC-P - GHOST-G: in the Adjustment menu to adjust so that G color ghost is at a minimum. 3. In the same way, use DAC-P - GHOST-B: in the Adjustment menu to adjust so that B color ghost is at a minimum. ViewSonic Corporation 5 Confidential - Do Not Copy PJ501/PJ551
-
 1
1 -
2
-
 3
3 -
 4
4 -
 5
5 -
 6
6 -
 7
7 -
 8
8 -
 9
9 -
 10
10 -
 11
11 -
 12
12 -
 13
13 -
14
-
15
-
16
-
17
-
18
-
19
-
20
-
21
-
22
-
23
-
24
-
25
-
26
-
27
-
28
-
29
-
30
-
31
-
32
-
33
-
34
-
35
-
36
-
37
-
38
-
39
-
40
-
41
-
42
-
43
-
44
-
45
-
46
-
47
-
48
-
49
-
50
-
51
-
52
-
53
-
54
-
55
-
56
-
57
-
58
-
59
-
60
-
61
-
62
 |
 |
