ViewSonic PS501W PS501W User Guide English - Page 32
Adjusting 4 corners (PS600W/PS600X), Magnifying and searching for details
 |
View all ViewSonic PS501W manuals
Add to My Manuals
Save this manual to your list of manuals |
Page 32 highlights
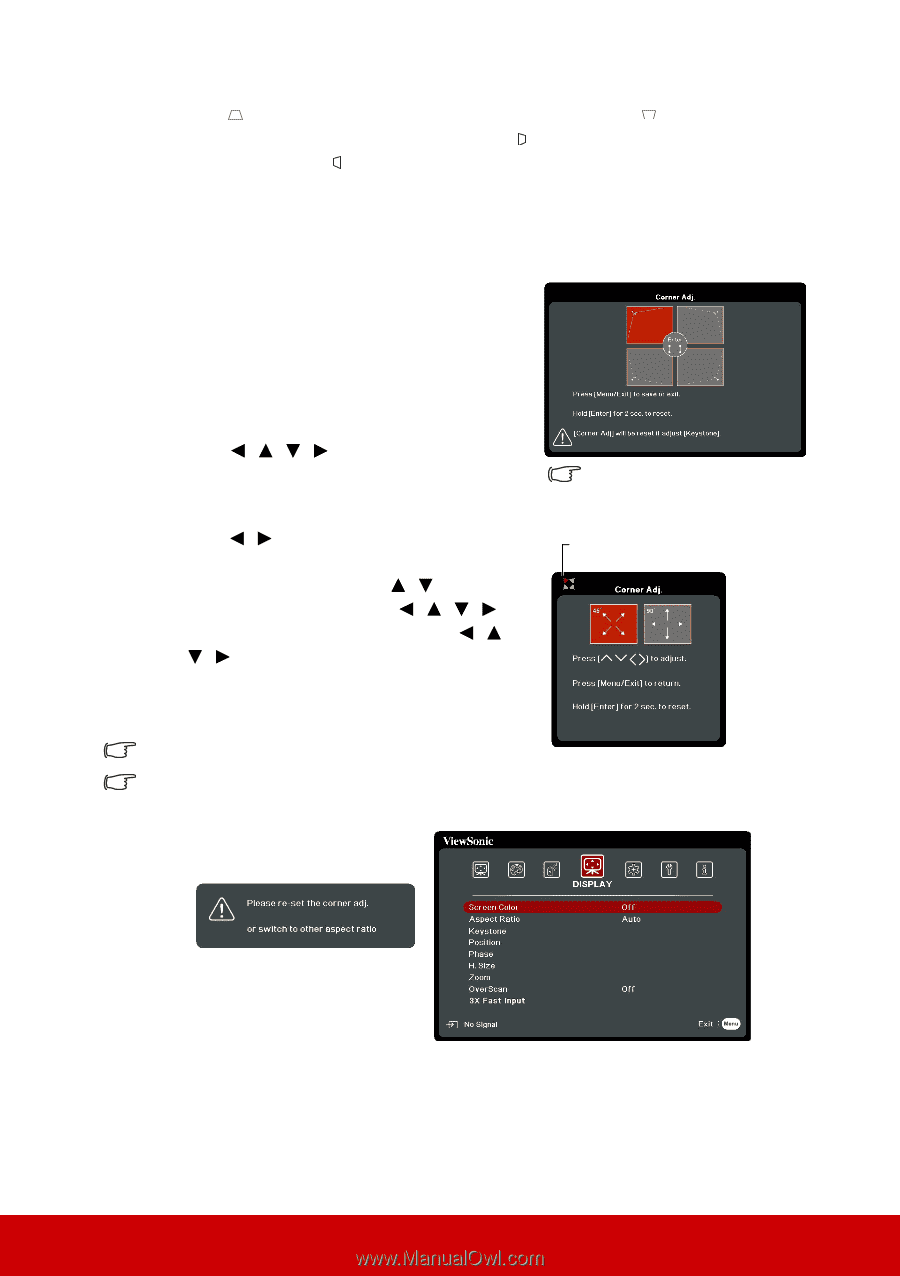
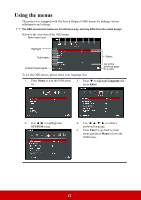
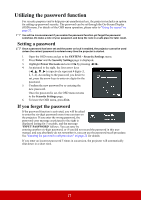
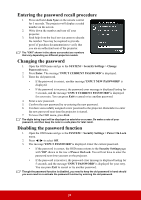
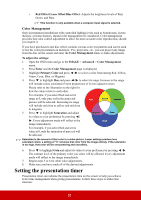
2. Press Enter. 3. Press to correct keystoning at the top of the image or press to correct keystoning at the bottom of the image. Press to correct keystoning at the right side of the image. Press to correct keystoning at the left side of the image. Adjusting 4 corners (PS600W/PS600X) You can manually adjusts the shape and size of an image that is unevenly rectangular on all sides. 1. To display the Corner Adj. page, you can do one of the followings: i. Press Enter. ii. Open the OSD menu and go to the DISPLAY > Corner Adj. menu and press Enter. The Corner Adj. page is displayed. 2. Press / / / to select the corner you wish to adjust and press Enter. 3. Press / to select an adjustment method that suits your need and press Enter. 4. As indicated on the screen ( / for a 45degree angle adjustment and / / / for a 90-degree angle adjustment), press / / / to adjust its shape and size. You can press Menu or Exit to go back to a previous step. A long press for 2 seconds on Enter will reset the settings on the corner that you chose. Adjusting keystone will reset the Corner Adj. settings. A long press for 2 seconds on Enter when this page displays will reset the settings on all 4 corners. Indicates the corner that you selected. After the Corner Adj. settings have been modified, some aspect ratios or timings are not available. When that happens, reset the settings on all 4 corners. The following messages will appear: Magnifying and searching for details If you need to find the details on the projected picture, magnify the picture. Use the direction arrow keys for navigating the picture. • Using the remote control 27
-
 1
1 -
2
-
3
-
4
-
5
-
6
-
7
-
8
-
9
-
10
-
11
-
12
-
13
-
14
-
15
-
16
-
17
-
18
-
19
-
20
-
21
-
22
-
23
-
24
-
25
-
26
-
 27
27 -
 28
28 -
 29
29 -
 30
30 -
 31
31 -
 32
32 -
 33
33 -
 34
34 -
 35
35 -
 36
36 -
 37
37 -
38
-
39
-
40
-
41
-
42
-
43
-
44
-
45
-
46
-
47
-
48
-
49
-
50
-
51
-
52
-
53
-
54
-
55
-
56
-
57
-
58
-
59
-
60
-
61
-
62
-
63
-
64
-
65
-
66
-
67
-
68
-
69
-
70
-
71
-
72
-
73
-
74
-
75
-
76
-
77
-
78
-
79
-
80
-
81
-
82
-
83
-
84
-
85
-
86
-
87
-
88
-
89
-
90
 |
 |