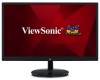
ViewSonic VA2459-smh VA2459-SMH User Guide English - Page 12
Additional Software Installation Optional, Wall Mounting Optional
 |
View all ViewSonic VA2459-smh manuals
Add to My Manuals
Save this manual to your list of manuals |
Page 12 highlights
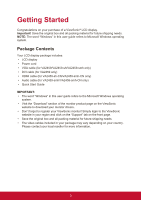
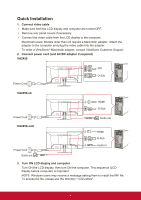
4. Insert the ViewSonic CD into the computer's CD drive. If your computer does not have a CD-ROM drive, please refer to Customer Support page. 5. Windows users: Set the timing mode (example: 1024x768) For instructions on changing the resolution and refresh rate, see the graphics card's user guide. 6. Installation is complete. Enjoy your new ViewSonic LCD display. Additional Software Installation (Optional) 1. Load the ViewSonic CD on your CD/DVD drive. 2. Double click on the "Software" folder and choose an application, if desired. 3. Double click on the Setup.exe file and follow the onscreen instructions to complete the simple installation. Wall Mounting (Optional) NOTE: For use only with UL Listed Wall Mount Bracket. To obtain a wall-mounting kit or height adjustment base, contact ViewSonic® or your local dealer. Refer to the instructions that come with the base mounting kit. To convert your display from a desk-mounted to a wall-mounted display, do the following: 1. Find VESA compatible wall-mounting kit which meets the quaternions below, Max Loading 14kg Hole pattern (W x H; mm) 100mm x 100mm Interface Pad (W x H x D) 115 mm x 115 mm x 2.6 mm Pad Hole Ø 5mm Screw Q'ty & Specification 4 piece M4 x 10mm 2. Verify that the power button is turned Off, then disconnect the power cord. 3. Lay the display face down on a towel or blanket. 4. Remove the base. (Screws removal might be required.) 5. Attach the mounting bracket from the wall mounting kit using screws of the appropriate length. 6. Attach the display to the wall, following the instructions in the wall-mounting kit. 5
-
 1
1 -
2
-
3
-
4
-
5
-
6
-
 7
7 -
 8
8 -
 9
9 -
 10
10 -
 11
11 -
 12
12 -
 13
13 -
 14
14 -
 15
15 -
 16
16 -
 17
17 -
18
-
19
-
20
-
21
-
22
-
23
-
24
-
25
 |
 |
