ViewSonic XG350R-C User Guide - Page 15
purposes only. The panel should not be rotated once it has been, attached to the monitor base.
 |
View all ViewSonic XG350R-C manuals
Add to My Manuals
Save this manual to your list of manuals |
Page 15 highlights
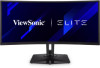
3. Rotate the monitor clockwise (see the below picture for reference). 4. Finish the monitor installation by fully rotating the monitor 90°(see the below picture for reference). NOTE: XG350R-C 90˚ panel rotation is intended for packaging purposes only. The panel should not be rotated once it has been attached to the monitor base. *This picture is for reference only 11
-
 1
1 -
2
-
3
-
4
-
5
-
6
-
7
-
8
-
9
-
 10
10 -
 11
11 -
 12
12 -
 13
13 -
 14
14 -
 15
15 -
 16
16 -
 17
17 -
 18
18 -
 19
19 -
 20
20 -
21
-
22
-
23
-
24
-
25
-
26
-
27
-
28
-
29
-
30
-
31
-
32
-
33
-
34
-
35
-
36
-
37
-
38
-
39
-
40
-
41
-
42
-
43
-
44
-
45
-
46
-
47
-
48
-
49
-
50
-
51
-
52
-
53
-
54
-
55
-
56
-
57
-
58
-
59
-
60
-
61
-
62
-
63
-
64
-
65
-
66
-
67
-
68
-
69
-
70
-
71
-
72
-
73
-
74
-
75
 |
 |

11
3.
Rotate the monitor clockwise (see the below picture for
reference).
4.
Finish the monitor installation by fully rotating the monitor
90°(see the below picture for reference).
NOTE:
XG350R-C 90˚ panel rotation is intended for packaging
purposes only. The panel should not be rotated once it has been
attached to the monitor base.
*This picture is for reference only