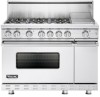
Viking BVGRC8486GWSS Use and Care Manual - Page 15
Door Replacement and Adjustment, Door Removal
 |
View all Viking BVGRC8486GWSS manuals
Add to My Manuals
Save this manual to your list of manuals |
Page 15 highlights
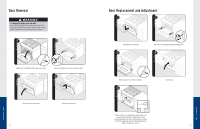
PRODUCT CARE Door Removal WARNING TO PREVENT PERSONAL INJURY Before removing the doors, make sure the pins are properly installed in the hinges. Failure to do so can result in personal injury to hands and/or fingers. 1 2 Open door completely. Place pin in pin hole. 3 2 2 1 Remove hinge trim screws and hinge trim. 4 Close until pins stop door. 28 Lift door up and out. Door Replacement and Adjustment 1 2 Reinstall door to range. 3 1 1 2 Open door completely. Reinstall hinge trim. 4 Remove pins from hole in hinges. 5 Close door. If door needs to be adjusted, loosen hinge trim screws located in Step 2. Adjust the screws located between the door and kickplate using a 5/32" hex head allen wrench. After adjustment, tighten hinge trim screws. 29 PRODUCT CARE
-
 1
1 -
2
-
3
-
4
-
5
-
6
-
7
-
8
-
9
-
 10
10 -
 11
11 -
 12
12 -
 13
13 -
 14
14 -
 15
15 -
 16
16 -
 17
17 -
 18
18
 |
 |
