Viking DDOE305SS Use and Care Manual - Page 18
Roasting
 |
View all Viking DDOE305SS manuals
Add to My Manuals
Save this manual to your list of manuals |
Page 18 highlights
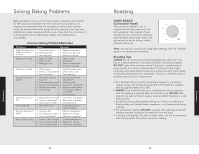
Operation Roasting Roasting Tips (cont.) • When using a meat thermometer, insert the probe halfway into the center of the thickest portion of the meat. (For poultry, insert the thermometer probe between the body and leg into the thickest part of the inner thigh.) The tip of the probe should not touch bone, fat, or gristle to ensure an accurate reading. Check the meat temperature halfway through the recommended roasting time. After reading the thermometer once, insert it 1⁄2 inch (1.3 cm) further into the meat, then take a second reading. If the second temperature registers below the first, continue cooking the meat. • Roasting times ALWAYS vary according to the size, shape and quality of meats and poultry. Less tender cuts of meat are best prepared in the conventional bake setting and may require moist cooking techniques. Remove roasted meats from the oven when the thermometer registers 5°F (-15°C) to 10ºF (-12°C) lower than the desired doneness. The meat will continue to cook after removal from the oven. Allow roasts to stand 15 to 20 minutes after roasting in order to make carving easier. For many foods, especially roasts and poultry, internal food temperature is the best test for doneness. The meat probe takes the guesswork out of roasting by cooking foods to the exact doneness you want. Note: Double oven models have a probe in the upper oven only. Use of probes other than the one provided with this product may result in damage to the probe. Use the handles of the probe and plug when inserting and removing them from the meat and outlet. • To avoid damaging your probe, DO NOT use tongs to pull on the cable when removing. • To avoid breaking the probe, make sure food is completely defrosted before inserting. • To prevent possible burns, DO NOT unplug the probe from the outlet until the oven has cooled. • NEVER leave the probe inside the oven during a self-cleaning cycle. • DO NOT store the probe in the oven. 34 Roasting Roasting Tips (cont.) After preparing the meat and placing on broiler pan, follow these steps for proper probe placement. • Lay the probe on the outside of the meat along the top or side and mark with your finger where the edge of the meat comes to on the probe. The point should rest in the center of the thickest meaty part of the roast. • Insert the probe completely into the meat. It should not touch the bone, fat, or gristle. For roasts with no bone, insert the probe into the meatiest part of the roast. For bone-in ham or lamb, insert the probe into the center of the lowest large muscle or joint. Insert the probe into the meatiest part of the inner thigh from below and parallel to the leg of a whole turkey. • When setting the probe temperature, it is recommended to set the temperature about 10°F (4°C) lower than desired internal temperature. The meat will continue to cook when removed from the oven and will reach the desired doneness while "standing". 35 Operation
-
 1
1 -
2
-
3
-
4
-
5
-
6
-
7
-
8
-
9
-
10
-
11
-
12
-
 13
13 -
 14
14 -
 15
15 -
 16
16 -
 17
17 -
 18
18 -
 19
19 -
 20
20 -
 21
21 -
 22
22 -
 23
23 -
24
-
25
-
26
 |
 |