Viking DFWB300R Use and Care Manual - Page 8
Changing the Light Tube in the Top Zone, Changing the Light Tube in the Middle Zone
 |
View all Viking DFWB300R manuals
Add to My Manuals
Save this manual to your list of manuals |
Page 8 highlights
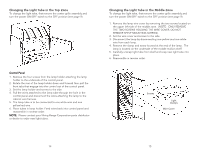
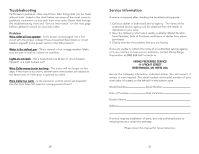
Changing the Light Tube in the Top Zone To change the light tube, first remove the center grille assembly and turn the power ON/OFF switch to the OFF position (see page 9). Control Panel 1. Remove the four screws from the lamp holder attaching the lamp holder to the underside of the control panel. 2. Rotate the rear of the lamp holder down and forward then pull the front tabs that engage into the control out of the control panel. 3. Set the lamp holder and screws to the side. 4. Pull the wires attached to the lamp tube through the hole in the control panel and disconnect the wires attaching the lamp to the cabinet wire harness. 5. The lamp tube is to be connected to one white wire and one yellow/red wire. 6. Place tubes in lamp holder. Feed wires back into control panel and reassemble in reverse order. NOTE: Please contact your Viking Range Corporation parts distributor or dealer to order new light tubes. Changing the Light Tube in the Middle Zone To change the light tube, first remove the center grille assembly and turn the power ON/OFF switch to the OFF position (see page 9). 1. Remove the lamp wire cover by removing the two screws located on the upper left side of the middle zone. (NOTE: ONLY REMOVE THE TWO SCREWS HOLDING THE WIRE COVER; DO NOT REMOVE SHELF MOUNTING SCREWS). 2. Set the wire cover and screws to the side. 3. Disconnect the lamp by disconnecting one yellow and one white wire from each lamp. 4. Remove the clamp and screw located at the end of the lamp. The lamp is located on the underside of the middle mullion shelf. 5. Carefully unsnap light tube from shelf and snap new light tube into place. 6. Reassemble in reverse order. Screws Light Clamps Wire Cover 14 15
-
 1
1 -
2
-
 3
3 -
 4
4 -
 5
5 -
 6
6 -
 7
7 -
 8
8 -
 9
9 -
 10
10 -
 11
11 -
 12
12
 |
 |
