Viking DFWB300R Custom Side Panel Hardware Kit - Installation Instructions - Page 1
Viking DFWB300R Manual
 |
View all Viking DFWB300R manuals
Add to My Manuals
Save this manual to your list of manuals |
Page 1 highlights
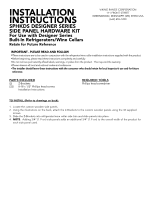
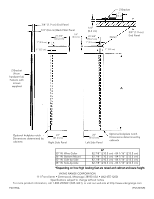
INSTALLATION INSTRUCTIONS SPHKDS DESIGNER SERIES SIDE PANEL HARDWARE KIT For Use with Designer Series Built-In Refrigerators/Wine Cellars Retain for Future Reference VIKING RANGE CORPORATION 111 FRONT STREET GREENWOOD, MISSISSIPPI (MS) 38930 USA (662) 455-1200 IMPORTANT - PLEASE READ AND FOLLOW •These instructions are to be used in conjunction with the refrigerator/wine cellar installation instructions supplied with the product. •Before beginning, please read these instructions completely and carefully. •Do not remove permanently affixed labels, warnings, or plates from the product. This may void the warranty. •Please observe all local and national codes and ordinances. •The installer should leave these instructions with the consumer who should retain for local inspector's use and for future reference. PARTS INCLUDED (2) Z-Brackets (32) 8-18 x 1/2" Phillips head screws Installation Instructions REQUIRED TOOLS Phillips head screwdriver TO INSTALL (Refer to drawings on back): 1. Locate the custom wooden side panels. 2. Using the illustrations on the back, attach the Z-Brackets to the custom wooden panels using the 32 supplied screws. 3. Slide the Z-Brackets into refrigerator/wine cellar side trim and slide panels into place. 4. NOTE: Adding 3/4" (1.9 cm) side panels adds an additional 3/4" (1.9 cm) to the overall width of the product for each side panel used.
-
 1
1 -
 2
2
 |
 |