Viking FDW100WS Viking Dishwasher Door Panel - RVDP - Installation Instruction - Page 2
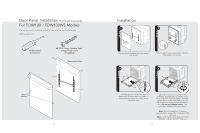
Door Panel Installation, For FDW100 / FDW100WS Models, Installation
 |
View all Viking FDW100WS manuals
Add to My Manuals
Save this manual to your list of manuals |
Page 2 highlights
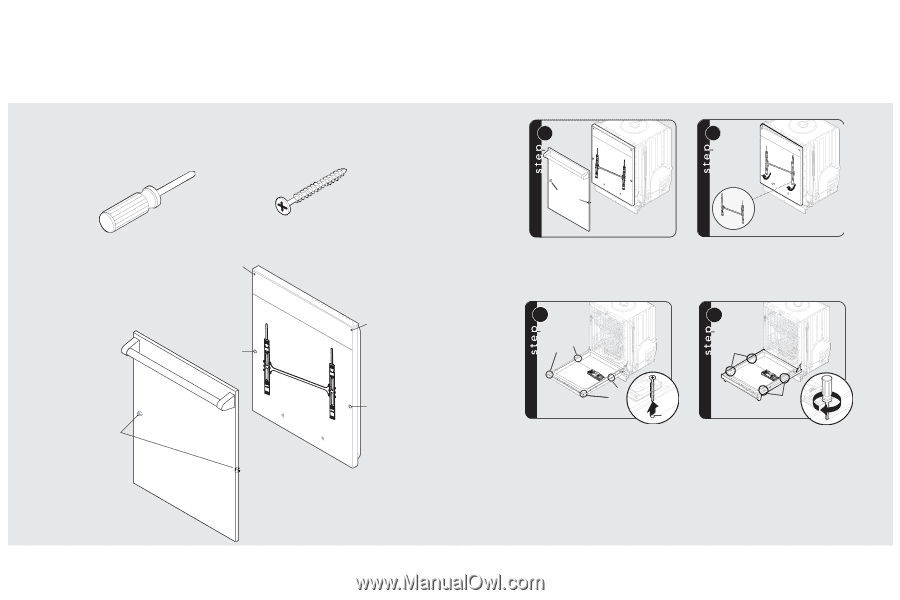
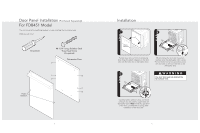
Door Panel Installation (Purchased Separately) For FDW100 / FDW100WS Models The unit comes with everything needed to make installing the door panel easy. What you will need: Phillips Head Screwdriver Plastic Retainers #8 1-3/4" long, Stainless Steel Phillips Head Screw (4 supplied) D Dishwasher Door D C C 2 Installation 1 2 Plastic Retainers Remove plastic retainers from door panel and discard. Remove plastic mounting brackets from the dishwasher and discard. 3 C D 4 D C x2 D D Carefully open the dishwasher door. Remove the (2) white caps from holes (C) and the (2) top screws from holes (D) on dishwasher door x4 D Carefully secure the door panel to the dishwasher through holes (C) and (D) using the four flat PHD screws provided. Carefully tighten all four screws and check to ensure that the panel is square with the dishwasher door. Do not over tighten screws. This may cause damage to the inner door. Note: Verify the operation of the door counterbalance springs after installation of the door skin. Note: Verify that the door does not hit the kickplate. Adjust kickplate if necessary. 3
-
 1
1 -
 2
2 -
 3
3 -
 4
4
 |
 |