Viking FDWB301R Installation Instructions - Page 13
General Information
 |
View all Viking FDWB301R manuals
Add to My Manuals
Save this manual to your list of manuals |
Page 13 highlights
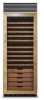
General Information Area Requirements Verify the following: • Unit can fit into residence and can be moved around corners and through doorways. • Floors can support unit's weight plus wine weight (approximately 1200 lbs total). • Rear wall is solid and is able to support two horizontally mounted 50x100 mm (included) bolted to two wall studs. The 50x100 mm board bolt heads must be flush with 50x100 mm to prevent obstruction. • Remove anything attached to rear or side walls that can obstruct unit installation. • Cutout dimensions are accurate. • Electrical outlet is in correct location. • Do not install a refrigeration unit near a heat source, nor in a location where the surrounding temperature will fall below 60º F. Electrical Requirements WARNING ELECTRICAL SHOCK HAZARD Plug into a grounded 3-prong outlet. DO NOT remove ground plug. DO NOT use an adapter. DO NOT use an extension cord. Failure to follow these instructions could result in fire or electrical shock. IMPORTANT: If the power cord is damaged, it must be replaced by a Viking qualified technician or a Viking Range Corporation representative in order to avoid hazard. It is the customer's responsibility to: • Contact a qualified electrical installer. • Assure that the electrical installation is adequate and in conformance with the National Electrical Code, ANSI/NFPA 70latest edition or Canadian Electrical Code C22.1-1998 and C22.2 No. 0-M91 (or latest edition), and all local codes and ordinances. (115 volt, 60-Hz, 15 amp, fused, electrical supply is required.) It is required that a separate circuit serving only this appliance be provided. This appliance is equipped with a power supply cord having a 3-prong grounding plug. To minimize possible shock hazard, the cord must be plugged into a mating 3-prong, grounding-type wall receptacle. Do not use an extension cord. If codes permit a separate grounding wire to be used, it is recommended that a qualified electrician determine that the grounding path is adequate. DO NOT ground to a gas pipe. Check with a qualified electrician if you are not sure the appliance is properly grounded. Do not have a fuse in the neutral or grounding circuit. Anti-Tip Requirements The anti-tip boards should be fastened into position prior to moving the unit into the opening. NOTE: Additional mounting boards may be required if the unit does not touch the back wall of the enclosure. To prevent unit from tipping forward, it must be secured in place with a solid soffit or wood block. 24 General Information • Most of the unit's weight is at the top. Extra care is needed when moving the unit to prevent tipping. • Do not remove protective film until unit is in operating position. • All four leveling legs must contact the floor to support and stabilize the full weight. • Do not drop unit. • Remove exterior shipping materials prior to moving unit into home, except door latching device. • Use two or more people to move and install unit. Failure to follow this instruction can result in back or other injury. • To avoid personal injury, wear gloves when performing any installation procedure and wear eye protection when cutting metal straps. Moving Unit WARNING TIP OVER HAZARD Appliance is top heavy and tips easily when not completely installed. Keep doors closed until appliance is completely installed and secured per installation instructions. Use two or more people to move and install appliance. Failure to do so can result in death or serious injury. Unpacking Unit 1. Remove top and bottom strap. 2. Remove top cap. 3. Cut carton rear approximately 1/4" (0.6 cm) to 1" (2.5 cm) from right corner with a utility knife extended 1/4" (0.6 cm). 4. Remove carton and exterior packaging. Save cardboard shipping material to protect floor surface when installing unit. Remove anti-tip boards and kickplate from rear of unit. Remove shipping brackets from skid by removing four bolts (two on each side) with a 1/2" deep-well socket wrench and a pair of pliers. NOTE: Tilting unit is not required to remove shipping brackets. Slip appliance dolly between unit and skid. Remove unit from skid. Only use dolly from the rear of the unit to remove unit from skid. After the unit is removed from the skid, a dolly can be used from either side or back but NOT THE FRONT. NOTE: Use excess packaging to protect decorative trim; also, verify that leveling legs are up (0" adjustment). 25
-
 1
1 -
2
-
3
-
4
-
5
-
6
-
7
-
 8
8 -
 9
9 -
 10
10 -
 11
11 -
 12
12 -
 13
13 -
 14
14 -
 15
15 -
 16
16 -
 17
17 -
 18
18
 |
 |
