Viking RDGSU2005BSS Use and Care Manual - Page 7
Surface Operation
 |
View all Viking RDGSU2005BSS manuals
Add to My Manuals
Save this manual to your list of manuals |
Page 7 highlights
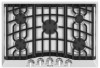
Operation Surface Operation Lighting Burners All burners are ignited by electric ignition. There are no open-flame, "standing" pilots. Surface Burners-Automatic Reignition To light the surface burners, push and turn the appropriate control knob counterclockwise to any position. This control is both a gas valve and an electric switch. Burners will ignite at any "ON" position with the automatic re-ignition system. If the flame goes out for any reason, the burners will automatically reignite if the gas is still flowing. When gas is permitted to flow to the burners, the electric igniters start sparking. On all surface igniters you should hear a "clicking" sound. If you do not, turn off the control and check that the unit is plugged in and that the fuse or circuit breaker is not blown or tripped. Rear, Center, and Front Burners Push in and turn the control knob counter-clockwise to the desired setting. The control knobs can be turned to any desired setting as the knobs do not have fixed positions between "Hi" and "Simmer". Within a few moments, enough gas will have traveled to the burner to light. When the burner lights, turn the burner control to any position to adjust the flame size. Setting the proper flame height for the desired cooking process and selecting the correct cooking vessel will result in superior cooking performance, while also saving time and energy. Note: The igniters may click a number of times before the burner ignites. This is normal. All igniters will spark regardless of which burner is being operated. 12 Surface Operation Surface Cooking Tips • The simmer line on the control panel is the beginning of the variable simmer setting and produces a high simmer setting. Turn the knob slowly towards "OFF" and the flame will adjust to a lower simmer setting. • Use low or medium flame heights when cooking in cookware that are poor conductors of heat, such as glass, and ceramic. Reduce the flame height until it covers approximately 1/3 of the cookware diameter. This will ensure more even heating within the cookware and reduce the likelihood of burning or scorching the food. • Reduce the flame if it is extended beyond the bottom of the cookware. A flame that extends along the sides of the cookware is potentially dangerous, heats the cookware handle and kitchen instead of the food, and wastes energy. • Reduce the flame height to the minimum level necessary to perform the desired cooking process. Remember that food cooks just as quickly at a gentle boil as it does at a rolling boil. Maintaining a higher boil than is necessary causes a loss in food flavor and nutrients. Surface Heat Settings* *Note: The above information is given as a guide only. You may need to vary the heat settings to suit your personal requirements. Heat Setting Simmer Low Med Low Med Med High High Use Melting small quantities Steaming rice Simmering sauces Melting large quantities Low-temperature frying (eggs, etc.) Simmering large quantities Heating milk, cream sauces, gravies, and puddings Sautéing and browning, braising, and pan-frying Maintaining slow boil on large quantities High-temperature frying Pan broiling Maintaining fast boil on large quantities Boiling water quickly Deep-fat frying in large cookware 13 Operation
-
 1
1 -
 2
2 -
 3
3 -
 4
4 -
 5
5 -
 6
6 -
 7
7 -
 8
8 -
 9
9 -
 10
10 -
 11
11 -
 12
12
 |
 |
