Viking VGBQ3002RT2NSS Installation Instructions - Page 16
Rotisserie System, Performance Checklist, Final Preparation
 |
View all Viking VGBQ3002RT2NSS manuals
Add to My Manuals
Save this manual to your list of manuals |
Page 16 highlights
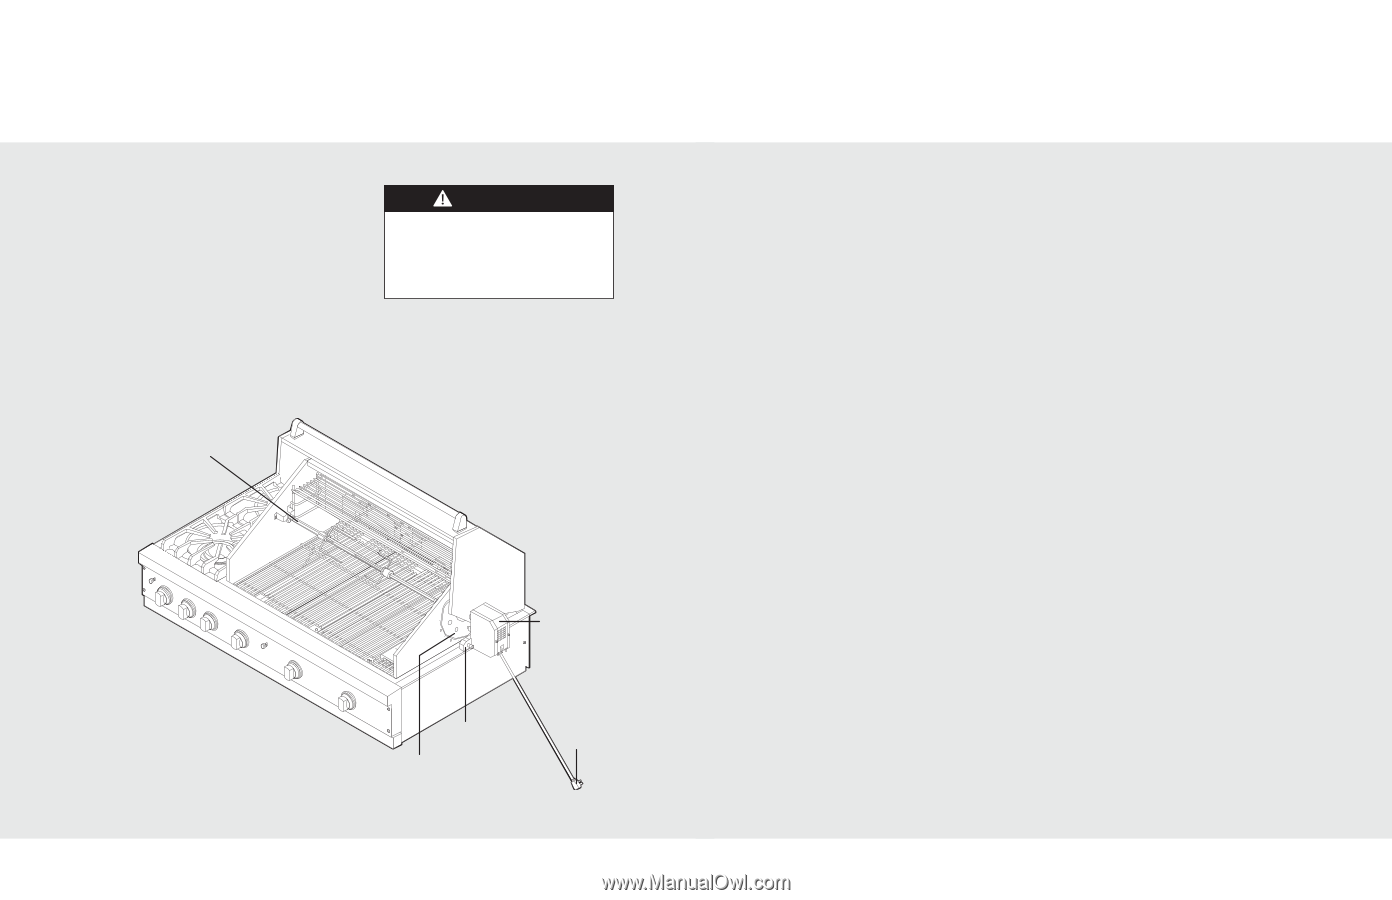
Rotisserie System The rotisserie motor is attached to the mounting bracket located on the right side of the grill frame. The rotisserie motor must be electrically grounded in accordance with local codes. The skewer for the rotisserie is assembled into the gear box assembly by placing the pointed end into the gear box, and resting the threaded end on the support at the left side of the grill. With the skewer pushed as far in as possible, the grooved skewer bushing should rest on the left side bracket. Do not remove the plastic cover on the rotisserie motor switch due to safety consideration. Groove skewer support WARNING ELECTRICAL SHOCK HAZARD This appliance is equipped with a grounding plug for your protection against shock hazard and should be plugged directly into a properly grounded receptacle. Do not cut or remove the grounding prong from this plug. Rotisserie motor Mounting bracket Gear box assembly Grounded plug 30 Performance Checklist A qualified installer should carry out the following checks: • All internal packaging removed. • Specified clearances maintained to combustible materials. • Pressure regulator connected and set. • Manual shut-off valve installed and accessible. • Check air shutter adjustment - sharp blue flame, no yellow tipping. • Check for gas leaks (odors) at all gas connections. • Each burner lights satisfactorily, individually or with adjacent burners lit. Any adjustments necessary that are the result of the installer not following instructions will be responsibility of the installer, dealer or the end user of the product. Final Preparation • Some stainless steel parts may have a plastic protective wrap which must be peeled off. The interior should be washed thoroughly with hot, soapy water to remove film residues and any dust or debris before being used, then rinsed and wiped dry. Solutions stronger than soap and water are rarely needed. • All stainless steel body parts should be wiped with hot, soapy water and with a liquid cleaner designed for this material. If buildup occurs, do not use steel wool, abrasive cloths, cleansers, or powders! If it is necessary to scrape stainless steel to remove encrusted materials, soak with hot, wet cloths to loosen the material, then use a wool or nylon scraper. Do not use a metal knife, spatula, or any other material tool to scrape stainless steel! Scratches are almost impossible to remove. 31
-
 1
1 -
2
-
3
-
4
-
5
-
6
-
7
-
8
-
9
-
10
-
 11
11 -
 12
12 -
 13
13 -
 14
14 -
 15
15 -
 16
16 -
 17
17 -
 18
18
 |
 |