Viking VGC5365B Installation Instructions - Page 8
General Information, Installation
 |
View all Viking VGC5365B manuals
Add to My Manuals
Save this manual to your list of manuals |
Page 8 highlights
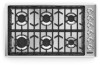
General Information CAUTION BURN HAZARD The use of cabinets for storage above the appliance may result in a potential burn hazard. Combustible items may ignite, metallic items may become hot and cause burns. If a cabinet storage is to be provided the risk can be reduced by installing a range hood that projects horizontally a minimum of 5" (12.7 cm) beyond the bottom of the cabinets. WARNING This appliance shall not be used for space heating. This information is based on safety considerations. • All openings in the wall behind the appliance and in the floor under the appliance shall be sealed. • Keep appliance area clear and free from combustible materials, gasoline, and other flammable vapors. • DO NOT obstruct the flow of combustion and ventilation air. • Disconnect the electrical supply to the appliance before servicing. When removing cooktop for cleaning and/or service: • Shut off gas at main supply • Disconnect AC power supply • Disconnect gas line to the inlet pipe. • Lift appliance out of cabinet cutout. Electrical Requirement Normal grounded household current, 120 volts, 60 Hz, 15 amps, single phase. Electrical installation should comply with national and local codes. Air Supply and Ventilation Means must be provided for any heavy-duty cooking appliance to exhaust combustion waste product to the outside of the building. It is recommended that the cooktop be set under a powered, vented exhaust hood, or non-vented recirculating hood. Nothing should obstruct the flow of combustion and ventilation air. Gas Manifold Pressure Natural gas - 5.0" W.C.P. LP/Propane - 10.0" W.C.P. Flexible Connections If the unit is to be installed with flexible couplings and/or quick disconnect fittings, the installer must use a flexible connector of at least 1/2" I.D. (1.3 cm) NPT with suitable strain reliefs and comply with ANSI Z21.41 and Z21.69 standards. 14 Installation 1 1 1 2 2 2 2 Remove the grates and burner caps. 3 Optional Gasket 2 Optional Gasket Turn the cooktop upside down and place on a nonscratch surface. NOTE: Make sure there are no loose objects on the cooktop before turning upside down. 4 Peel away the plastic covering and place the gasket material all the way around the burner flange. IMPORTANT: Make sure the corners are covered completely, leaving no air gaps. Turn the cooktop over and place into countertop opening. 15
-
 1
1 -
2
-
 3
3 -
 4
4 -
 5
5 -
 6
6 -
 7
7 -
 8
8 -
 9
9 -
 10
10
 |
 |
