Viking VISB542DSS Installation Instructions - Page 21
Hinge Adjustment
 |
View all Viking VISB542DSS manuals
Add to My Manuals
Save this manual to your list of manuals |
Page 21 highlights
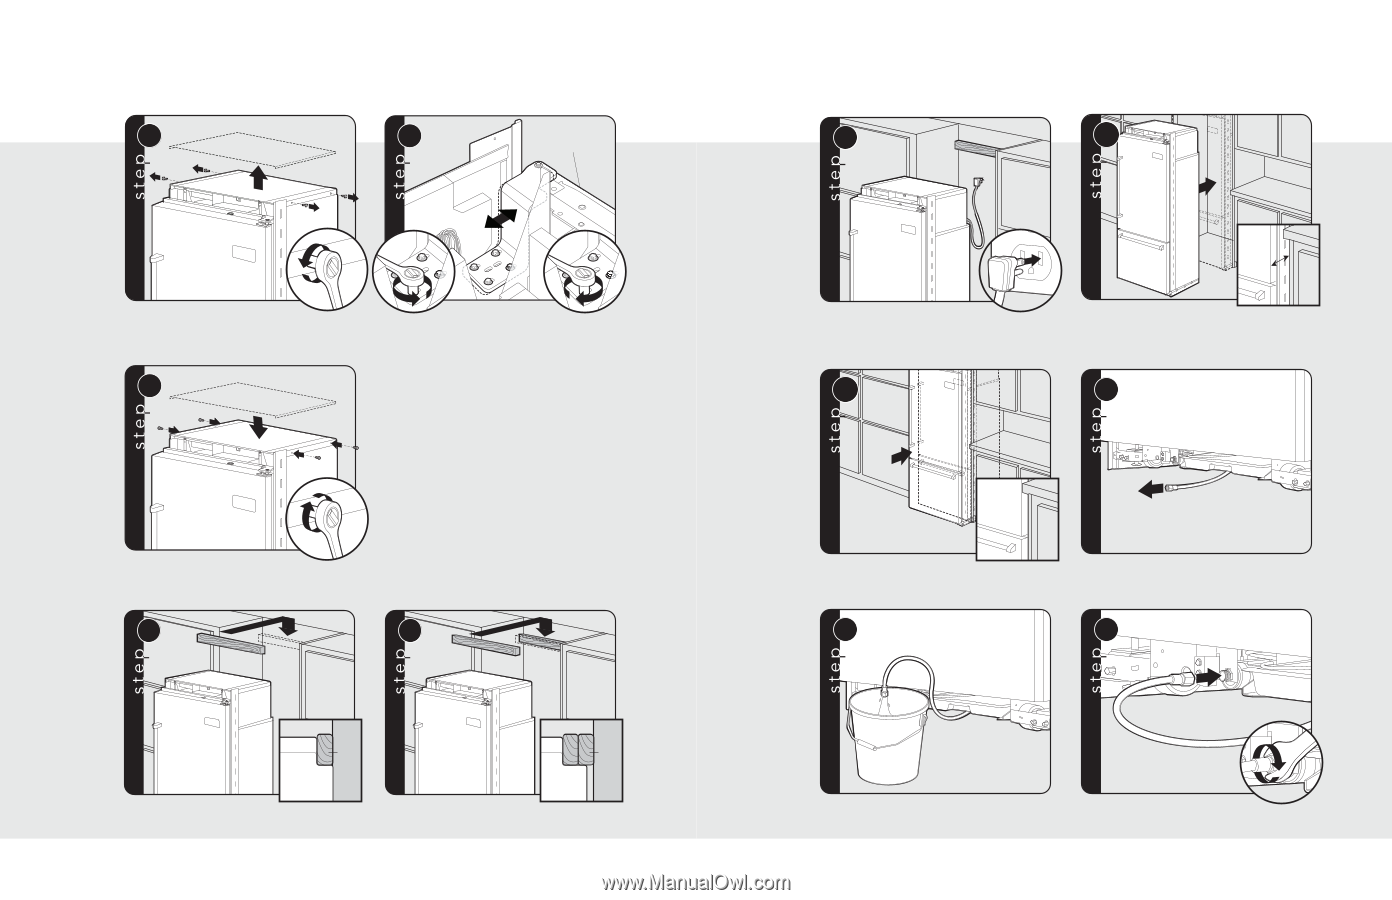
Hinge Adjustment 5 2 1 Remove four side screws and remove unit top. 7 1 6 Front of unit 2 1 3 Loosen the four hinge screws. Adjust door. Retighten four hinge screws. 2 Replace unit top. Replace four side screws. 8a 8b Wall 2x4 Refrigerator Attach one 2x4 to wall stud (refer to dimensions page for exact location). Wall 2x4 Refrigerator If needed, depending on cabinet and depth, attach second 2x4 to first 2x4. 40 9 10a 3" Plug in power cord to verify operation. NOTE: Make sure power switch is in the "On" Position. 10b Place unit within 3" of being flush with cabinets. NOTE: To avoid cabinet damage, place cardboard between cabinets and unit. When moving unit, do not crimp, kink or crush water supply line. 11 Carefully move unit until semi flush with cabinet (depending on unit). 12 Pull supply tubing forward under unit. NOTE: DO NOT use plastic water lines. 13 Flush water line by running two quarts of water into a bucket. Turn water off. Connect supply tube to water valve using a 1/2" wrench. NOTE: DO NOT overtighten. 41
-
 1
1 -
2
-
3
-
4
-
5
-
6
-
7
-
8
-
9
-
10
-
11
-
12
-
13
-
14
-
15
-
 16
16 -
 17
17 -
 18
18 -
 19
19 -
 20
20 -
 21
21 -
 22
22 -
 23
23 -
 24
24 -
 25
25 -
 26
26
 |
 |