Vtech 3111-2 Quick Start Guide - Page 1
Vtech 3111-2 Manual
 |
View all Vtech 3111-2 manuals
Add to My Manuals
Save this manual to your list of manuals |
Page 1 highlights
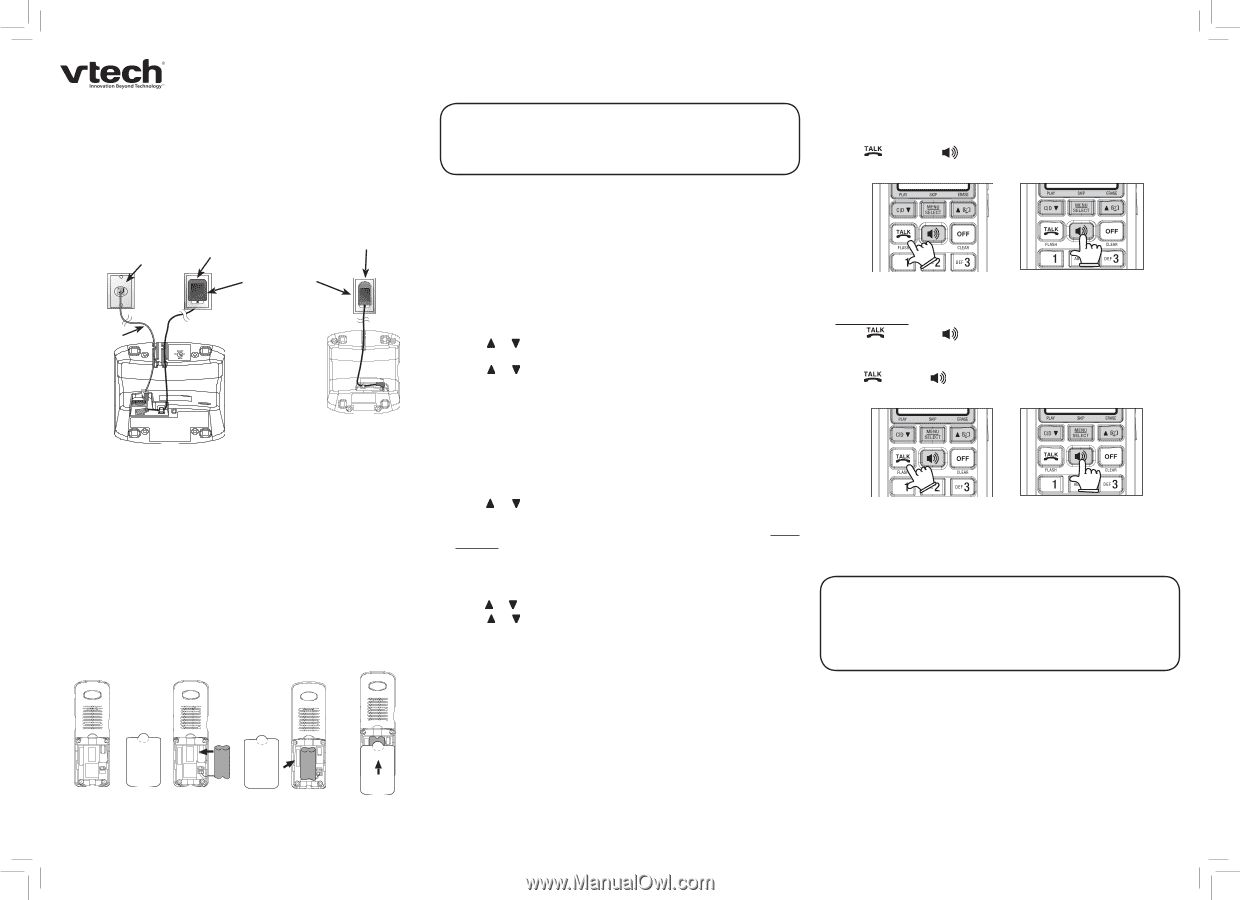
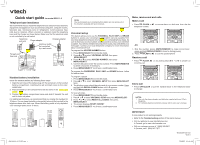
Quick start guide for model DS3111-2 Telephone base installation We recommend that you install the telephone base away from any electronic equipment and appliances such as personal computers, computer routers, television sets, microwave ovens or refrigerators. Avoid excessive heat, cold, dust or moisture. When a location is selected, install the telephone base and the charger as shown below. Make sure that the electrical outlet is not controlled by a wall switch. Telephone wall jack Power adapter Charger adapter Electrical outlet not controlled by a wall switch Te l e p h o n e line cord TELEPHONE EQUIPMENT DC 6V 300mA CLASS 2 POWER SOURCE ONLY THIS DEVICE COMPLIES WITH PART 15 OF THE FCC RULES. OPERATION IS SUBJECT TO THE FOLLOWING TWO CONDITIONS: 1) THIS DEVICE MAY NOT CAUSE HARMFUL INTERFERENCE; AND 2) THIS DEVICE MUST ACCEPT ANY INTERFERENCE RECEIVED, INCLUDING INTERFERENCE THAT MAY CAUSE UNDESIRED OPERATION. PRIVACY OF COMMUNICATIONS MAY NOT BE ENSURED WHEN USING THIS PHONE. HAC FCC ID: EW780-5656-00 USOC JACK: RJ11C/RJ11W RINGER EQUIVALENCE: 0.1B REGISTRATION NO.: US:EW7W401B80-565600 COMPLIES WITH 47 CFR PART 68 MANUFACTURED IN CHINA Handset battery installation Install the handset battery by following these steps: 1. Align the two holes of the battery plug with the socket pins in the handset battery compartment, matching the red and black wires to the colorcoded label. 2. Place the battery in the compartment with the wires in the lower right corner. 3. Position the battery compartment cover and slide it towards the unit until it clicks into place. For optimal performance, we recommend that you charge the handset for 16 hours. You can keep the battery charged by returning the handset to the telephone base after each use. When the battery power is fully depleted, a full recharge takes about 16 hours. NOTE: You must program your voicemail buttons before you can access all of the functions available with your voicemail. Voicemail setup This feature allows you to use the VOICEMAIL, PLAY, SKIP and ERASE buttons to access your voicemail (a subscription service available from your local telephone company for a fee). Before completing these steps, be sure to have your access number and password to access your voicemail available. You will also need the key sequence to play, skip and delete your messages. Contact your local telephone company for more information about voicemail service. To program the ACCESS NUMBER button: 1. Press MENU/SELECT from the idle mode. 2. Press or to select VOICEMAIL SETUP, then press MENU/SELECT. 3. Press or to select ACCESS NUMBER, then press MENU/SELECT. 4. Use the dial pad to enter the access number. Press MUTE/REMOVE to delete characters if necessary. 5. Press MENU/SELECT. You'll hear a confirmation tone. To program the PASSWORD, PLAY, SKIP and ERASE buttons, follow the above steps. To program a pause: 1. Press MENU/SELECT from the idle mode. 2. Press or to select VOICEMAIL SETUP then press MENU/SELECT twice. 3. The blinking cursor should be at the end of your access number. Press and hold the REDIAL/PAUSE button until a P appears. 4. Press MENU/SELECT. You'll hear a confirmation tone. To reset all codes: 1. Press MENU/SELECT from the idle mode. 2. Press or to select VOICEMAIL SETUP then press MENU/SELECT. 3. Press or to select RESET ALL CODES, then press MENU/SELECT. 4. The screen displays RESET CODES? 5. Press MENU/SELECT. You'll hear a confirmation tone. Make, receive and end calls Make a call • Press /FLASH or telephone number. to ensure there is a dial tone, then dial the -OR- 1. Dial the number (press MUTE/REMOVE to make corrections; press and hold REDIAL/PAUSE to insert a dialing pause). 2. Press /FLASH or to use the speakerphone. Receive a call • Press /FLASH, incoming call. or any dialing keys (0-9, * or #) to answer an End a call • Press OFF/CLEAR or put the handset back in the telephone base or charger. NOTES: 1. Use only the power adapters and batteries supplied with your VTech telephone. 2. For complete feature instructions, please refer to your user's manual. IC:xxxxX-xxxxxxxx FCC ID: XXxxx-xxxx-xx IC:xxxxX-xxxxxxxx FCC ID: XXxxx-xxxx-xx IC:xxxxX-xxxxxxxx FCC ID: XXxxx-xxxx-xx IC:xxxxX-xxxxxxxx FCC ID: XXxxx-xxxx-xx IMPORTANT! If your product is not working properly: • Refer to the Troubleshooting section of the user's manual. • Visit our website at www.vtechphones.com. In Canada, go to www.vtechcanada.com. • Call our customer service at 1 (800) 595-9511. In Canada, call 1 (800) 267-7377. 96-006499-030-100 issue 2 QSG DS3111-2 071207.indd 1 7/28/2007 5:54:04 PM
-
 1
1
 |
 |