Vtech Go Go Smart Wheels 2-in-1 Race Track User Manual - Page 5
Getting Started
 |
View all Vtech Go Go Smart Wheels 2-in-1 Race Track manuals
Add to My Manuals
Save this manual to your list of manuals |
Page 5 highlights
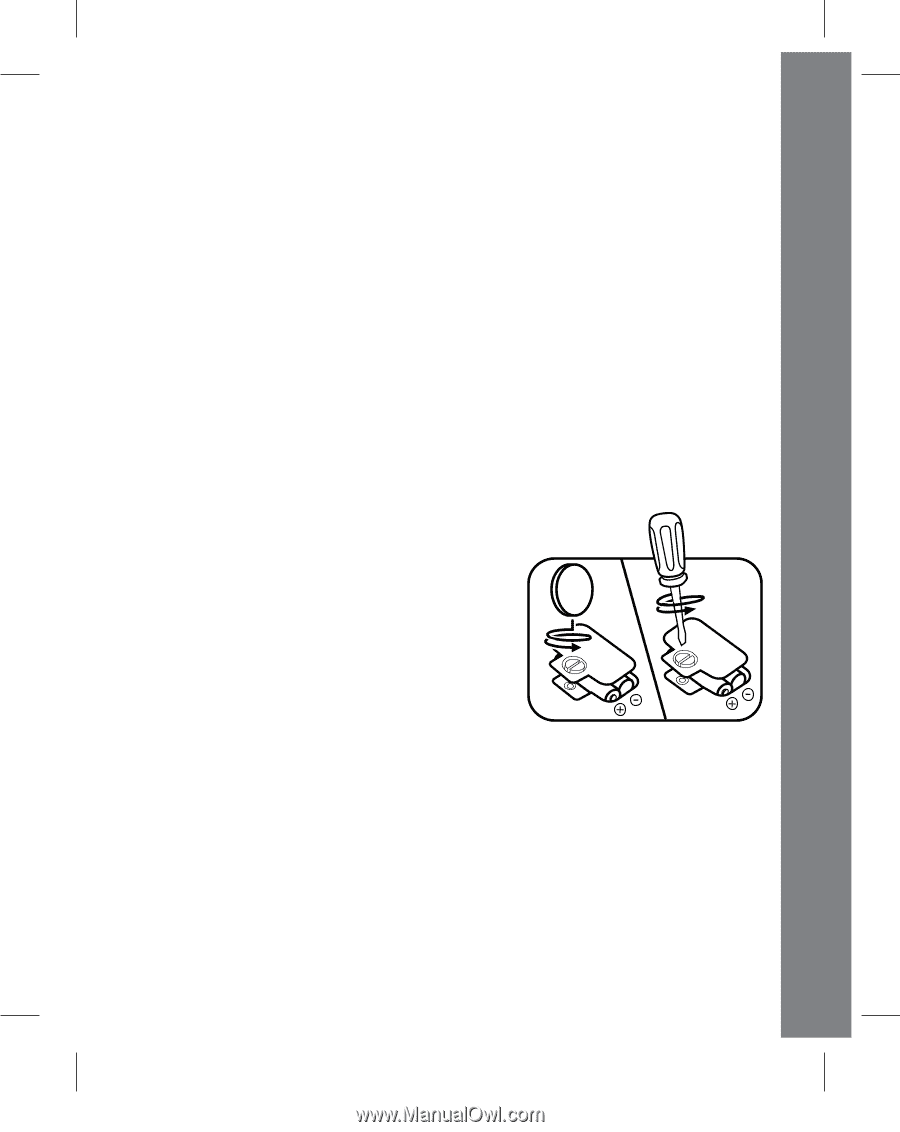
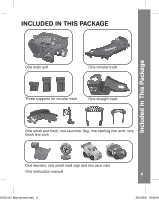
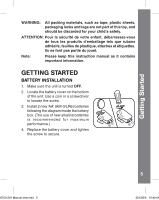
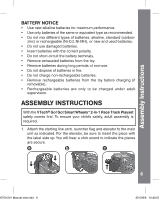
Getting Started WARNING: All packing materials, such as tape, plastic sheets, packaging locks and tags are not part of this toy, and should be discarded for your child's safety. ATTENTION: Pour la sécurité de votre enfant, débarrassez-vous de tous les produits d'emballage tels que rubans adhésifs, feuilles de plastique, attaches et étiquettes. Ils ne font pas partie du jouet. Note: Please keep this instruction manual as it contains important information. GETTING STARTED BATTERY INSTALLATION 1. Make sure the unit is turned OFF. 2. Locate the battery cover on the bottom of the unit. Use a coin or a screwdriver to loosen the screw. 3. Install 2 new 'AA' (AM-3/LR6) batteries following the diagram inside the battery box. (The use of new alkaline batteries is recommended for maximum performance.) 4. Replace the battery cover and tighten the screw to secure. 36700-201 Manual new.indd 5 5 2013/6/6 10:42:01
-
 1
1 -
 2
2 -
 3
3 -
 4
4 -
 5
5 -
 6
6 -
 7
7 -
 8
8 -
 9
9 -
 10
10 -
 11
11 -
12
 |
 |