Waring WW250X2 Instruction Manual - Page 8
Instructions
 |
View all Waring WW250X2 manuals
Add to My Manuals
Save this manual to your list of manuals |
Page 8 highlights
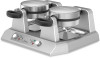
INSTRUCTIONS 1. Carefully unpack the replacement kit. 2. Using the provided screwdriver, carefully remove the screws from the perimeter edge of waffle plate/s. Lift plates up and off the housing. Slight force may be needed to release the plates completely. Discard the old plate/s and screws. 3. Starting with the lower grid, place the new plate onto the housing by aligning rear and front projections onto the base. The wider projections will fit into the rear. 4. Install 1 large screw into the slot located near the handle. 5. Install the smaller screws around the perimeter. 6. Repeat steps 2-5 for the upper grid replacement. LIMITED ONE YEAR WARRANTY (U.S. and Canada only) Waring® Commercial warrants every new Waring® Commercial Waffle Maker to be free from defects in material and workmanship for a period of one year from the date of purchase when used with foodstuffs, nonabrasive liquids (other than detergents) and nonabrasive semiliquids, providing it has not been subject to loads in excess of the indicated rating. Under this warranty, Waring® Commercial will repair or replace any part which, upon our examination, is defective in materials or workmanship, provided the product is delivered prepaid to the Waring Service Center at: 314 Ella T. Grasso Ave., Torrington, CT 06790, or any Factory Approved Service Center. This warranty does not: a) apply to any product that has become worn, defective, damaged or broken due to use or due to repairs or servicing by other than the Waring Service Center or a Factory Approved Service Center, or due to abuse, misuse, overloading or tampering; or b) cover incidental or consequential damages of any kind. Warning: This warranty is void if appliance is used on Direct Current (DC). WARING COMMERCIAL 314 Ella T. Grasso Ave. Torrington, CT 06790 8
-
 1
1 -
2
-
 3
3 -
 4
4 -
 5
5 -
 6
6 -
 7
7 -
 8
8 -
 9
9 -
 10
10 -
 11
11 -
 12
12 -
 13
13 -
14
-
15
-
16
-
17
-
18
-
19
-
20
-
21
-
22
-
23
-
24
 |
 |
