Weed Eater LT 20V Owner Manual - Page 10
Assembly, Awarning
 |
View all Weed Eater LT 20V manuals
Add to My Manuals
Save this manual to your list of manuals |
Page 10 highlights
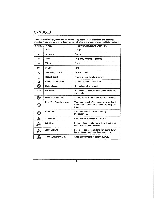
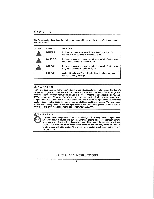
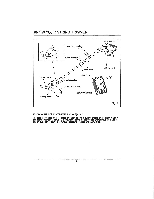
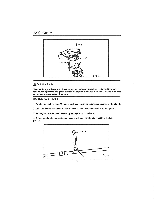
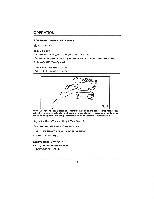
ASSEMBLY AWARNING To avoid injury and to reduce the risk of electrical shock or fire: • Replace the battery pack or charger immediately if the battery case or charger cord is damaged, • Always make sure the trimmer switch is OFF before inserting or removing the battery pack, • Always make sure the battery pack is removed and the switch turned OFF, before inspecting, adjusting, or maintaining any other part of the trimmer. • Read, understand, and follow the Battery Charger instructions. To Install 1. Align the tongue (3) of the battery pack with the cavity in the handle housing. 2. Grasp Ke trigger handle (2) firmly. 3. Push the battery pack into the handle until both sides lock. e latch buttons will click when they lock. 4, Do not use force when inserting the battery pa It should slide into place and click. GUARD (See Figure 3.) To avoid injury, always remove the battery pack before installing the guard, changing a cutting line, or making any adjustments. If the guard is damaged, do not use the grass trimmer until it is replaced, NOTE: Install the protective guard before operating the grass trimmer. It can not be removed or disassembled. 1. Remove the battery pack. 2. Invert the grass trimmer to access the trimmer head. 3. Using a phillips head screwdriver, remove the pre-installed screw (1) from the trimmer head. 4. Place the guard (2) on to the trimmer head and turn the guard 45° following the track on the head. 5. Align the screw hole on the guard with the screw hole on the trimmer head. 6. Insert the screw to the trimmer head fastening the guard in place. 10
-
 1
1 -
2
-
3
-
4
-
 5
5 -
 6
6 -
 7
7 -
 8
8 -
 9
9 -
 10
10 -
 11
11 -
 12
12 -
 13
13 -
 14
14 -
 15
15 -
16
-
17
-
18
-
19
-
20
-
21
-
22
-
23
-
24
 |
 |
