Weed Eater PE550 Owner Manual - Page 4
Assembly - problems
 |
View all Weed Eater PE550 manuals
Add to My Manuals
Save this manual to your list of manuals |
Page 4 highlights
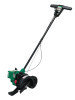
SPECIAL NOTICE: Exposure to vibra- tions through prolonged use of gasoline powered hand tools could cause blood vessel or nerve damage in the fingers, hands, and joints of people prone to circulation disorders or abnormal swellings. Prolonged use in cold weather has been linked to blood vessel damage in otherwise healthy people. If symptoms occur such as numbness, pain, loss of strength, change in skin color or texture, or loss of feeling in the fingers, hands, or joints, discontinue the use of this tool and seek medical attention. An anti-vibration system does not guarantee the avoidance of these problems. Users who operate power tools on a continual and regular basis must monitor closely their physical condition and the condition of this tool. SAVE THESE INSTRUCTIONS ASSEMBLY WARNING: If received assembled, repeat all steps to ensure your unit is properly assembled and all fasteners are secure. Examine parts for damage. Do not use damaged parts. NOTE: If you need assistance or find parts missing or damaged, call 1-800-554--6723. This instruction manual has been developed to help you assemble the unit and to provide its safe operation. It is important that you read the entire manual to become familiar with the unit before you begin assembly. Read your instruction manual. Tools you will need: S Adjustable wrench S Hex wrench (provided) TUBE ASSEMBLY NOTE: When performing the following step, be sure the handle is aligned as follows: label on top, throttle trigger to the operator's right hand side. The starter rope and the throttle cable must not wrap around the tube. Throttle trigger Label 3. Thread one locknut onto each screw and tighten securely. Handle tube Screws Lower Tube Starter Rope Locknuts NOTE: When performing the following step, be sure the starter rope is not caught under the cable clamp. The starter rope must hang freely to operate properly. 4. Align the cable clamp between the tube screws. Install the cable clamp around the tube and throttle cable. 1. Assemble handle tube to the lower tube (it will be necessary to pull some of the starter rope out of the housing). 2. Align the screw holes; insert the screws through the aligned holes. Throttle cable Cable Clamp 4
-
 1
1 -
 2
2 -
 3
3 -
 4
4 -
 5
5 -
 6
6 -
 7
7 -
 8
8 -
 9
9 -
 10
10 -
11
-
12
-
13
 |
 |
