Weider 175 English Manual
Weider 175 Manual
 |
View all Weider 175 manuals
Add to My Manuals
Save this manual to your list of manuals |
Weider 175 manual content summary:
- Weider 175 | English Manual - Page 1
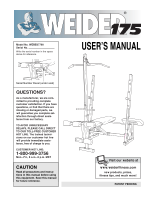
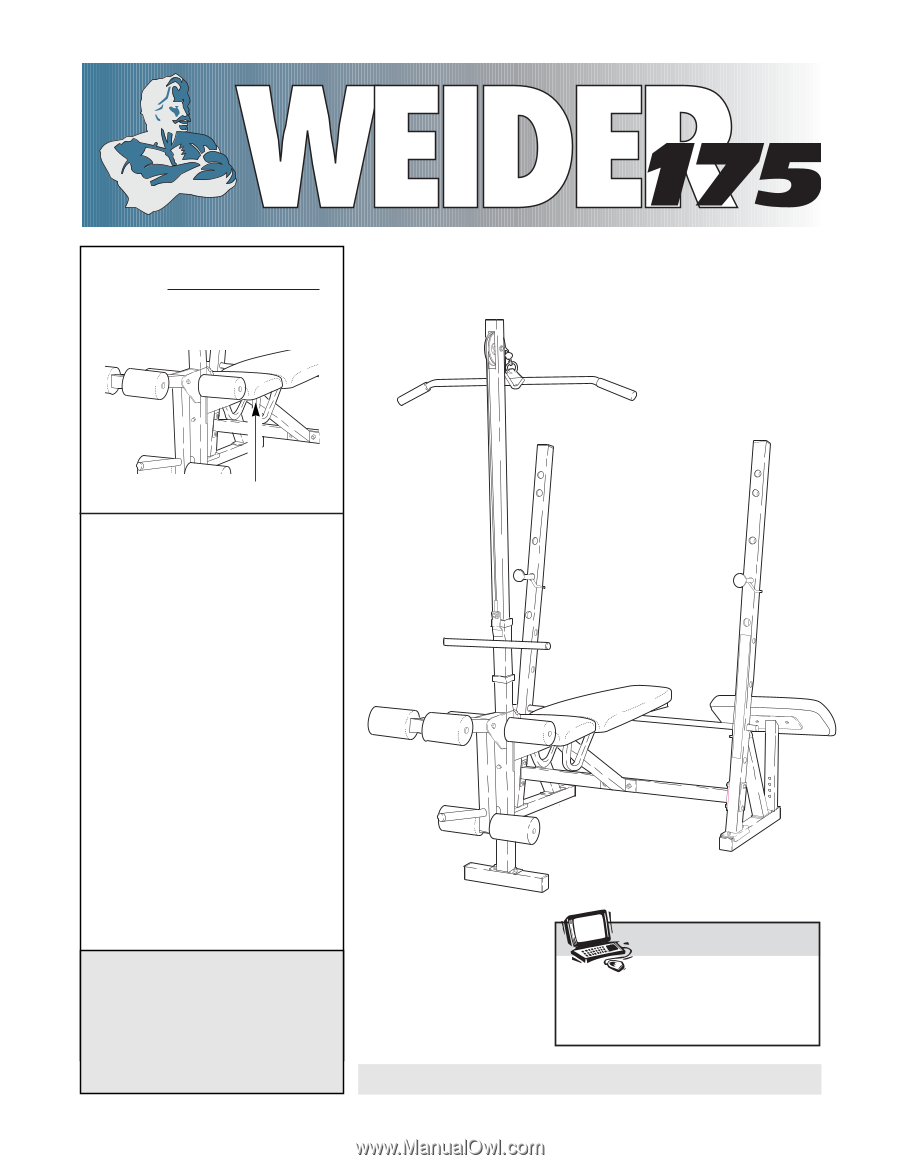
No. WEBE07790 Serial No. Write the serial number in the space above for reference. USERÕS MANUAL Serial Number Decal (under seat) QUESTIONS? As a manufacturer, we are committed to providing complete customer satisfaction. If you have questions, or find that there are missing or damaged parts, we - Weider 175 | English Manual - Page 2
Identification Chart 5 Assembly 6 Adjusting the Weight Bench 13 Exercise Guidelines 17 Ordering Replacement Parts Back Cover Limited Warranty Back Cover Note: A Part List/Exploded Drawing is attached to the center of this manual. Remove the Part List/Exploded Drawing before beginning assembly - Weider 175 | English Manual - Page 3
bench is intended for home use only. Do not use the weight bench in any commercial, rental or institutional setting. 4. Use the weight bench only on a level surface. Cover the floor beneath the weight bench for protection. 5. Inspect and tighten all parts each time you use the weight bench. Replace - Weider 175 | English Manual - Page 4
is WEBE07790. The serial number can be found on a decal attached to the Weight Bench (see the front cover of this manual). For your benefit, read this manual carefully before using the WEIDER¨ 175 Weight Bench. If you have additional questions, please call our Customer Service Before reading - Weider 175 | English Manual - Page 5
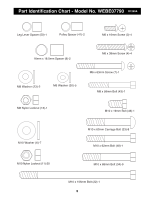
Part Identification Chart - Model No. WEBE07790 R1299A Leg Lever Spacer (50)-1 Pulley Spacer (41)-2 M6 x 16mm Screw (3)-4 16mm x 18.5mm Spacer (8)-2 M8 Washer (23)-2 M6 Washer (30)-5 M6 x 38mm Screw (4)-4 M6 x - Weider 175 | English Manual - Page 6
parts as you assemble them, unless instructed to do otherwise. ¥ For help identifying the small parts, use the PART IDENTIFICATION CHART on page 5. ¥ As you assemble the weight bench, make sure all parts tools: A socket set, a set of open-end or closed-end wrenches or a set of ratchet wrenches. - Weider 175 | English Manual - Page 7
plan to place the weight bench, it may be more practical for you to have this storage tube on the right side of the bench. If so, simply switch the two Uprights (1) before attaching the Crossbar (20). Insert two M10 x 68mm Bolts (34) through the holes in one of the Support Plates (16) and - Weider 175 | English Manual - Page 8
- 5 ed bracket on the Bench Frame (5) and then through the Bench Frame with two M10 Nylon Locknuts (11). Go back and tighten all M10 Nylon Locknuts used in steps 1 through 6. 11 11 5 6 34 20 7. Press a 45mm x 45mm Square Inner Cap (24) into 7 each end of the Leg lever (18). Attach the Weight - Weider 175 | English Manual - Page 9
of the Weight Tube (39). Press a 1Ó Round Inner Cap 8 into the opposite end of the Weight Tube. Slide a Weight Stop (53) onto the Weight Tube. 15 Line up the M10 x 155mm Bolt (22) with the hole in the Bench Frame (5) and slide the Bolt through the Frame until the tip is barely visible - Weider 175 | English Manual - Page 10
(30). Attach the other end of the Seat (14) to the bracket on the Bench Frame (5) with two M6 x 16mm Screws (3). 14 5 30 7 3 13. Press each end of the 15 Weight Carriage (47). 12 Press a 1Ó Round Inner Cap (12) into each end of the weight tube on the Weight Carriage (47). Insert the M10 - Weider 175 | English Manual - Page 11
the Cable (45) onto the M10 x 19mm Bolt (46) in the bracket on the Weight Carriage (47). Secure the Cable with an M10 Nylon Locknut (11). Slide a Weight Stop (53) onto each end of the weight tube on the Weight Carriage (47). 45 53 11 9 46 47 53 17. Insert the Lat Tower (9) into - Weider 175 | English Manual - Page 12
into place around the Upright. Make sure both Weight Rests are set at the same height. 32 21 1 1 32 21 20. Make sure all parts are properly tightened before you use the weight bench. The use of all remaining parts will be explained in ADJUSTING THE WEIGHT BENCH starting on the next page. 12 - Weider 175 | English Manual - Page 13
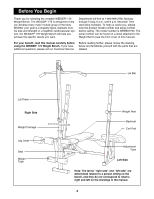
each time you use the weight bench. Replace any worn parts immediately. The weight bench can be cleaned with a damp cloth and a mild, non-abrasive detergent. Do not use solvents. ADJUSTING THE BACKREST The Backrest (15) can be set to five different positions: a level position, two decline positions - Weider 175 | English Manual - Page 14
inset drawing). However, for some exercises, you should store these parts away from the weight bench so they do not interfere with your exercise program. ADJUSTING THE it through the other set of holes in the bracket. Slide the Foam Pad back onto the Pad Tube. ATTACHING WEIGHTS TO THE LEG LEVER To - Weider 175 | English Manual - Page 15
BENCH FOR SQUAT EXERCISES To perform squat or toe raise exercises, fold the Backrest (15) into the upright position by lifting and pulling it forward as far as it will go. Remove the Adjustment Tube (29, not shown) from the Uprights (1). Insert the Weight Rests (21) into one of the two highest sets - Weider 175 | English Manual - Page 16
ATTACHING THE LAT BAR TO THE LAT TOWER To use the Lat Tower (9), attach the Lat Bar (51) to the Cable (45) with a Cable Clip (40). 45 40 9 51 16 - Weider 175 | English Manual - Page 17
sets. You will gain the greatest benefits from exercising by maintaining proper form. This requires moving through the full range of motion for each exercise and moving only the appropriate parts weight training workouts on Monday, feeling exhausted. On the exercise poster accompanying this manual - Weider 175 | English Manual - Page 18
record of each workout. The chart on page 19 of this manual can be photocopied and used to schedule and record your workouts. List the date, the exercises performed, the weight plus the numbers of sets and repetitions completed. Record your weight and key body measurements at the end of every month - Weider 175 | English Manual - Page 19
MONDAY Date: / / EXERCISE WEIGHT SETS REPS TUESDAY Date: / / WEDNESDAY Date: / / AEROBIC EXERCISE EXERCISE WEIGHT SETS REPS THURSDAY Date: / / FRIDAY Date: / / AEROBIC EXERCISE EXERCISE WEIGHT SETS REPS Make photocopies of this page for scheduling and recording your workouts. 19 - Weider 175 | English Manual - Page 20
56 1 Stop Screw 28 4 1Ó Square Inner Cap # 1 UserÕs Manual 29 1 Adjustment Tube # 1 Exercise Guide Note: Ò#Ó indicates a non-illustrated part. Specifications are subject to change without notice. See the back cover of the userÕs manual for information about ordering replacement parts. - Weider 175 | English Manual - Page 21
33 17 32 21 1 29 12 6 11 34 6 11 11 11 16 31 11 34 17 25 17 33 33 R1299A Exploded Drawing - Model No. WEBE07790 - Weider 175 | English Manual - Page 22
Replacement Parts To order replacement parts, simply call our Customer Service WEBE07790). 2. The NAME of the product (WEIDER¨ 175 Weight Bench). 3. The SERIAL NUMBER of the product (see the front cover of this manual). 4. The KEY NUMBER and DESCRIPTION of the desired part(s) (see the PART set forth
-
 1
1 -
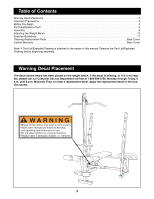 2
2 -
 3
3 -
 4
4 -
 5
5 -
 6
6 -
 7
7 -
8
-
9
-
10
-
11
-
12
-
13
-
14
-
15
-
16
-
17
-
18
-
19
-
20
-
21
-
22
 |
 |
QUESTIONS?
As a manufacturer, we are com-
mitted to providing complete
customer satisfaction. If you have
questions, or find that there are
missing or damaged parts, we
will guarantee you complete sat-
isfaction through direct assis-
tance from our factory.
TO AVOID UNNECESSARY
DELAYS, PLEASE CALL DIRECT
TO OUR TOLL-FREE CUSTOMER
HOT LINE. The trained techni-
cians on our customer hot line
will provide immediate assis-
tance, free of charge to you.
CUSTOMER HOT LINE:
1-800-999-3756
Mon.—Fri., 6 a.m.—6 p.m. MST
Model No. WEBE07790
Serial No.
Write the serial number in the space
above for reference.
CAUTION
Read all precautions and instruc-
tions in this manual before using
this equipment. Save this manual
for future reference.
Serial Number Decal (under seat)
USER°S MANUAL
PATENT PENDING
¤
Visit our website at
www.weiderfitness.com
new products, prizes,
fitness tips, and much more!