Weider 320 Classic English Manual - Page 3
Weider 320 Classic Manual
 |
View all Weider 320 Classic manuals
Add to My Manuals
Save this manual to your list of manuals |
Page 3 highlights
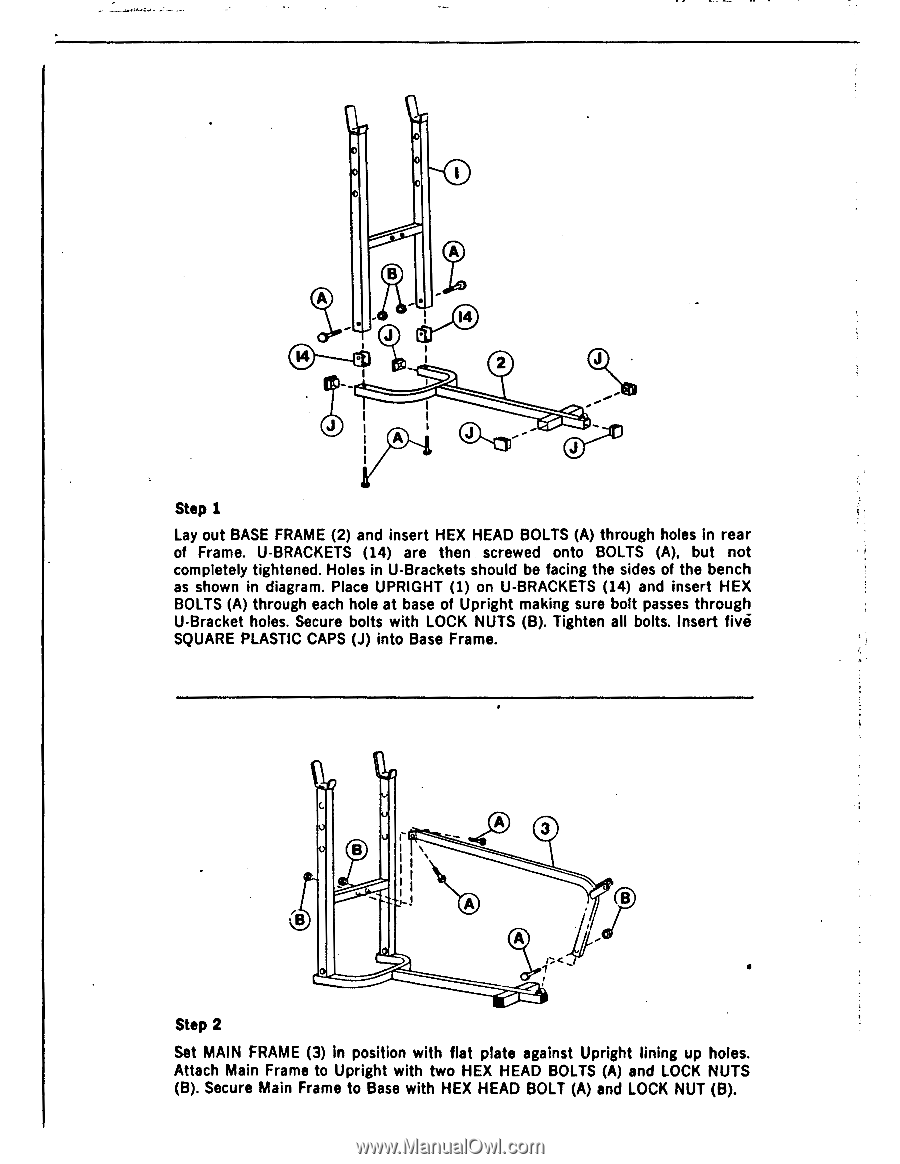
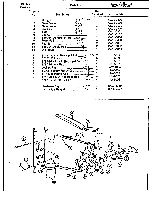
1 14 14 2 0 A J J Step 1 Lay out BASE FRAME (2) and insert HEX HEAD BOLTS (A) through holes in rear of Frame. U-BRACKETS (14) are then screwed onto BOLTS (A), but not completely tightened. Holes in U-Brackets should be facing the sides of the bench as shown in diagram. Place UPRIGHT (1) on U-BRACKETS (14) and insert HEX BOLTS (A) through each hole at base of Upright making sure bolt passes through U-Bracket holes. Secure bolts with LOCK NUTS (B). Tighten all bolts. Insert five SQUARE PLASTIC CAPS (J) into Base Frame. 0 3 B Step 2 Set MAIN FRAME (3) In position with flat plate against Upright lining up holes. Attach Main Frame to Upright with two HEX HEAD BOLTS (A) and LOCK NUTS (B). Secure Main Frame to Base with HEX HEAD BOLT (A) and LOCK NUT (B).
-
 1
1 -
 2
2 -
 3
3 -
 4
4 -
 5
5 -
 6
6 -
 7
7
 |
 |