Weider 8507 User Manual - Page 7
Place the Arm Frame Bracket 69 over the Arm
 |
View all Weider 8507 manuals
Add to My Manuals
Save this manual to your list of manuals |
Page 7 highlights
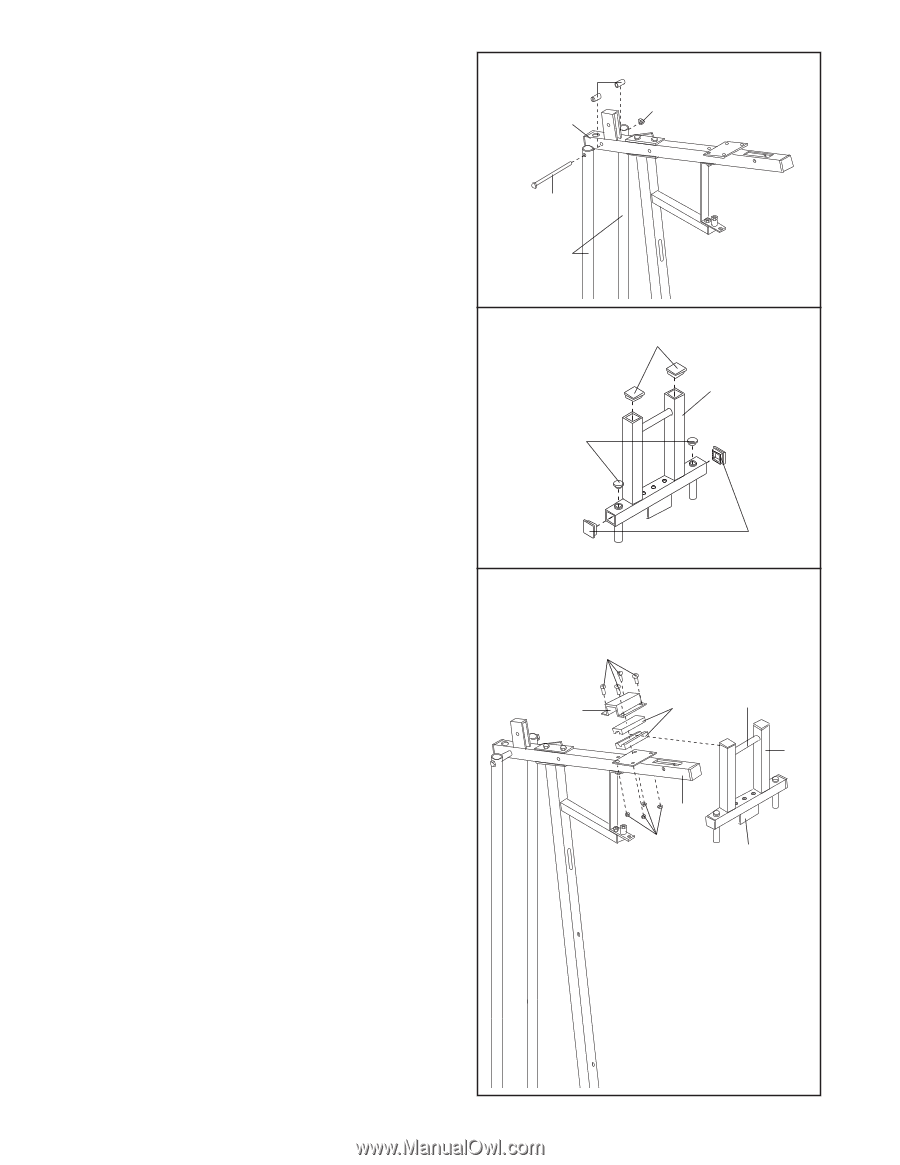
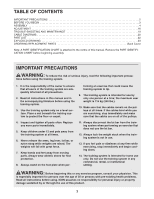
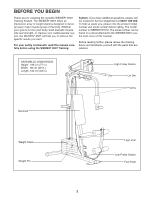
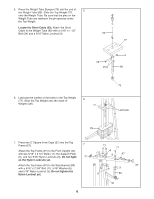
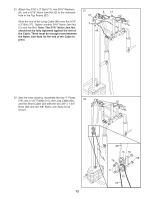
8. Attach the upper ends of the Weight Guides (72) to 8 the Top Frame (67) with the 5/16" x 6" Bolt (74), two 1/2" x 3/4" Spacers (73), and a 5/16" Nylon Locknut (3). Tighten all Nylon Locknuts used in steps 4 through 8. 9. Press two 1 3/4" Square Inner Caps (44), two 1 1/2" Square Inner Caps (32), and two Round Inner Caps 9 (89) into the Arm Frame (52). 73 67 74 72 89 3 32 52 10. Lubricate the upper axle on the Arm Frame (52). Hold the axle between the two Arm Frame 10 Bushings (68). Set the Arm Frame Bushings and the Arm Frame on the welded plate on the Top Frame (67). Make sure that the Arm Frame is turned so the bracket is on the side shown. Place the Arm Frame Bracket (69) over the Arm Frame Bushings. Attach the Arm Frame Bracket to the Top Frame with four 1/4" x 1/2" Screws (31) and 1/4" Nylon Jam Nuts (86). 44 31 69 68 Lubricate 52 67 86 Bracket 7
-
 1
1 -
 2
2 -
 3
3 -
 4
4 -
 5
5 -
 6
6 -
 7
7 -
 8
8 -
 9
9 -
 10
10 -
 11
11 -
 12
12 -
13
-
14
-
15
-
16
-
17
-
18
-
19
-
20
-
21
-
22
-
23
-
24
-
25
-
26
-
27
 |
 |