Weider Body Works Pro 2.0 Bench Uk Manual - Page 7
Caution
 |
View all Weider Body Works Pro 2.0 Bench manuals
Add to My Manuals
Save this manual to your list of manuals |
Page 7 highlights
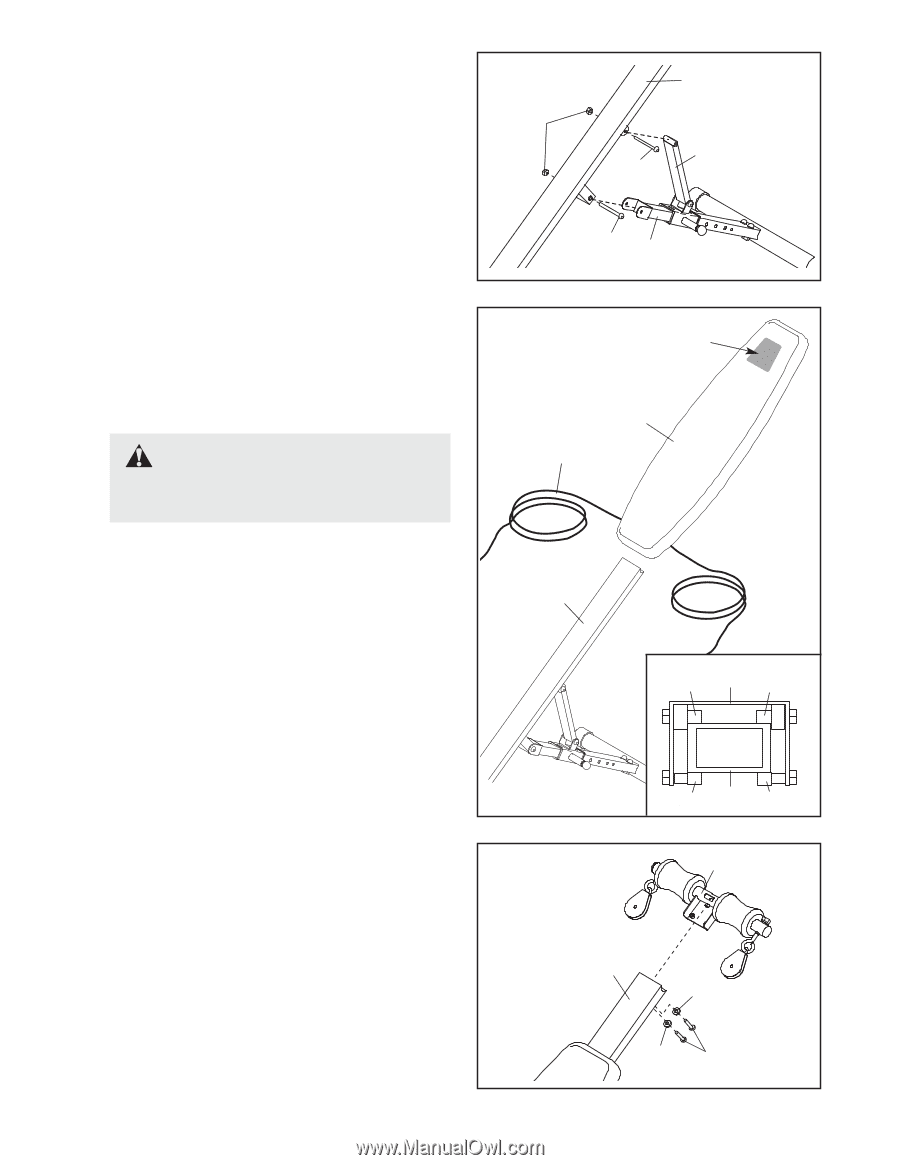
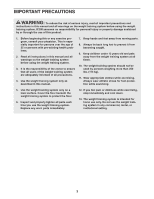
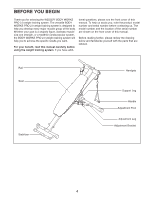
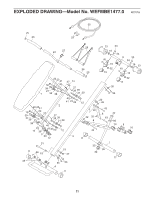
3. Note: The following steps require two persons. 3 Attach the Adjustment Leg (8) to the Rail (3) with an M10 x 90mm Bolt (44) and an M10 Nylon Locknut 32 (32). Attach the Support Leg (6) to the Rail (3) with an M10 x 75mm Bolt (43) and an M10 Nylon Locknut (32). Do not overtighten the Nylon Locknuts; the Adjustment Leg (8) and the Support Leg must pivot easily. 3 6 43 44 8 4. Have a second person hold the ends of the Cord 4 (30) above the Seat (1). See the inset drawing. Slide the Seat Bracket (2) onto the Rail (3). Make sure that the Wheels (21) are on top of the Rail and that the Large Bushings (23) are below the Rail. CAUTION: Make sure that the 30 Seat (1) is oriented as shown in the draw- ing. Silkscreen 1 3 21 2 21 5. Attach the Upper Bar (5) to the Rail (3) with two 5 M10 Washers (35) and two M10 x 25mm Screws (36). 7 23 3 23 5 3 35 35 36
-
 1
1 -
 2
2 -
 3
3 -
 4
4 -
 5
5 -
 6
6 -
 7
7 -
 8
8 -
 9
9 -
 10
10 -
 11
11 -
 12
12
 |
 |