Weslo 8.0 English Manual - Page 5
Assembly, Operation, Adjustment
 |
View all Weslo 8.0 manuals
Add to My Manuals
Save this manual to your list of manuals |
Page 5 highlights
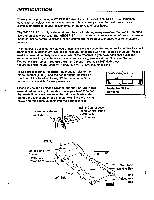
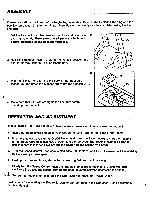
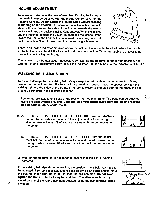
ASSEMBLY t Please read all instructions before beginning assembly. Refer to the Exploded Drawing and the Part List on pages 10-11 for help in part identification. Assembly can be completed using the tool provided. 1. Set the treadmill in a clear area on the floor and remove all 2 packing materials. Make sure that all parts are included before disposing of the packing materials. 17 20 2. Raise the Handrail Posts (17, 20) to the vertical position and tighten the two Handrail Locking Knobs (28). 3 3. Plug the Sensor Wire (9) into the back of the Electronic Monitor (5) and press the Monitor firmly into the Console (10). • 0 .0 9 28 5 1O 4. Make sure that all parts are tightened securely before operating the treadmill. OPERATION AND ADJUSTMENT TREADMILL OPERATION - Follow the steps below each time you use the treadmill. 1. Step onto the treadmill and place your feet on the Grip Tape on the sides of the Frame. 2. Insert the Safety Card into the On/Off Switch and press the Switch down to start the treadmill. (If the Safety Card becomes lost, a credit card can be used. The treadmill cannot be started unless a card is inserted.) Do not lift the Switch or the Switch will break. 3. Turn the Speed Control Knob counterclockwise until it stops, and then clockwise until the Walking Belt is moving at slow speed. 4. Holding the Handrail firmly, step onto the Walking Belt and begin walking. 5. Slowly turn the Speed Control Knob until the desired speed is reached. (Turning the knob clockwise increases the speed. Turning the knob counterclockwise decreases the speed.) To turn the treadmill off, step onto the Grip Tape and press the On/Off Switch. Instructions for operating the Electronic Monitor can be found in the Operation Guide accompany- ing this Manual. 5
-
 1
1 -
 2
2 -
 3
3 -
 4
4 -
 5
5 -
 6
6 -
 7
7 -
 8
8 -
 9
9 -
 10
10 -
 11
11 -
12
 |
 |
