Weslo 850 Instruction Manual - Page 6
Symptom: The Walking Belt Is Off
 |
View all Weslo 850 manuals
Add to My Manuals
Save this manual to your list of manuals |
Page 6 highlights
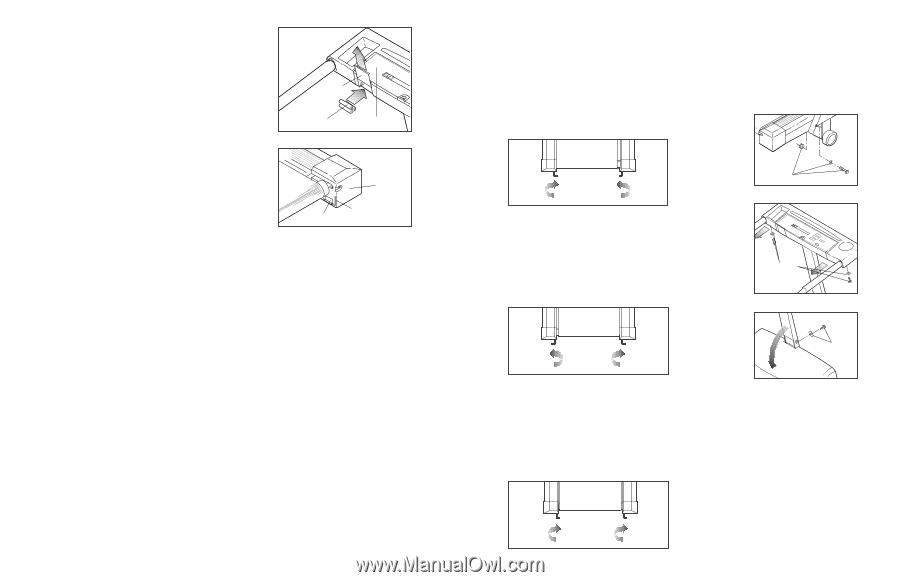
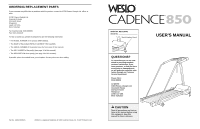
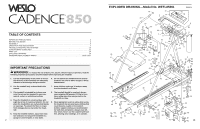
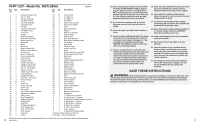
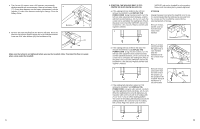
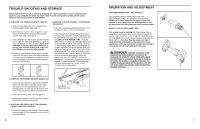
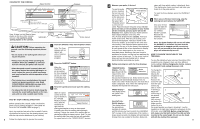
4. The Console (5) requires three "AA" batteries (not included); alkaline batteries are recommended. Slide up the Battery Cover 4 (77). Press three batteries into the battery compartment, with the negative (-) ends of the batteries touching the springs. Close the Battery Cover. 77 Batteries 5 5. Remove the paper backing from the Wrench Clip (64). Press the 5 Wrench Clip onto the Right Endcap (63) in the indicated location. Press the 3/16" Allen Wrench (65) into the Wrench Clip. 63 65 64 Make sure that all parts are tightened before you use the treadmill. Note: To protect the floor or carpet, place a mat under the treadmill. 6 5. SYMPTOM: THE WALKING BELT IS OFFCENTRE OR SLIPS WHEN WALKED ON SAFEKEY and run the treadmill for a few minutes. Repeat until the walking belt is properly tightened. a. If the walking belt has shifted to the left, first remove the SAFEKEY and UNPLUG THE POWER CORD. Using the allen wrench, turn the left rear roller adjustment bolt clockwise, and the right bolt counterclockwise, 1/4 of a turn each. Be careful not to overtighten the walking belt. Plug in the power cord, insert the SAFEKEY and run the treadmill for a few minutes. Repeat until the walking belt is centred. a STORAGE Unplug the power cord when the treadmill is not in use. It is recommended that the batteries be removed from the console and the treadmill be covered during extended periods of storage. Remove the bolt, washer, and nut from the lower end of each handrail. Remove b. If the walking belt has shifted to the right, first remove the SAFEKEY and UNPLUG THE POWER CORD. Using the allen wrench, turn the left rear roller adjustment bolt counterclockwise, and the right bolt clockwise, 1/4 of a turn each. Be careful not to overtighten the walking belt. Plug in the power cord, insert the SAFEKEY and run the treadmill for a few minutes. Repeat until the walking belt is centred. Remove the bolt and washer from the upper end of each handrail. Slide the handrails out of the console housing. b c. If the walking belt slips when walked on, first remove the SAFEKEY and UNPLUG THE POWER CORD. Using the allen wrench, turn both rear roller adjustment bolts clockwise, 1/4 of a turn. When the walking belt is correctly tightened, you should be able to lift each side of the walking belt 2" to 3" (5 to 7 cm) cm off the walking platform. The centre of the walking belt should just touch the walking platform. Be careful to keep the walking belt centred. Plug in the power cord, insert the Remove the bolt and washer from the lower end of the upright. Lay the upright on the treadmill. Keep all hardware in a secure location. c Remove Remove 11
-
 1
1 -
 2
2 -
 3
3 -
 4
4 -
 5
5 -
 6
6 -
 7
7 -
 8
8
 |
 |