Weslo Aero 750 Owners Manual - Page 5
Assembly
 |
View all Weslo Aero 750 manuals
Add to My Manuals
Save this manual to your list of manuals |
Page 5 highlights
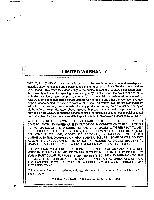
ASSEMBLY Remove all parts from the packing carton. Make sure all parts are included before disposing of the packing materials. Read each step carefully before beginning. Some of the hardware used in assembly will be found on one of the parts to be assembled, and must be removed before assembly. 1. Attach one of the Stabilizers (34) to the rear of the Frame (46) with two Carriage Bolts (36), Curved 33 Washers (33) and Locknuts (12). (The Stabilizer must be turned so that the recessed holes in the Stabilizer 36 are towards the Frame.) 46 V 34 2. Attach the other Stabilizer (34) to the front of the Frame (46) with two Carriage Bolts (36), Curved Washers (33) and Locknuts (12). (The Stabilizer must be turned so 46 that the recessed holes in the Stabilizer are towards the 34 Frame.) 12 33 36 3. Remove the three Nuts (42) from the underside of the Seat (40). Attach the Seat to the top of the Seat Post (41) with the three Nuts. Slide the Bellows (43) onto the Seat Post as shown. Remove the Seat Pin (45), and insert the Seat Post into the Frame (46). Adjust the Seat to the desired height and insert the Seat Pin into the Frame and Seat Post. CAUTION: The Seat Post must be inserted a minimum of 2 inches. 40 -41 46 45 43 42 4. Slide the Pivot Shaft (17) into the Frame (46). Slide the Left Handlebar (10) onto the left end of the Shaft. Slide the Right Handlebar (not shown) onto the right end of the Shaft. Attach both Handlebars with Pivot Washers (56) and Locknuts (12). 10 56 46 17 5
-
 1
1 -
 2
2 -
 3
3 -
 4
4 -
 5
5 -
 6
6 -
 7
7 -
 8
8 -
 9
9 -
 10
10 -
 11
11 -
12
 |
 |
