Weslo Cadence 820 English Manual - Page 6
Assembly
 |
View all Weslo Cadence 820 manuals
Add to My Manuals
Save this manual to your list of manuals |
Page 6 highlights
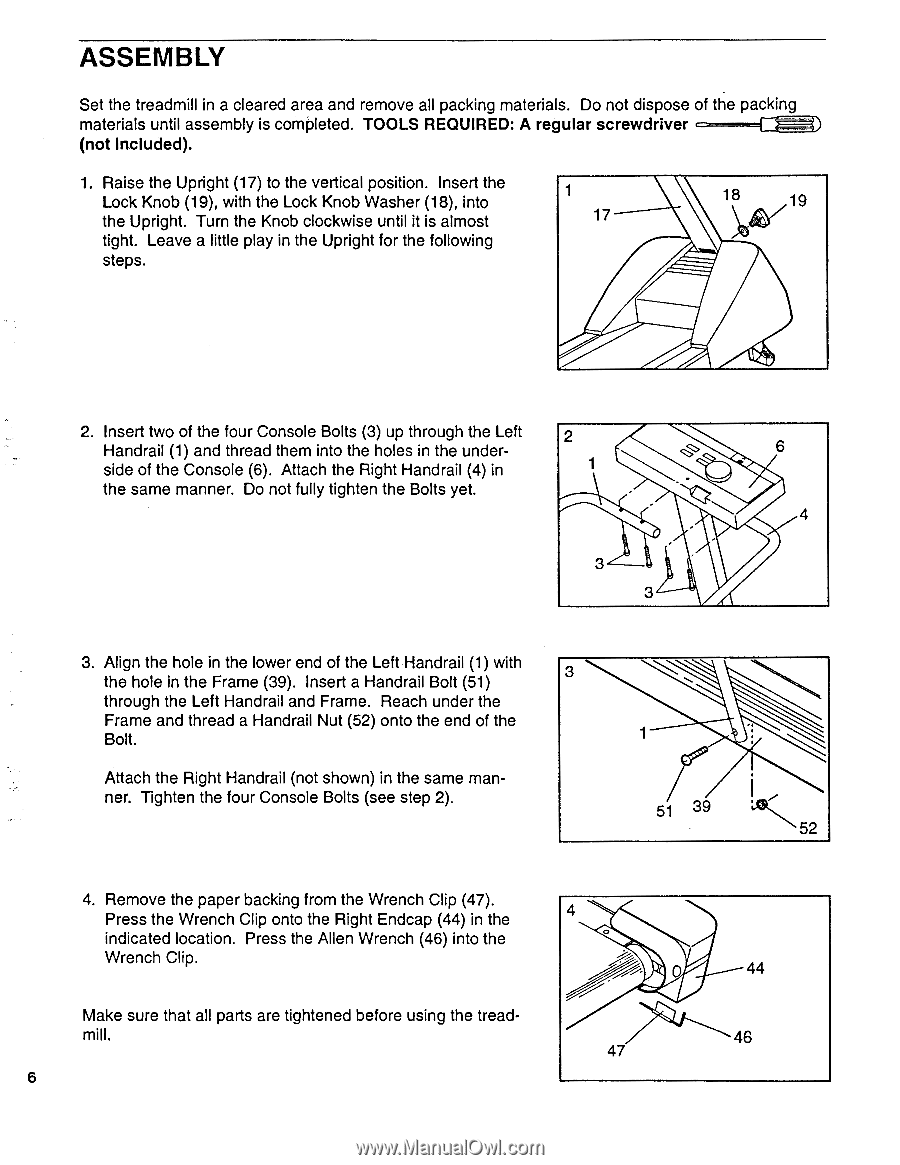
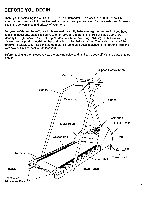
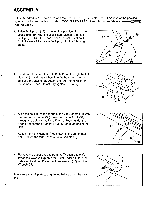
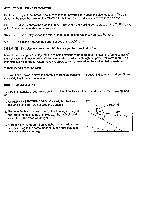
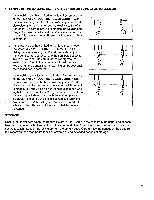
ASSEMBLY Set the treadmill in a cleared area and remove all packing materials. Do not dispose of the packing materials until assembly is completed. TOOLS REQUIRED: A regular screwdriver (not Included). 1. Raise the Upright (17) to the vertical position. Insert the Lock Knob (19), with the Lock Knob Washer (18), into the Upright. Turn the Knob clockwise until it is almost 17 tight. Leave a little play in the Upright for the following steps. 18 19 )Z5 2. Insert two of the four Console Bolts (3) up through the Left 2 Handrail (1) and thread them into the holes in the under- side of the Console (6). Attach the Right Handrail (4) in the same manner. Do not fully tighten the Bolts yet. 3 3 6 4 3. Align the hole in the lower end of the Left Handrail (1) with the hole in the Frame (39). Insert a Handrail Bolt (51) 3 through the Left Handrail and Frame. Reach under the Frame and thread a Handrail Nut (52) onto the end of the Bolt. Attach the Right Handrail (not shown) in the same manner. Tighten the four Console Bolts (see step 2). 51 39 52 4. Remove the paper backing from the Wrench Clip (47). Press the Wrench Clip onto the Right Endcap (44) in the 4 indicated location. Press the Allen Wrench (46) into the O Wrench Clip. 0 44 Make sure that all parts are tightened before using the tread- mill. 46 47 6
-
 1
1 -
 2
2 -
 3
3 -
 4
4 -
 5
5 -
 6
6 -
 7
7 -
 8
8 -
 9
9 -
 10
10 -
 11
11 -
 12
12 -
13
-
14
-
15
-
16
 |
 |