Weslo Cadence 825 Treadmill Owners Manual - Page 6
treadmill.
 |
View all Weslo Cadence 825 Treadmill manuals
Add to My Manuals
Save this manual to your list of manuals |
Page 6 highlights
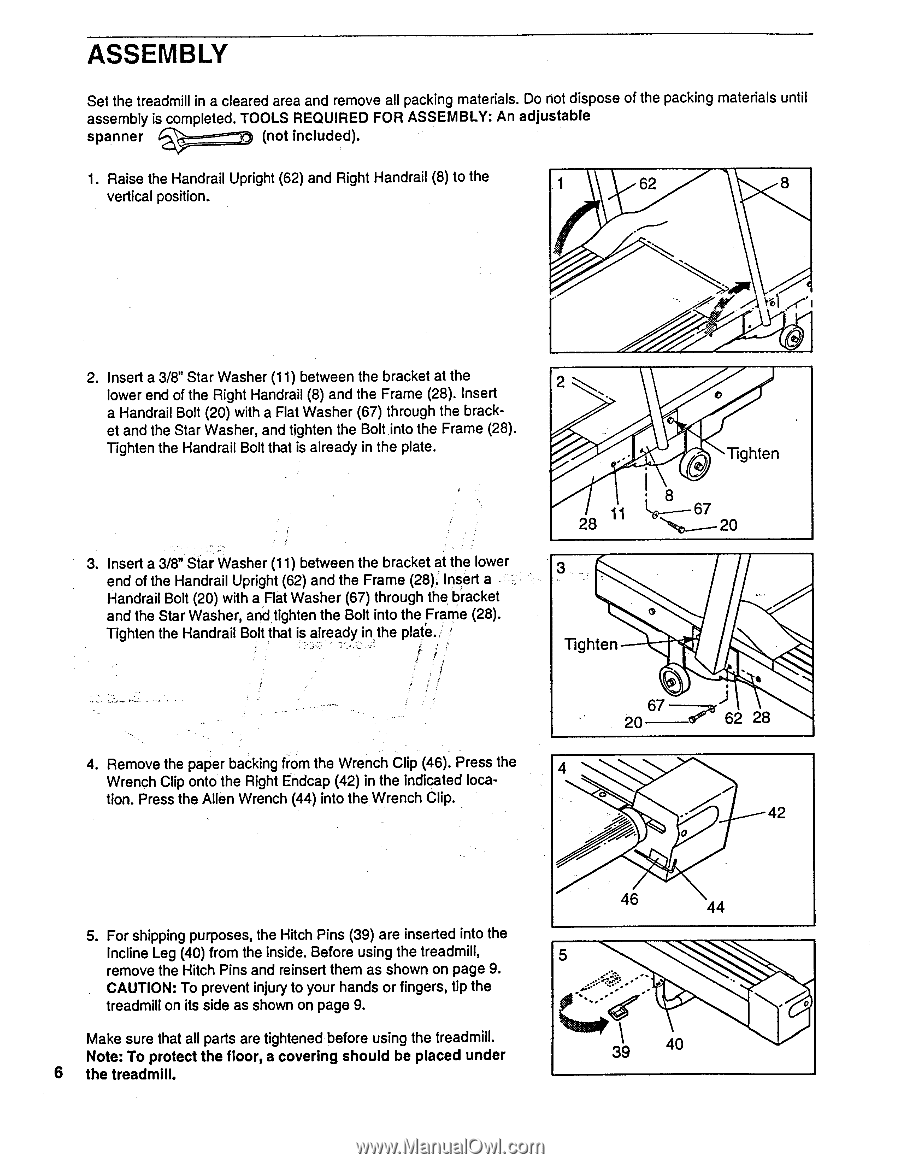
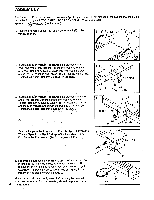
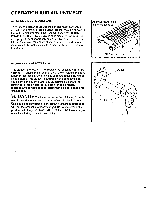
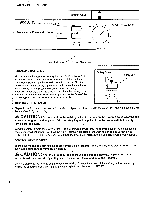
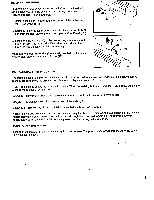
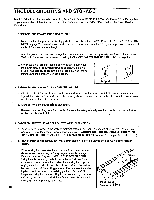
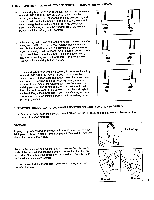
ASSEMBLY Set the treadmill in a cleared area and remove all packing materials. Do not dispose of the packing materials until assembly is completed. TOOLS REQUIRED FOR ASSEMBLY: An adjustable spanner : :D (not included). 1. Raise the Handrail Upright (62) and Right Handrail (8) to the vertical position. 62 8 2. Insert a 3/8" Star Washer (11) between the bracket at the lower end of the Right Handrail (8) and the Frame (28). Insert 2 a Handrail Bolt (20) with a Flat Washer (67) through the brack- et and the Star Washer, and tighten the Bolt into the Frame (28). Tighten the Handrail Bolt that is already in the plate. 3. Insert a 3/8" Star Washer (11) between the bracket at the lower end of the Handrail Upright (62) and the Frame (28). Insert a Handrail Bolt (20) with a Flat Washer (67) through the bracket and the Star Washer, and tighten the Bolt into the Frame (28). Tighten the Handrail Bolt that is already in the plate., 28 11 Tighten Tighten 67 20 4. Remove the paper backing from the Wrench Clip (46). Press the Wrench Clip onto the Right Endcap (42) in the indicated location. Press the Allen Wrench (44) into the Wrench Clip. 67 20 te 62 28 42 0 5. For shipping purposes, the Hitch Pins (39) are inserted into the Incline Leg (40) from the inside. Before using the treadmill, remove the Hitch Pins and reinsert them as shown on page 9. CAUTION: To prevent injury to your hands or fingers, tip the treadmill on its side as shown on page 9. Make sure that all parts are tightened before using the treadmill. Note: To protect the floor, a covering should be placed under 6 the treadmill. 46 44 5 .'\ 39 40
-
 1
1 -
 2
2 -
 3
3 -
 4
4 -
 5
5 -
 6
6 -
 7
7 -
 8
8 -
 9
9 -
 10
10 -
 11
11 -
 12
12 -
13
-
14
-
15
-
16
 |
 |