Weslo Cadence C6 Uk Manual - Page 6
Assembly
 |
View all Weslo Cadence C6 manuals
Add to My Manuals
Save this manual to your list of manuals |
Page 6 highlights
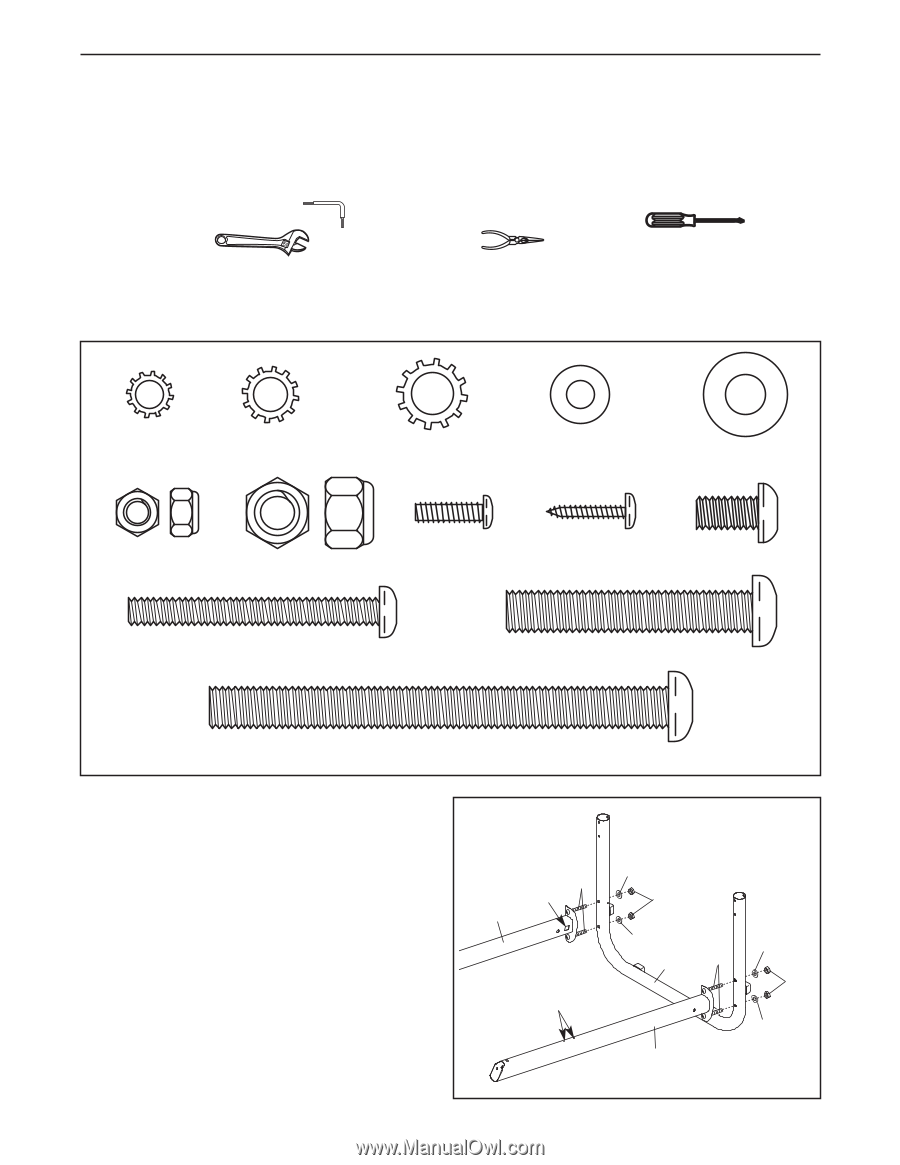
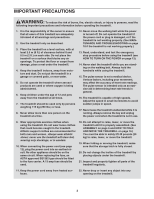
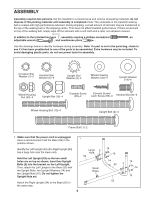
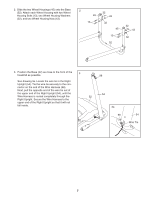
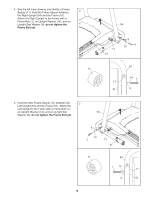
ASSEMB2 L3/4Y" Bolt (47)-4 Star Washer (81)-4 Washer (29)-4 Handrail Washer (11)- Assembly requires two persons. Set the treadmill in a cleared area and remove all packing materials; do not dispose of the packing materials until assembly is completed. Note: The underside of the treadmill walking belt is coated with high-pe4r"foBromlta(n1c2e0)l-u2bricant. During shipping, a small amount of lubricant may be transferred to the top of the walking belt or the shipping carton. This does not affect treadmill performance. If there is lubricant on top of the walking belt, simply wipe off the lubricant with a soft cloth and a mild, non-abrasive cleaner. In addition to the included hex keys , assembly requires a phillips screwdriver , an adjustable wrench , and needlenose pliers . Use the drawings below to identify hardware during assembly. Note: If a part is not in the parts bag, check to see if it has been preattached to one of the parts to be assembled. Extra hardware may be included. To avoid damaging plastic parts, do not use power tools for assembly. Crossbar Star Washer (7)-2 Handrail Star Washer (5)-6 Upright Star Washer (9)-2 Wheel Housing Washer (32)-4 Upright Washer (14)-6 Wheel Housing Nut (43)-4 Upright Nut (16)-4 Crossbar Screw (85)-2 Console Screw/ Latch Screw (95)-6 Handrail Bolt (8)-6 Wheel Housing Bolt (13)-4 Upright Bolt (2)-4 Frame Bolt (1)-2 1. Make sure that the power cord is unplugged. Have a second person hold the Base (52) in the position shown. Identify the Left Upright (53) (the Right Upright [54] has a large hole near the lower end). Hold the Left Upright (53) so the two small holes are on top as shown. Insert two Upright Bolts (2) into the bracket on the Left Upright. Then, attach the Left Upright to the Base (52) with the Upright Bolts, two Upright Washers (14) and two Upright Nuts (16). Do not tighten the Upright Nuts yet. Base Pad AttaScchretwhe(2R6ig)-h6t Upright (54) to the Base (52) in the same way. 1 Large 2 Hole 54 14 16 14 52 14 2 Small 16 Holes Wheel Housing Bolt (13)-4 14 53 6 Upright Bolt (2)-4
-
 1
1 -
 2
2 -
 3
3 -
 4
4 -
 5
5 -
 6
6 -
 7
7 -
 8
8 -
 9
9 -
 10
10 -
 11
11 -
 12
12 -
13
-
14
-
15
-
16
-
17
-
18
-
19
-
20
-
21
-
22
-
23
-
24
-
25
-
26
-
27
-
28
 |
 |