WestBend EM925AJWP1 Instruction Manual - Page 7
Setting Up Your Oven
 |
View all WestBend EM925AJWP1 manuals
Add to My Manuals
Save this manual to your list of manuals |
Page 7 highlights
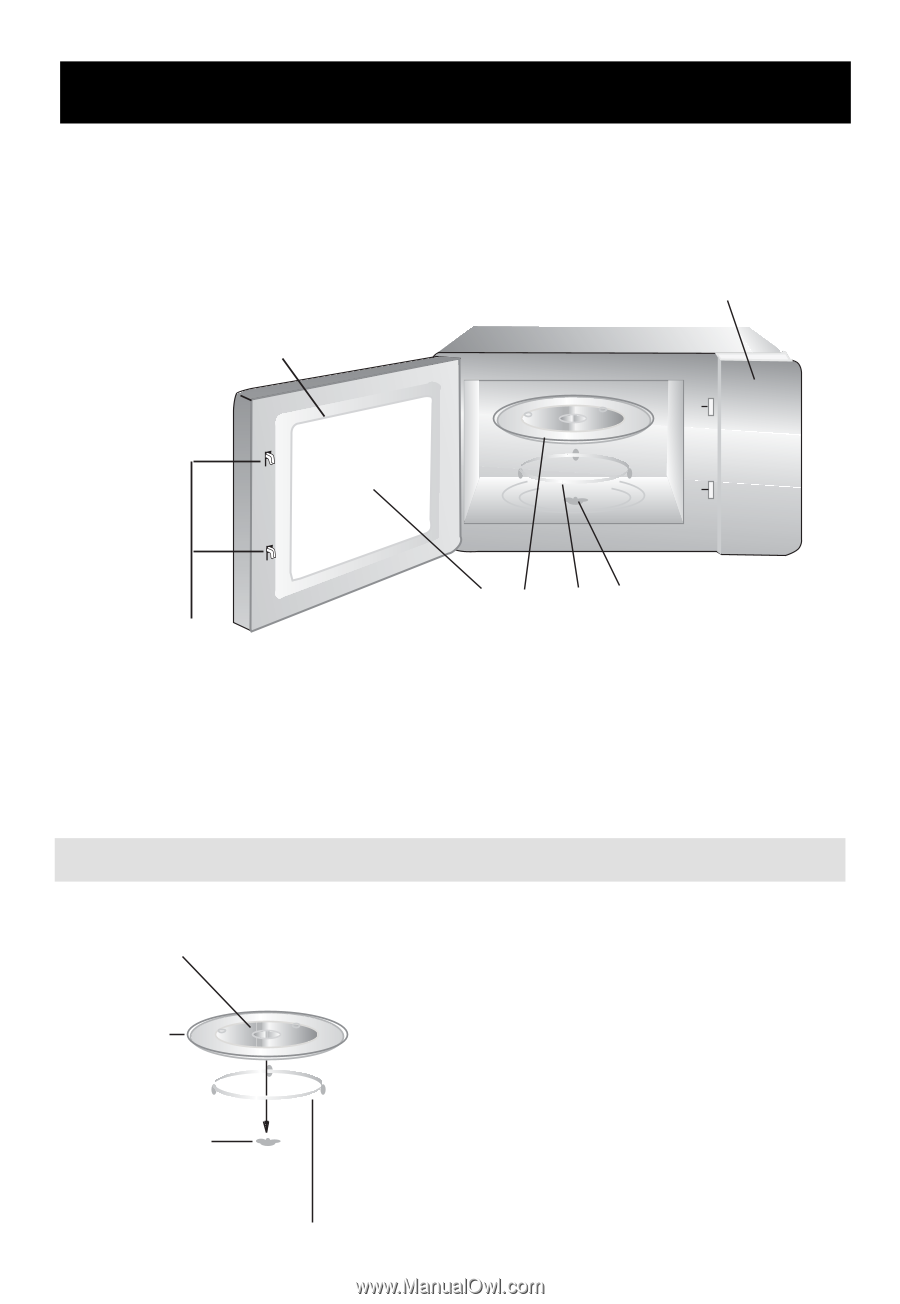
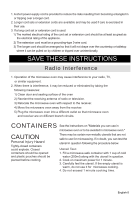
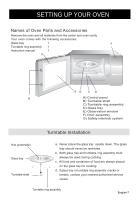
SETTING UP YOUR OVEN Names of Oven Parts and Accessories Remove the oven and all materials from the carton and oven cavity. Your oven comes with the following accessories: Glass tray 1 A Turntable ring assembly 1 Instruction manual 1 F ED CB G A) Control panel B) Turntable shaft C) Turntable ring assembly D) Glass tray E) Observation window F) Door assembly G) Safety interlock system Turntable Installation Hub (underside) Glass tray Turntable shaft a. Never place the glass tray upside down. The glass tray should never be restricted. b. Both glass tray and turntable ring assembly must always be used during cooking. c. All food and containers of food are always placed on the glass tray for cooking. d. If glass tray or turntable ring assembly cracks or breaks, contact your nearest authorized service center. Turntable ring assembly English-7
-
 1
1 -
 2
2 -
 3
3 -
 4
4 -
 5
5 -
 6
6 -
 7
7 -
 8
8 -
 9
9 -
 10
10 -
 11
11 -
 12
12 -
13
-
14
-
15
-
16
-
17
-
18
-
19
-
20
-
21
-
22
-
23
-
24
-
25
-
26
-
27
-
28
-
29
-
30
-
31
-
32
 |
 |