Western Digital AC22000 User Manual (pdf) - Page 8
Install the Hard Drive
 |
View all Western Digital AC22000 manuals
Add to My Manuals
Save this manual to your list of manuals |
Page 8 highlights
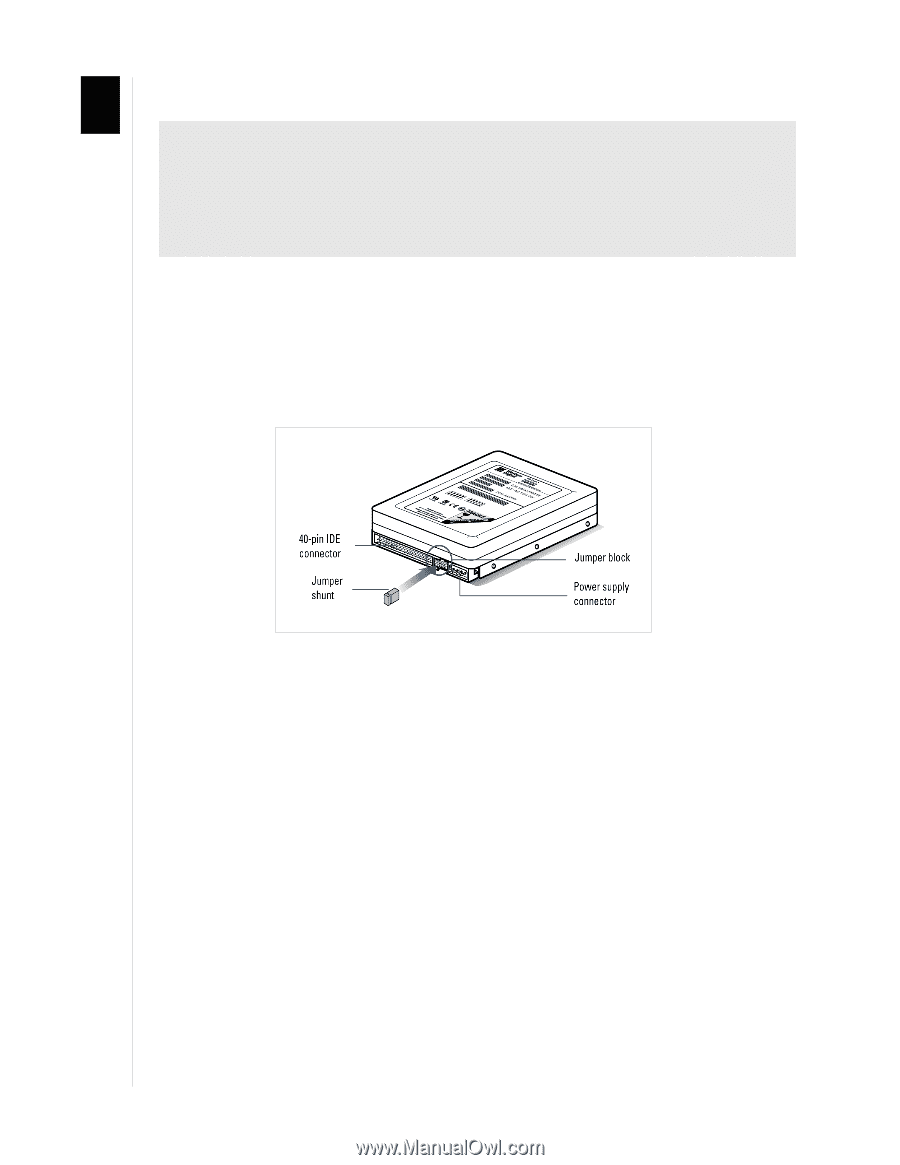
WESTERN DIGITAL EIDE HARD DRIVE INSTALLATION GUIDE 2 Install the Hard Drive IMPORTANT - Installing Your New Western Digital Hard Drive as an Upgrade From a Previously Installed Hard Drive: To ensure the optimal settings for your drive configuration, we recommend you run the Installation Tutorial in the Windows version of Data Lifeguard Tools prior to the hardware installation. Data Lifeguard Tools for Windows will generate your custom installation instructions based on the configuration you choose. For instructions, see page 10. Set the Jumpers Jumper settings are used to determine the order in which IDE devices attached to a single cable are detected by the system. Western Digital Enhanced IDE hard drives have a 10-pin jumper block located next to the 40-pin, 80-conductor IDE connector on the hard drive. The default jumper setting for Western Digital hard drives is Cable Select. Western Digital EIDE Hard Drive Cable Select Configuration Cable Select requires a special cable (included in your kit). If your system supports Cable Select, there is no need to reposition the jumper shunt on the drive. If you are installing your new Western Digital hard drive with an existing IDE drive on the cable, make sure that the other drive is also jumpered as Cable Select. If your system does not support Cable Select or if you are uncertain, use the Master/Slave or Single configuration. See page 5 for the jumper block diagram. INSTALL THE HARD DRIVE - 4
-
 1
1 -
2
-
 3
3 -
 4
4 -
 5
5 -
 6
6 -
 7
7 -
 8
8 -
 9
9 -
 10
10 -
 11
11 -
 12
12 -
 13
13 -
14
-
15
-
16
-
17
-
18
-
19
-
20
-
21
-
22
-
23
-
24
-
25
-
26
-
27
-
28
-
29
-
30
-
31
-
32
-
33
-
34
-
35
-
36
 |
 |