Western Digital WD800B002 Quick Install Guide (pdf) - Page 1
Western Digital WD800B002 - Firewire Manual
 |
View all Western Digital WD800B002 manuals
Add to My Manuals
Save this manual to your list of manuals |
Page 1 highlights
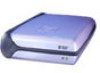
Unplugging the USB 2.0 External Hard Drive CAUTION: Do not unplug your USB 2.0 external hard drive before following the steps below as this could result in data loss. Windows Users Double click on the Windows Unplug or Eject Hardware icon in your system tray (located in the bottom right corner of your screen-see the dialog box below for a depiction of this icon). The following dialog box displays: Unplug or Eject Hardware system tray icon Technical Support Services If you need additional information or help during installation or normal use of this product, contact Western Digital Technical Support. When calling for support, please have your Western Digital USB 2.0 external hard drive serial number, system hardware, and software versions available. Telephone Assistance 800.ASK.4WDC (800.275.4932) +31.20.446.7651 (Europe) Online Services support.wdc.com www.westerndigital.com Western Digital and the Western Digital logo are registered trademarks of Western Digital Technologies, Inc. Other marks may be mentioned herein that belong to other companies. ©2002 by Western Digital Technologies, Inc. All rights reserved. Assembled in the USA. Select and highlight USB Mass Storage Device from the list, then click Stop. To confirm your selection of the drive to be disconnected, click OK. You may now unplug the USB 2.0 external hard drive from your computer. Macintosh Users To unplug your USB 2.0 external hard drive, drag the USB 2.0 hard drive icon to the Trash. After the disk icon has disappeared from the desktop, you may safely disconnect the external hard drive. - 7 - Western Digital 20511 Lake Forest Drive Lake Forest, CA 92630 For service and literature: 800.ASK.4WDC USA +31.20.4467651 Europe support.wdc.com www.westerndigital.com 2079-001033-000 08/02 Western Digital External Hard Drive USB 2.0 and 1.1 Install Guide Hardware Installation and Setup for your USB 2.0 External Hard Drive 1 Getting Started • Minimum System Requirements: An available USB port (a USB 2.0 host controller or USB 2.0 PCI adapter card is required for USB 2.0 Hi-Speed performance), Windows® 98SE/Me/2000/XP, a Pentium II processor or higher, and least 64 MB of RAM. Macintosh® users require Mac OS X or higher, a true G3 processor or higher, and at least 32 MB of RAM. • USB Backward Compatibility: All current computer systems that have existing USB 1.1 ports can be used with Western Digital's USB 2.0 external hard drive. A USB 2.0 PCI adapter card is required for USB 2.0 Hi-Speed performance-up to 40 times faster than USB 1.1 in data transfer rates. • Record Serial Number: Located on the bottom of the external hard drive, the serial number is used for setup and technical support purposes. Western Digital USB 2.0 External Hard Drive Kit Contents 2 Connecting the USB 2.0 External Hard Drive Windows 98SE users only: You must install the device drivers on your system prior to connecting the device. Skip to page 4 for installation procedures. 1. Power on your computer. 2. Plug the end of the power connector with the flat side facing up into the power supply socket located on the back of the drive. 3. Connect the power cord (with the AC power supply connected) into an electrical outlet. Verify that the power LED is lit. 4. Connect one end of the included USB 2.0 cable into an available USB port on your computer. 5. Plug the other end of the USB 2.0 cable into the back of the external hard drive. USB 2.0 Port Power Supply Socket Power LED (Green) Access LED (Red) USB Connection USB 2.0 Certified Interface Cable AC Power Supply 7200 RPM External Hard Drive Also included: power cord, warranty card, and Install guide. CAUTION: Do not drop or jolt your USB 2.0 external hard drive or attempt to open the drive and service it yourself. These actions will void the warranty. - 1 - USB 2.0 External Hard Drive Rear and Front Panel with Installation - 2 -
-
 1
1 -
 2
2
 |
 |
