Western Digital WDBMCE0010HBK User Manual
Western Digital WDBMCE0010HBK Manual
 |
View all Western Digital WDBMCE0010HBK manuals
Add to My Manuals
Save this manual to your list of manuals |
Western Digital WDBMCE0010HBK manual content summary:
- Western Digital WDBMCE0010HBK | User Manual - Page 1
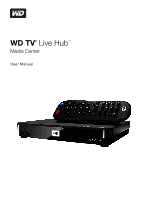
WD TV® Live Hub™ Media Center User Manual - Western Digital WDBMCE0010HBK | User Manual - Page 2
Table of Contents 1 Important User Information 1 Important Safety Instructions 1 WD Service and Support 2 Recording Your WD Product Information 3 Registering Your WD Product 3 Accessories 3 2 Product Overview 4 3 Features and Functions 6 Features 6 Connections 7 Power Button and LED - Western Digital WDBMCE0010HBK | User Manual - Page 3
Music Playback Options 53 Playing Music From Your iPod 55 8 Viewing Photos 56 Photo Display 56 Digital Camera Support 58 Photos Menu Options 11 Network Services 72 Accessing Media Content from the Network 72 Using the Web UI 73 12 Internet Services 78 Adding a Service to Favorites - Western Digital WDBMCE0010HBK | User Manual - Page 4
Operation 156 System 158 Mobile Access/WD Photos 164 About 167 Media Library 168 15 System Maintenance 170 System Firmware Upgrade 170 Troubleshooting 172 Common Error Messages 175 FAQs 176 16 Appendix 177 Multiformat Content Playback 177 Supported Formats 178 Regulatory Compliance 182 - Western Digital WDBMCE0010HBK | User Manual - Page 5
WD TV Live Hub Media Center User Manual 1 Important User Information Important Safety Instructions time. „ Refer all servicing to qualified service personnel. Servicing is required when the „ Carefully read and follow the Quick Install Guide and User Manual. „ Do not operate this device outside the - Western Digital WDBMCE0010HBK | User Manual - Page 6
Hub Media Center User Manual WD Service and Support Should you encounter any problem, please give us an opportunity to address it before returning this product. Most technical support questions can be answered through our knowledge base or e-mail support service at http://support.wdc.com. If the - Western Digital WDBMCE0010HBK | User Manual - Page 7
Manual Recording Your WD Product Information In the following table, write the serial and model numbers of your new WD contact with WD technical support. Register your WD product online to "Device Registration" on page 161 for instructions. Accessories For information on optional accessories for - Western Digital WDBMCE0010HBK | User Manual - Page 8
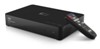
Manual 2 Product Overview Thank you for purchasing a WD TV Live Hub Media Center. This user manual provides step-by-step instructions for installing and using your new media center. For the latest WD navigation menus. Play almost any type of media file - WD TV Live Hub supports a wide variety - Western Digital WDBMCE0010HBK | User Manual - Page 9
User Manual Transfer files easily - Copy, move or delete files stored on a USB drive, a network drive, your camcorder, or a camera to the Live Hub built-in drive using the on-screen menus. It's a multi-room media server streaming to any TV in your house - You can stream any file on the WD - Western Digital WDBMCE0010HBK | User Manual - Page 10
Media Center User Manual 3 Features and Functions Features Menus Your media is organized, categorized and ready to play - The WD TV Live Hub media for better identification. Play photo slideshows with the music you choose Tag your favorites for instant playback Supports DVD Navigation - View all - Western Digital WDBMCE0010HBK | User Manual - Page 11
WD TV Live Hub Media Center User Manual „ Video output resolution includes 480i, 576i, 480p, 576p, 720i, „ Wired or wireless Internet connection for access to online media content. Plug-and-Play USB 2.0 Support* „ USB storage device with a USB connector „ Portable media centers with USB connector - Western Digital WDBMCE0010HBK | User Manual - Page 12
Button and LED Indicator WD TV Live Hub Media Center User Manual 1 2 3 Item 1 2 3 Component Power button Power LED (WD logo) Infrared receiver by three short flashes-A system diagnostic failure has occurred. See "Troubleshooting" on page 172. • Receives signals from the remote control. - Western Digital WDBMCE0010HBK | User Manual - Page 13
Remote Control WD TV Live Hub Media Center User Manual CAUTION: Do not expose the batteries or the remote control 13 9. Alpha-numeric keys 10. SEARCH 5 14 11. HOME 12. Audio 6 13. REV, PAUSE/PLAY, FF 14. Options 7 15 15. Next Page 8 16 16. Setup 17. Shortcut/function keys 17 18 - Western Digital WDBMCE0010HBK | User Manual - Page 14
User Manual WD TV Live Hub Media Center Remote control and Two AAA batteries AC power adapter Quick Install Guide Installation Requirements „ Standard or HD TV with a composite (standard A/V), component (YPbPr), or HDMI input „ An available network connection for online content and services - Western Digital WDBMCE0010HBK | User Manual - Page 15
WD TV Live Hub Media Center User Manual Installation Procedure The media center installation procedure is outlined below: 1. Connect the power cable. 2. Establish a network connection. 3. Transfer content from your computer to the media - Western Digital WDBMCE0010HBK | User Manual - Page 16
WD TV Live Hub Media Center User Manual Step if using a switch, it must be connected to the router). For detailed instructions on wireless and wired network connections and configuration, see "Network Setup" on Network See "Network Services" on page 72. Accessing Online Media Content See "Internet - Western Digital WDBMCE0010HBK | User Manual - Page 17
WD TV Live Hub Media Center User Manual Step 3 - Loading Content On Your Media Center Transfer on page 12) and a computer to your router as shown above. Windows Using WD Discovery™ 1. Download the WD Discovery tool from http://products.wdc.com/WDTVLiveHub. 2. Double-click on the downloaded installer - Western Digital WDBMCE0010HBK | User Manual - Page 18
WD TV Live Hub Media Center User Manual 4. Click WDTVLiveHub in the Network Drives Found list and Map Network Drive in the Things To Do from Z. When mapping completes, the media center appears as a network drive in the WD Discovery screen. Click Back to return to the main page. GETTING STARTED - 14 - Western Digital WDBMCE0010HBK | User Manual - Page 19
drive letter. Click Yes to complete drive letter assignment. Note: Once a unit is mapped to a network drive, automatically or manually, it keeps the same drive letter. 7. Close the WD Discovery Tool. 8. Click or Start and then (My) Computer. The media center root displays. You can now drag and drop - Western Digital WDBMCE0010HBK | User Manual - Page 20
WD TV Live Hub Media Center User Manual Step 4 - Connecting the Media Center The following figures illustrate the cable connections supported by the media center. The standard connection uses the included composite-to-mini AV cables. Note: HDMI and S/PDIF (optical) cables are sold separately. - Western Digital WDBMCE0010HBK | User Manual - Page 21
WD TV Live Hub Media Center User Manual HDMI Video and Audio (High-Definition) HDMI combines high-definition video, multi-channel audio, and inter-component control in a single digital cable. This interface provides - Western Digital WDBMCE0010HBK | User Manual - Page 22
WD TV Live Hub Media Center User Manual Component Video and Audio (High Definition) The component connection only provides video signals. You will also need to connect the composite audio cables to provide - Western Digital WDBMCE0010HBK | User Manual - Page 23
WD TV Live Hub Media Center User Manual Composite AV Connection (Standard Definition) To use a composite connection: 1. Plug the composite connectors into the composite jacks on the media center. 2. Plug the opposite ends - Western Digital WDBMCE0010HBK | User Manual - Page 24
WD TV Live Hub Media Center User Manual Home Theater (High-Definition) To connect a home theater system using HDMI: 1. Plug an HDMI cable into the HDMI connector on the media center. 2. Plug the - Western Digital WDBMCE0010HBK | User Manual - Page 25
TV Live Hub Media Center User Manual Step 5 - Connecting a USB Device (Optional) The media center has two USB ports that support playback from WD USB external drives.* * For a list of supported WD external drives, see article #5688 in or knowledge base at http://support.wdc.com. To connect the USB - Western Digital WDBMCE0010HBK | User Manual - Page 26
Center User Manual To unlock a locked WD USB device: A USB device must be unlocked for the media center to access its contents. 1. Navigate to the Home screen, and select the menu for the media content you wish to access. It can be Music, Videos, or Photo. 2. In the Unlock your WD Drive screen - Western Digital WDBMCE0010HBK | User Manual - Page 27
WD TV Live Hub Media Center User Manual OK STOP Back REV (reverse) PREV SEARCH Options PAUSE/PLAY FF (fast forward) NEXT Function Displays the main menu display more service options. Toggles between pause and playback. Scans forward through the audio/video playback. Supports the following speeds - Western Digital WDBMCE0010HBK | User Manual - Page 28
WD TV Live Hub Media Center User Manual Button EJECT MUTE Subtitle Audio Setup Alpha-numeric keys A, B, C, D Function Switches to playback. Goes back to the previous screen. Scans backward during audio/video playback. Supports the following speeds: 2×, 4×, 8×, 16×. OPERATING THE MEDIA CENTER - 24 - Western Digital WDBMCE0010HBK | User Manual - Page 29
WD TV Live Hub Media Center User Manual Key or key sequence Function P (Previous) • Press screen, press to display more service options. SPACE BAR (Play/Pause) Toggles between pause and playback. + (FF) Scans forward through the audio/video playback. Supports the following speeds: 2×, 4×, - Western Digital WDBMCE0010HBK | User Manual - Page 30
WD TV Live Hub Media Center User Manual Using the Media Center Menu The Home screen displays when Options The main Home options are: „ Videos „ Music „ Photos „ Files „ Setup „ Services „ New Firmware (automatically detects new firmware and only appears when new firmware is available) The Music - Western Digital WDBMCE0010HBK | User Manual - Page 31
WD TV Live Hub Media Center User Manual Home Screen Navigation Use the following keys to navigate dashboard. Your Favorites are shown by default. Navigate to to filter the media files and internet service links shown on the main dashboard page by category and media type. For example, to find photos - Western Digital WDBMCE0010HBK | User Manual - Page 32
WD TV Live Hub Media Center User Manual Press , Use the / navigation buttons, then press OK in the dashboard to display your media files by the following categories: „ Favorites (see "Favorite" on page - Western Digital WDBMCE0010HBK | User Manual - Page 33
WD TV Live Hub Media Center User Manual Dashboard Options With a file selected in any of the dashboard categories, press Options. Dashboard Options - Favorites Dashboard Options - Last 30 Days or Recently Viewed Dashboard - Western Digital WDBMCE0010HBK | User Manual - Page 34
WD TV Live Hub Media Center User Manual Media Library Compilation Exemptions The following conditions will prevent press OK. Note: Clear Media Library clears then rebuilds the media library. Supported Categories for Media Library Compilation Once the media library compilation process is completed, - Western Digital WDBMCE0010HBK | User Manual - Page 35
WD TV Live Hub Media Center User Manual folders/files that have been played recently. Displays a list of the option icons in an Internet service's submenu bar Move within a Support for Media Files Your media center supports thumbnails in two ways - embedded or external (some file formats do not support - Western Digital WDBMCE0010HBK | User Manual - Page 36
WD TV Live Hub Media Center User Manual display the image file with the same name as the audio file to be played. (for example, song.wav will be associated with song.jpg) Photo: function. Go to "Media Library Compilation" on page 29 for instructions. To perform a media search: 1. Go to the main - Western Digital WDBMCE0010HBK | User Manual - Page 37
WD TV Live Hub Media Center User Manual 3. Select Title, Director, or Actor (Videos); Title, File Name, Album or Artist (Music); or Title (Photos). Press OK, then to select the . Press OK. Search - Western Digital WDBMCE0010HBK | User Manual - Page 38
WD TV Live Hub Media Center User Manual 5. Using the on-screen keyboard: „ Use the navigation buttons to select a character, then press OK to input it in the search bar. Alternatives to this - Western Digital WDBMCE0010HBK | User Manual - Page 39
WD TV Live Hub Media Center User Manual If media files matching the search parameters you set are found, they will be listed as shown below (the result of entering 'bea' in Photos). - Western Digital WDBMCE0010HBK | User Manual - Page 40
can watch videos on your TV using the media center. Supported Video Formats The following video file formats are supported. „ AVI (Xvid, AVC, MPEG1/2/4) „ MPG/MPEG Playback To play back video: 1. Navigate to the Home | Videos menu, then press OK. WD TV Live Hub Media Center User Manual 2. The - Western Digital WDBMCE0010HBK | User Manual - Page 41
WD TV Live Hub Media Center User Manual If Media Library is enabled, you can choose to navigate using sorting (Alphabetical, Date, Ratings, Recently Viewed) and filter options (All Video, Genre, Playlists, Folder, Favorites) See "Supported Categories for Media Library Compilation" on page 30 for - Western Digital WDBMCE0010HBK | User Manual - Page 42
WD TV Live Hub Media Center User Manual Sorting 1. Press or navigate to the sort and filter content icon , and press OK. 2. Press , then / to select Sorting by Date, Alphabetically, by Ratings, or - Western Digital WDBMCE0010HBK | User Manual - Page 43
WD TV Live Hub Media Center User Manual If a No Content Info Found message displays, navigate to the keyboard icon then press OK. Enter the whole title or a portion of the title using - Western Digital WDBMCE0010HBK | User Manual - Page 44
WD TV Live Hub Media Center User Manual Move & Copy 1. Press / and select Move or Copy from the list of options, then press OK. 2. Select a storage destination for the file you want to - Western Digital WDBMCE0010HBK | User Manual - Page 45
WD TV Live Hub Media Center User Manual 3. The screen below displays. Press OK to select "Don't ask me again!" if you do not want this screen to appear again, then press to - Western Digital WDBMCE0010HBK | User Manual - Page 46
WD TV Live Hub Media Center User Manual Video Playback Controls Use these buttons on the remote control to control video playback: Button Function STOP Discontinues video playback PAUSE/PLAY next chapter (if the video file supports chapters). PREV • Plays the previous video file in the video - Western Digital WDBMCE0010HBK | User Manual - Page 47
WD TV Live Hub Media Center User Manual Video Playback Options „ To display the video playback options while playing a video, press Options. : Subtitle files (specific types that are supported) need to have the exact same file name as the media they are playing (the extensions will be different) and - Western Digital WDBMCE0010HBK | User Manual - Page 48
WD TV Live Hub Media Center User Manual To view subtitles: 1. During video playback, press Subtitle color from the Subtitle Color menu. „ Encoding - see "Additional Encoding Support" on page 160. Play Mode Use the play mode option to set video repeat options. Press OK repeatedly until the repeat - Western Digital WDBMCE0010HBK | User Manual - Page 49
WD TV Live Hub Media Center User Manual „ Repeat All - All the video files in the current video folder are played in sequence and repeatedly until you press STOP or Back. „ Repeat One - The current video file is played repeatedly until you press STOP or Back. Audio Channel Selection Use this option - Western Digital WDBMCE0010HBK | User Manual - Page 50
WD TV Live Hub Media Center User Manual Displaying the Video Playback Panel Use this option to display the Video Playback Panel on the bottom of the screen. This panel shows the following - Western Digital WDBMCE0010HBK | User Manual - Page 51
WD TV Live Hub Media Center User Manual DVD Navigation In most cases, when the contents repeatedly to select the scan speed) 2. Press PAUSE/PLAY to resume playback on the selected position Scans the video playback forward or backward The media center supports the following scan speeds: 2x, 4x, 8x, - Western Digital WDBMCE0010HBK | User Manual - Page 52
WD TV Live Hub Media Center User Manual Button Left arrow Right arrow Function • At the main menu, move between selections such as Play Movie, Scene Selection, Set Up, Special Features, etc. • Reduce subtitle display speed during video playback. • At the main menu, move between selections such as - Western Digital WDBMCE0010HBK | User Manual - Page 53
WD TV Live Hub Media Center User Manual 7 Playing Music You can listen to audio files on your TV/audio system using the media center. Supported Audio Formats „ MP3 „ WAV/PCM/LPCM „ WMA „ AAC „ FLAC „ MKA „ AIF/AIFF „ OGG „ Dolby Digital Plus „ DTS Music Playback 1. Navigate to the Home | Music menu, - Western Digital WDBMCE0010HBK | User Manual - Page 54
WD TV Live Hub Media Center User Manual Genre, Artist, Album, Playlists, Favorites) See "Supported Categories for Media Library Compilation" on page 30 for details. 3. Locate the audio file you want to play PAUSE/PLAY. „ To find audio files on a network share or media center, follow the instructions - Western Digital WDBMCE0010HBK | User Manual - Page 55
WD TV Live Hub Media Center User Manual Sorting 1. Press or navigate to the sort and filter content icon , and press OK. 2. Press , then / to select Sorting by Date, Music view info function is the same as the Videos view info function. See "Video Playback Controls" on page 42. PLAYING MUSIC - 51 - Western Digital WDBMCE0010HBK | User Manual - Page 56
WD TV Live Hub Media Center User Manual Favorite The Music favorite function is the same as repeatedly to select the scan speed). 2. Press PLAY to resume playback on the selected position. Scan the audio playback forward or backward The media center supports the following scan speeds: 2×, 4×, 8×, - Western Digital WDBMCE0010HBK | User Manual - Page 57
WD TV Live Hub Media Center User Manual Note: If you leave the music playback screen, the only track). Music Playback Screen The music playback screen displays the following information about the currently playing album and/or audio file: Album art (if available) Album name Audio filename(s) Track - Western Digital WDBMCE0010HBK | User Manual - Page 58
WD TV Live Hub Media Center User Manual Get Content Info The Music get content info function Music rate function is the same as the Video rate function. See "Rate" on page 39. Play Mode Use the music play mode to set repeat and shuffle options. Repeat To set the music repeat mode: 1. During - Western Digital WDBMCE0010HBK | User Manual - Page 59
WD TV Live Hub Media Center User Manual Shuffle Use this option to set the audio tracks in the current music folder/playlist to play in random order. To enable music shuffle mode: 1. During music playback, press Options. 2. Select Play Mode, then press OK repeatedly until the repeat icon you - Western Digital WDBMCE0010HBK | User Manual - Page 60
WD TV Live Hub Media Center User Manual 8 Viewing Photos You can view your digital photos both individually and in slideshow mode on your TV using the media center. Supported Image File Formats „ GIF (Animated GIFs are not supported) „ BMP (non-compressed) „ JPEG (grayscale, RGB, YCbCy) (does not - Western Digital WDBMCE0010HBK | User Manual - Page 61
WD TV Live Hub Media Center User Manual Date, Folders, Recent). See "Supported Categories for Media Library Compilation" on (previous). „ To find picture files on a network share or media center, follow the instructions in "Accessing Media Content from the Network" on page 72. You can also view a - Western Digital WDBMCE0010HBK | User Manual - Page 62
WD TV Live Hub Media Center User Manual Sorting 1. Press or navigate to the sort and filter content check mark selected, press OK again. Digital Camera Support You can attach your digital camera to the media center via a USB port and view the supported image files stored in the camera's memory card. - Western Digital WDBMCE0010HBK | User Manual - Page 63
WD TV Live Hub Media Center User Manual Photos Menu Options In the main photo screen, press Options. The Photos menu options display. Press Back when complete to return to the main menu. - Western Digital WDBMCE0010HBK | User Manual - Page 64
WD TV Live Hub Media Center User Manual 1. Find and select the photo you want to use for the background displayed. Options include: „ Repeat All - All the photo files in the current photo folder are played in sequence and repeatedly until you press STOP or Back. „ Shuffle - All the photo files in - Western Digital WDBMCE0010HBK | User Manual - Page 65
WD TV Live Hub Media Center User Manual Rotate Left & Right 1. During photo viewing, press Options. 2. Select Rotate Left or Rotate Right, then press OK. 3. Press Options and select Rotate Left or Rotate - Western Digital WDBMCE0010HBK | User Manual - Page 66
WD TV Live Hub Media Center User Manual Displaying Photo Information Use this option to display the the slideshow. (See "Photo Display" on page 56.) 2. Select the photo folder, then press PAUSE/PLAY to start the slideshow. To listen to background music with a slideshow: 1. Navigate to the music - Western Digital WDBMCE0010HBK | User Manual - Page 67
WD TV Live Hub Media Center User Manual Slideshow Playback Controls Use these buttons on the remote control to control slideshow playback: Button STOP PAUSE/PLAY NEXT PREV Function Discontinue the slideshow Pause or resume the slideshow Display the next picture file in the slideshow Play the - Western Digital WDBMCE0010HBK | User Manual - Page 68
WD TV Live Hub Media Center User Manual 9 Files You can view and manage all of you want to play. „ To play a single file, select the file from the list or by navigating through the folder structure, then press OK. „ Follow the instructions under "Watching Video" on page 36, "Playing Music" on page - Western Digital WDBMCE0010HBK | User Manual - Page 69
WD TV Live Hub Media Center User Manual Sort & Filter Files You can sort and filter files based on your preferences using the sort & filter option. 1. Press or navigate to the sort and - Western Digital WDBMCE0010HBK | User Manual - Page 70
10 WD TV Live Hub Media Center User Manual Network Setup The media center can be connected to the local area network using a wired or wireless network connection for access to streaming video and - Western Digital WDBMCE0010HBK | User Manual - Page 71
Network setup, then press OK. WD TV Live Hub Media Center User Manual 6. Select a setup configuration option, then press OK. Select Automatic to have the device attempt to detect your network connection automatically, then go to step 11. Select Manual to manually set your network connection, then - Western Digital WDBMCE0010HBK | User Manual - Page 72
WD TV Live Hub Media Center User Manual 8. Press to key in your IP address using the on-screen keyboard Home screen. After establishing a network connection, you can: „ Use the different Internet services integrated into your media center to access streaming media. Go to the next chapter for more information - Western Digital WDBMCE0010HBK | User Manual - Page 73
Wireless Network Setup WD TV Live Hub Media Center User Manual Note: Streaming over wi-fi may be a list of tested, compatible wireless USB adapters, see Article #5688 in our knowledge base at http://support.wdc.com. 2. Navigate to the Home | Setup menu bar. 3. Press / to select Network Settings - Western Digital WDBMCE0010HBK | User Manual - Page 74
selected Manual, follow steps 7-10 under "Ethernet Network (Wired) Setup" on page 66. When finished, proceed to step 12 below. 11. Once the network is successfully set up, press OK to display the Home screen. After establishing a network connection, you can: „ Use the Internet services integrated - Western Digital WDBMCE0010HBK | User Manual - Page 75
settings. If a problem is indicated, check your router settings and manual for a solution. A red cross mark indicates a problem with the network settings. It can either be the IP address or the DNS server address. If the problem persists, check with your Internet service provider. NETWORK SETUP - Western Digital WDBMCE0010HBK | User Manual - Page 76
11 Network Services WD TV Live Hub Media Center User Manual Accessing Media Content from the Network Once the media , refer to your NAS device documentation. 6. Press to select OK, then press OK. Supported content for the selected media type displays. 7. Select the content you wish to access, - Western Digital WDBMCE0010HBK | User Manual - Page 77
WD TV Live Hub Media Center User Manual Using the Web UI The media center provides a Web-based user interface (UI) that can be used to control certain from the Language list. 4. Click I accept END USER LICENSE AGREEMENT, then click Login. 5. The Web UI menu options display. NETWORK SERVICES - 73 - Western Digital WDBMCE0010HBK | User Manual - Page 78
WD TV Live Hub Media Center User Manual System Click System in the Web UI home page to manage the system Control" on page 23 for further information). Media Click Media to enable the Twonky service, launch the Twonky media browser, and enable the iTunes server to access media on iTunes. NETWORK - Western Digital WDBMCE0010HBK | User Manual - Page 79
WD TV Live Hub Media Center User Manual TwonkyMedia™ Click Enabled, then Launch Twonky to launch the TwonkyMedia server media browser in a separate browser window. The TwonkyMedia home screen displays. Navigate through the Music, Photos, and Videos subcategories to find a file to play SERVICES - 75 - Western Digital WDBMCE0010HBK | User Manual - Page 80
for the listed Internet services supported by the media center (supported services vary by region and country). Support Click Support to access Express Customer Support (includes diagnostic test) and Support Documentation including product documentation, FAQ's, and a WD TV user forum. NETWORK - Western Digital WDBMCE0010HBK | User Manual - Page 81
WD TV Live Hub Media Center User Manual Status Bar The status bar at the bottom of the Web UI displays media center status, hard drive capacity usage, and a graphical video stored on the media center. Logout Click the Logout button in the main menu to log out of the Web UI. NETWORK SERVICES - 77 - Western Digital WDBMCE0010HBK | User Manual - Page 82
Services WD TV Live Hub Media Center User Manual Important: A broadband Internet connection (e.g., DSL or cable) is required to use Internet services. Availability varies by country. These services Choose from thousands of titles to rent or buy, including new releases, cinema classics and TV shows - Western Digital WDBMCE0010HBK | User Manual - Page 83
WD TV Live Hub Media Center User Manual „ Pandora - Free, personalized Internet radio playing only the music you love. Enter your favorite songs or artists, and enjoy stations created just for you. Rate songs as they play largest Internet radio guide with access to The above services are fully - Western Digital WDBMCE0010HBK | User Manual - Page 84
WD TV Live Hub Media Center User Manual Adding a Service to Favorites You can add a Service to your Favorites so that it's quickly available via the dashboard when you are in the Home screen or other screens (when you press or navigate to in certain screens then press OK). 1. In the Services screen, - Western Digital WDBMCE0010HBK | User Manual - Page 85
WD TV Live Hub Media Center User Manual AccuWeather.com The Weather service provided by AccuWeather.com provides local forecasts for everywhere in the United States and over two million locations worldwide. To access Weather: 1. Navigate to the Home | Services menu bar and press OK. 2. The list - Western Digital WDBMCE0010HBK | User Manual - Page 86
WD TV Live Hub Media Center User Manual BLOCKBUSTER On Demand® The BLOCKBUSTER On Demand service lets you order and instantly watch movies from BLOCKBUSTER® right on your TV!* „ Rent or buy the movie before the download completes by pressing Play Now when it becomes available. After the movie - Western Digital WDBMCE0010HBK | User Manual - Page 87
WD TV Live Hub Media Center User Manual subscription required! 2. Follow the on-screen instructions to begin activation and receive your PIN press OK. 4. The list of Services display in alphabetical order. Press / to begin watching within minutes by selecting Play Now as soon as it becomes - Western Digital WDBMCE0010HBK | User Manual - Page 88
WD TV Live Hub Media Center User Manual Deezer Deezer is a personalized on-demand music service to listen to seven million tracks anytime, anywhere and one of the most popular Internet and mobile music offerings in Europe. To access Deezer: 1. Navigate to the Home | Services menu bar and press OK - Western Digital WDBMCE0010HBK | User Manual - Page 89
Center User Manual Signing in to Your Deezer Account Sign in to your Deezer account to access My Music (your playlists and favorites) and Top Charts. Note: If you do not have a Deezer account and want to create one, go to http://www.deezer.com. 1. Navigate to the Home | Services menu bar - Western Digital WDBMCE0010HBK | User Manual - Page 90
WD TV Live Hub Media Center User Manual Radios You can choose from a variety of playback status bar, album, artist, and the elapsed and total playback times. „ Press PLAY/PAUSE to pause and resume playback. „ Press FF/REV to fast forward or rewind in if not already logged in. INTERNET SERVICES - 86 - Western Digital WDBMCE0010HBK | User Manual - Page 91
3. Select Playlists, then press OK. WD TV Live Hub Media Center User Manual 4. Press Options, then select Create Your Playlist. Press OK. 5. Type in the name of your playlist on the remote. 1. With a radio station selected in My Music > Favorite Radios screen, press Options. INTERNET SERVICES - 87 - Western Digital WDBMCE0010HBK | User Manual - Page 92
WD TV Live Hub Media Center User Manual 2. Press / to select Delete from Favorite, then press OK. 3. Select OK, then select OK on the confirmation prompt, then press OK. Exit Deezer To return to the Services home screen, press / to select Exit in the Deezer home screen, then press OK. INTERNET - Western Digital WDBMCE0010HBK | User Manual - Page 93
Center User Manual Facebook Share your status, photos, videos, and your favorite links on Facebook. Find out the latest news from your social network or the world and so much more. Access it all on your big screen TV. You must have have a valid Facebook account to use this service. You can - Western Digital WDBMCE0010HBK | User Manual - Page 94
WD TV Live Hub Media Center User Manual 8. Press OK to complete the photo album, then press OK. 3. Navigate to a photo then press OK, or press (PAUSE/PLAY) to start a photo slideshow (see "Slideshow Playback Controls" on page 63). Photos Options With default viewing scale. INTERNET SERVICES - 90 - Western Digital WDBMCE0010HBK | User Manual - Page 95
WD TV Live Hub Media Center User Manual Newsfeed The Facebook news feed displays all of your friends' comments and allows you to "Like" or comment. The number posted to Facebook. 1. In the Facebook main menu, select Videos then press OK. 2. Navigate to a video, then press OK. INTERNET SERVICES - 91 - Western Digital WDBMCE0010HBK | User Manual - Page 96
WD TV Live Hub Media Center User Manual Videos Player With a video playing, press OK to bring up the videos player info panel. You can choose to Like or Comment on a video . Exit In the Facebook main menu, select Exit then press OK to exit Facebook and return to the Services home screen. INTERNET - Western Digital WDBMCE0010HBK | User Manual - Page 97
WD TV Live Hub Media Center User Manual Delete Facebook Account You can delete a Facebook account in the login screen. 1. Navigate to the Home | Services menu bar and press OK. 2. The list of Internet services display in alphabetical order. Press / to select Facebook, then press OK. 3. Select the - Western Digital WDBMCE0010HBK | User Manual - Page 98
WD TV Live Hub Media Center User Manual Flickr Flickr is an online image and video management and sharing website. Flickr content is rated as interesting in the past seven days by Flickr users displays. Go to page 99 for instructions on how to navigate a photostream. INTERNET SERVICES - 94 - Western Digital WDBMCE0010HBK | User Manual - Page 99
WD TV Live Hub Media Center User Manual To explore based on the upload date: Press / to select Recent Upload in the Flickr home screen, then press OK. A photostream showing the most recently uploaded content displays. Go to "Flickr Photostream" on page 99 for instructions page. INTERNET SERVICES - 95 - Western Digital WDBMCE0010HBK | User Manual - Page 100
WD TV Live Hub Media Center User Manual 1. Press / to select Search in the Flickr home screen, then press OK. 2. Press / to select associated with the specified word is displayed. Go to "Flickr Photostream" on page 99 for instructions on how to navigate a photostream. INTERNET SERVICES - 96 - Western Digital WDBMCE0010HBK | User Manual - Page 101
WD TV Live Hub Media Center User Manual Searching for a Flickr Member To search for a content selection, then press OK to explore it. Go to the next section for instructions on how to navigate a photostream. My Contacts My Contacts shows a list of to view their photos. INTERNET SERVICES - 97 - Western Digital WDBMCE0010HBK | User Manual - Page 102
WD TV Live Hub Media Center User Manual 3. To remove a contact from the list, select the contact name and press Options. Select Delete or Delete All Items, then remove a tag from the list, select the tag and press Options. Select Delete or Delete All Items, then press OK. INTERNET SERVICES - 98 - Western Digital WDBMCE0010HBK | User Manual - Page 103
WD TV Live Hub Media Center User Manual Flickr Photostream The Flickr photostream layout is the same as that of a Photos directory in thumbnail mode. „ You image in the photostream. „ Press to view the previous image in the photostream. „ To return to the photostream, press . INTERNET SERVICES - 99 - Western Digital WDBMCE0010HBK | User Manual - Page 104
Center User Manual Player Options As with a regular photo slideshow, you can customize the way content is displayed in the Flickr Player. To do this, press Options. Note: To view photos enlarged in fit to screen or full screen mode, access the Setup menu and follow the instructions under "Photo - Western Digital WDBMCE0010HBK | User Manual - Page 105
WD TV Live Hub Media Center User Manual To access Flingo: 1. Navigate to the Home | Services menu bar and press OK. 2. The list of Internet services display in alphabetical order. Press / to select Flingo , or OK to begin playing the video. 5. Press the Home button to exit Flingo. INTERNET - Western Digital WDBMCE0010HBK | User Manual - Page 106
WD TV Live Hub Media Center User Manual Live365 Use Live365 to create your own online radio and press OK. 2. The list of Internet services display in alphabetical order. Press / to select Live365 , then press OK. Options include: „ Stations „ Last Played „ My Presets „ About „ Exit Signing - Western Digital WDBMCE0010HBK | User Manual - Page 107
WD TV Live Hub Media Center User Manual 2. Press / to select Sign In or Don't have an account?, then press OK. If you don't have an account, follow the on-screen instructions process every time you use the media player to access the Live365 service. „ Save username only - Your user name is saved, but - Western Digital WDBMCE0010HBK | User Manual - Page 108
WD TV Live Hub Media Center User Manual Listening to a Live365 Station „ New Live365 users can browse for a radio station. „ You can access the last station you've Presets if you have a Live365 account. Press OK. 5. Press or OK to start listening to the selected radio station. INTERNET SERVICES - 104 - Western Digital WDBMCE0010HBK | User Manual - Page 109
WD TV Live Hub Media Center User Manual The Live365 Station screen: The Live365 station screen provides view and sorting and audio quality station listened to: 1. On the Live365 main screen, press / to select Last played. 2. Press or OK to start listening to the selected radio station. INTERNET - Western Digital WDBMCE0010HBK | User Manual - Page 110
WD TV Live Hub Media Center User Manual To listen to a favorite station: 1. On the Live365 main screen, press / to select My Presets, then press . To search for a Live 365 station: 1. On the Live365 home screen, select My Presets, Stations, or Last Played, then press Options. INTERNET SERVICES - 106 - Western Digital WDBMCE0010HBK | User Manual - Page 111
select Search, then press OK. WD TV Live Hub Media Center User Manual 3. On the on-screen keyboard, your Live365 account. Go to "To sign in to Live365:" on page 102 for instructions. 2. From the Live365 home screen, press / to select My Presets, then press Playing screen. INTERNET SERVICES - 107 - Western Digital WDBMCE0010HBK | User Manual - Page 112
WD TV Live Hub Media Center User Manual Providing Song Feedback Music selections in Live365 are compiled based on their user ratings. You can participate in the selection process by giving a song the "thumbs up" or "thumbs down" vote. To provide song feedback: 1. While the song is playing Playing - Western Digital WDBMCE0010HBK | User Manual - Page 113
WD TV Live Hub Media Center User Manual Mediafly Mediafly conveniently brings your favorite Internet do not have a Mediafly account and want to create one, go to www.mediafly.com/wd. 1. Navigate to the Home | Services menu bar. 2. Press / to select Mediafly, then press OK. 3. On the Mediafly - Western Digital WDBMCE0010HBK | User Manual - Page 114
, then press OK. WD TV Live Hub Media Center User Manual 5. You are provided with two options to sign in to your Mediafly account. Option 1: On your computer, go to www.mediafly.com/wd and enter the code Press or OK to start watching or listening to the selected podcast. INTERNET SERVICES - 110 - Western Digital WDBMCE0010HBK | User Manual - Page 115
WD TV Live Hub Media Center User Manual Mediafly Player The Mediafly layout is similar to the regular video playback screen. It displays the playback status bar and the elapsed and total playback times. „ Press PLAY/ These are channels deemed most popular by Mediafly users. INTERNET SERVICES - 111 - Western Digital WDBMCE0010HBK | User Manual - Page 116
WD TV Live Hub Media Center User Manual To access Popular Channels: 1. On the Mediafly dashboard, press / to select Popular Channels, then press OK. 2. Press / to select a Popular press OK. 2. Press / to select one of the options in the Media Plug-ins screen, then press OK. INTERNET SERVICES - 112 - Western Digital WDBMCE0010HBK | User Manual - Page 117
WD TV Live Hub Media Center User Manual Search 1. On the Mediafly dashboard, press / to select Search, then press OK. 2. Press on the confirmation prompt, then press OK. Exit Mediafly To return to the Services home screen, press / to select Exit in the Mediafly home screen, then press OK. INTERNET - Western Digital WDBMCE0010HBK | User Manual - Page 118
Hub Media Center User Manual Netflix Enjoy new releases, classics, and TV episodes instantly on your WD TV Live Hub Media instructions below. See "System Firmware Upgrade" on page 170 for further details. 1. Navigate to the Home | Services menu bar and press OK. 2. The list of Internet services - Western Digital WDBMCE0010HBK | User Manual - Page 119
WD TV Live Hub Media Center User Manual Pandora (US only) Pandora is an automated music recommendation and Internet radio service. With Pandora, you can input a song title or artist name and the service responds by playing selections that are musically similar. You can provide feedback (approved/not - Western Digital WDBMCE0010HBK | User Manual - Page 120
WD TV Live Hub Media Center User Manual Signing in to Pandora for the First Time 1. Navigate to the Home | Services menu bar and press OK. 2. The list of Internet services the activation code and follow the onscreen instructions (go to www.pandora.com/wd to create your new account). When finished - Western Digital WDBMCE0010HBK | User Manual - Page 121
WD TV Live Hub Media Center User Manual the initial station "seed' used in creating that station. Go to the next section for instructions on how to create a new Pandora station. „ the track feedback (thumbs up / thumbs replay the songs played on your Pandora station. INTERNET SERVICES - 117 - Western Digital WDBMCE0010HBK | User Manual - Page 122
WD TV Live Hub Media Center User Manual To create a Pandora station: 1. Navigate to Create Station or press Options to select Create station. Press OK. 2. Use the / to select Remove this station. Press OK. 3. Press / to select OK on the confirmation prompt, then press OK. INTERNET SERVICES - 118 - Western Digital WDBMCE0010HBK | User Manual - Page 123
WD TV Live Hub Media Center User Manual QuickMix QuickMix is a feature that allows you to listen to more than one of your stations at once. QuickMix will play only one song based on particular musical characteristics at a time (unlike regular Pandora stations, which play stop playing, if play playing, - Western Digital WDBMCE0010HBK | User Manual - Page 124
WD TV Live Hub Media Center User Manual Bookmarking a Song or Artist You have the option to bookmark a song or an artist for later reference. You can later refer to this bookmark if you want buy the track when you've sign in to Pandora from your computer or mobile computing device, or if - Western Digital WDBMCE0010HBK | User Manual - Page 125
WD TV Live Hub Media Center User Manual Picasa Picasa is an online image and video management and sharing service. Picasa content is organized based on albums and is searchable by a number of criteria. To learn more about Picasa services, and the options and limitations related to them, go to - Western Digital WDBMCE0010HBK | User Manual - Page 126
2. Select Add Account, then press OK. WD TV Live Hub Media Center User Manual 3. Use the navigation buttons to type your Picasa user name in the on-screen keyboard. Select Submit, any photos or videos, the screen displays "there is no media in the current folder." INTERNET SERVICES - 122 - Western Digital WDBMCE0010HBK | User Manual - Page 127
WD TV Live Hub Media Center User Manual You can sort and filter content on this page by showing all content (All) or your Unlisted Gallery or Public Gallery. the subject matter of the content you're looking for using the on-screen keyboard. Select Submit, then press OK. INTERNET SERVICES - 123 - Western Digital WDBMCE0010HBK | User Manual - Page 128
WD TV Live Hub Media Center User Manual The content search begins (this may take a few seconds). Content matching your search word appears in a Search result screen. 3. Use the an individual file and press OK to view, or press to view a slideshow of all the photos in an album. INTERNET SERVICES - 124 - Western Digital WDBMCE0010HBK | User Manual - Page 129
WD TV Live Hub Media Center User Manual Photo Menu Options With a photo thumbnail in a web album selected, press Options. The My Photos menu options display. Use the navigation buttons to select Hide Comments or Write a Comment... using the onscreen keyboard, then press OK. INTERNET SERVICES - 125 - Western Digital WDBMCE0010HBK | User Manual - Page 130
WD TV Live Hub Media Center User Manual Photo Display Options „ To display the photo options while viewing a photo, press Options. „ To return to the photo you were viewing, press Back or Options again. Information See "Information" on page 125. Play Mode See "Play on page 62. INTERNET SERVICES - 126 - Western Digital WDBMCE0010HBK | User Manual - Page 131
WD TV Live Hub Media Center User Manual Video Player The Picasa video layer layout is similar to the regular video playback screen. It displays the playback the account you want to delete, then press OK. 4. Press / to select OK on the confirmation prompt, then press OK. INTERNET SERVICES - 127 - Western Digital WDBMCE0010HBK | User Manual - Page 132
WD TV Live Hub Media Center User Manual TuneIn The world's largest Internet radio guide with access to over 30,000 free radio stations searchable by location, genre, or format. To access TuneIn: 1. Navigate to the Home | Services menu and press OK. 2. The list of Internet services display in - Western Digital WDBMCE0010HBK | User Manual - Page 133
WD TV Live Hub Media Center User Manual 3. Write down the activation code and follow the onscreen instructions (go to http://radiotime.com/mydevice to associate the media player with your account podcast: 1. On the TuneIn main screen, press / to select Search, then press OK. INTERNET SERVICES - 129 - Western Digital WDBMCE0010HBK | User Manual - Page 134
navigation buttons search keyword, then press OK. WD TV Live Hub Media Center User Manual to key in a Note: You can to add. 2. Press / to select the station you want to add or begin playing a station. 3. Press Options, then press / to select Add to Preset if you to remove. INTERNET SERVICES - 130 - Western Digital WDBMCE0010HBK | User Manual - Page 135
playing or selected, press Options, then / to select Report problem. Press OK. 2. The reporting problems screen appears, displaying options for reporting problems such as audio, wrong information, errors, etc. After making your selection press OK to return to the previous screen. INTERNET SERVICES - Western Digital WDBMCE0010HBK | User Manual - Page 136
WD TV Live Hub Media Center User Manual Signing Out from TuneIn Sign out of TuneIn after a listening session to ensure that nobody can make changes to your TuneIn simply exit out of TuneIn and stay signed in, press / to select Exit in the TuneIn main screen, then press OK. INTERNET SERVICES - 132 - Western Digital WDBMCE0010HBK | User Manual - Page 137
WD TV Live Hub Media Center User Manual YouTube YouTube is a video hosting website where you can upload and share videos. To access YouTube: 1. Navigate to the Home | Services menu bar and and press OK. 2. The list of Internet services display in alphabetical order. Press / to select YouTube - Western Digital WDBMCE0010HBK | User Manual - Page 138
WD TV Live Hub Media Center User Manual 3. Use the navigation buttons to type your YouTube user name in the on-screen keyboard. Select Submit, then press OK. playlists (Playlists). Press or navigate to , and press OK, then press / and OK twice to switch that selection. INTERNET SERVICES - 134 - Western Digital WDBMCE0010HBK | User Manual - Page 139
WD TV Live Hub Media Center User Manual Searching for Videos You can search YouTube for videos of particular interest to you. The search results are based on the the selected video. Go to page 138 for more information on using the YouTube Player. To use search history: INTERNET SERVICES - 135 - Western Digital WDBMCE0010HBK | User Manual - Page 140
WD TV Live Hub Media Center User Manual 1. Press the SEARCH button on the remote control. This toggles you to the Search History list. 2. Press / to select a search from OK to start watching the selected video. Go to page 138 for more information on using the YouTube Player. INTERNET SERVICES - 136 - Western Digital WDBMCE0010HBK | User Manual - Page 141
WD TV Live Hub Media Center User Manual Most Popular These are videos deemed most popular by YouTube users. To access Most Popular: 1. Press / to select Most Popular in or OK to start watching the selected video. Go to page 138 for more information on using the YouTube Player. INTERNET SERVICES - 137 - Western Digital WDBMCE0010HBK | User Manual - Page 142
WD TV Live Hub Media Center User Manual YouTube Options When you select a video in any of the YouTube submenu screens described above (i.e., User > My Favorites, Search, Top . Press to pause and resume playback. Press or to fast forward or reverse in 10 second increments. INTERNET SERVICES - 138 - Western Digital WDBMCE0010HBK | User Manual - Page 143
WD TV Live Hub Media Center User Manual YouTube Player Options As with a regular video playback screen, you can viewed display. This screen lists videos which might be related to recently played video by subject matter, making it easier to search for videos based on the same or similar subject - Western Digital WDBMCE0010HBK | User Manual - Page 144
WD TV Live Hub Media Center User Manual Press the navigation buttons to select a video from the list, then press start watching the selected video. or OK to The other options on this screen allow you to: „ Replay the recently playbacked video - Play for sign-in instructions. 1. During playback - Western Digital WDBMCE0010HBK | User Manual - Page 145
WD TV Live Hub Media Center User Manual Adding Videos to connected devices. If you attempt to play one of these videos, press OK to return to the previous screen. Encoding Support for YouTube Worldwide Many YouTube videos support for the language that is causing the error. INTERNET SERVICES - 141 - Western Digital WDBMCE0010HBK | User Manual - Page 146
Manual To set the media player's additional encoding setting: 1. Navigate to Home | Setup menu bar. 2. Press / to select System, then press OK. 3. Press / to select Additional Encoding Support, then press OK. 4. Press / to select the encoding support you require, then press OK. INTERNET SERVICES - Western Digital WDBMCE0010HBK | User Manual - Page 147
13 WD TV Live Hub Media Center User Manual Games You can access games and use the remote control to play them using the Games menu. Games Display 1. Navigate to the Home | Games menu, then press OK. 2. The screen displays all available games. The display is - Western Digital WDBMCE0010HBK | User Manual - Page 148
14 WD TV Live Hub Media Center User Manual Setup and Advanced Features The Setup menu lets you customize the way you use the media center and set preferences for media playback. To select a - Western Digital WDBMCE0010HBK | User Manual - Page 149
WD TV Live Hub Media Center User Manual Setup Navigation Buttons Use these buttons on the remote control OK within 15 seconds, the new setting will not be applied. If your entertainment unit cannot support the selected setting, no change is made and the original setting is retained. Applies the - Western Digital WDBMCE0010HBK | User Manual - Page 150
WD TV Live Hub Media Center User Manual You will be prompted to select the TV standard applicable higher the resolution and clearer the picture. HDMI When using an HDMI cable (if your TV supports HDMI resolution), select HDMI in the Video output screen. You will be prompted to select the applicable - Western Digital WDBMCE0010HBK | User Manual - Page 151
WD TV Live Hub Media Center User Manual The media center's default setting is Widescreen. Make sure your TV can support widescreen resolution, or this to have the media center detect receiver settings automatically. Or, select Manual (Except DVD), then select one or more of the following options - Western Digital WDBMCE0010HBK | User Manual - Page 152
WD TV Live Hub Media Center User Manual display is cropped in the TV screen). To correct any overscan problems, calibrate the display by reducing the display size by up to 5% increments. User Interface Themes The media center supports interchangeable user interfaces called themes. Themes alter the - Western Digital WDBMCE0010HBK | User Manual - Page 153
Media Center User Manual User Interface Backgrounds You can use this menu to set a different photo as the system background to replace the default grass field and sunny sky photo. You can choose from the WD Creative Masters backgrounds or your own backgrounds. WD Creative Masters WD Creative Masters - Western Digital WDBMCE0010HBK | User Manual - Page 154
WD TV Live Hub Media Center User Manual Your Backgounds Your Backgrounds shows the default background as setting is 5 minutes. Screensaver Style Use this menu to choose your screensaver display style. The WD Logo screensaver is the default style, but you can also choose a Random Photo Slideshow of - Western Digital WDBMCE0010HBK | User Manual - Page 155
WD TV Live Hub Media Center User Manual Video Playback Sequence Use this menu to select the video playback mode. The default setting is Normal. Go to "Play Mode" on page 44 for a description of these video playback modes. Subtitle Font Size Use this menu to set the default font size (24 to - Western Digital WDBMCE0010HBK | User Manual - Page 156
WD TV Live Hub Media Center User Manual Music Settings Use the menus in the Music settings screen to Panel When turned On, a music info menu bar appears at the top of the screen when music is playing in the background. Resume Music Longer Than 15 Min When turned On, will prompt you to resume or - Western Digital WDBMCE0010HBK | User Manual - Page 157
WD TV Live Hub Media Center User Manual Browser Display Use this menu to select the default display mode the slideshow sequence mode. The default setting is Normal. „ Normal - The slideshow is played once. When the last image is displayed, the previous browser screen is displayed. „ Shuffle - The - Western Digital WDBMCE0010HBK | User Manual - Page 158
WD TV Live Hub Media Center User Manual Slideshow Interval Time Use this menu to set the time interval between pictures in the slideshow. You can select from 3 seconds (default) to 5 minutes. Photo - Western Digital WDBMCE0010HBK | User Manual - Page 159
WD TV Live Hub Media Center User Manual Network Use the menus in this category to configure and view the media center's network settings. Press / to make a selection from the list of options, then press OK. Network Setup See "Network Setup" on page 66 for information and instructions. Wireless - Western Digital WDBMCE0010HBK | User Manual - Page 160
WD TV Live Hub Media Center User Manual Network Share Server Must be set to On to use network services. See "Network Services" on page 72 for information and instructions. Workgroup Allows you to join a specific workgroup on your network. Windows-based computers and devices in the same workgroup may - Western Digital WDBMCE0010HBK | User Manual - Page 161
WD TV Live Hub Media Center User Manual Remote Settings Select a function for the A, B, C, and D then press OK. Press / to select functions such as display mode, filter menu, Music, Video, Services, Setup, etc., then press OK. To reset the function buttons to default settings, select Reset, then - Western Digital WDBMCE0010HBK | User Manual - Page 162
Manual Delete Music Preset (Buttons 0-9) To clear a music file or playlist preset from one of the 0-9 buttons, press / to select a numbered button. Press to select the , then press OK. Sync From USB Storage This option allows you to turn the USB sync feature Off, Sync All Files, or Sync Supported - Western Digital WDBMCE0010HBK | User Manual - Page 163
WD TV Live Hub Media Center User Manual Set Time Zone for Clock Use this menu to select your local time zone and turn Daylight Savings Time Off or On so that the - Western Digital WDBMCE0010HBK | User Manual - Page 164
WD TV Live Hub Media Center User Manual Folder Lock Select Set Default Lock Folder to select a folder 2. Ask - the password must be entered to access the service. Additional Encoding Support Press / to select an encoding support for a secondary language, then press OK. This prevents garbled - Western Digital WDBMCE0010HBK | User Manual - Page 165
WD TV Live Hub Media Center User Manual Disk Manager This option displays information about the media Device Registration To register your WD product using the Setup menu: 1. Make sure your media center has an active network connection. Go to "Network Setup" on page 66 for instructions on how to set - Western Digital WDBMCE0010HBK | User Manual - Page 166
WD TV Live Hub Media Center User Manual 3. Press / to select System, then press OK. 4. Press / to select Device Registration, and playback settings to their default factory values. This may correct problems caused by a failed firmware upgrade or faulty configuration settings. SETUP AND ADVANCED FEATURES - Western Digital WDBMCE0010HBK | User Manual - Page 167
WD TV Live Hub Media Center User Manual Reset All Settings Except Online Service Accounts - restores all media center system preferences and playback settings to their default factory values with the exception of your internet Services personal account information. Reset All Online Service Accounts - Western Digital WDBMCE0010HBK | User Manual - Page 168
Live Hub Media Center User Manual Mobile Access/WD Photos Use this menu to share files on the media center with mobile devices that have the WD Photos app loaded. You can provide access for up to four mobile devices. For further information on WD Photos, go to http://wdphotos.wdc.com. Mobile Sharing - Western Digital WDBMCE0010HBK | User Manual - Page 169
Photos and tap Connect Now. WD TV Live Hub Media Center User Manual 5. Tap WD TV Live Hub. 6. Select Get Code Mobile Devices screen. Repeat the steps above to add additional mobile devices. You can now use WD Photos on the mobile devices you've added. Removing a Mobile Device 1. Navigate to a - Western Digital WDBMCE0010HBK | User Manual - Page 170
Hub Media Center User Manual Upload Content to the Media Center You can take a photo or video clip with your mobile device and upload it directly to the built-in hard drive on your media center. To upload content: 1. Open WD Photos on your mobile device. 2. Tap the folder icon next to - Western Digital WDBMCE0010HBK | User Manual - Page 171
WD TV Live Hub Media Center User Manual About Select this option to display the network info, firmware version currently installed, part number, and serial number of the device as well as online service info. „ Select Network Info then press OK to view info such as the device's MAC and IP addresses, - Western Digital WDBMCE0010HBK | User Manual - Page 172
WD TV Live Hub Media Center User Manual Media Library Media Library scans and consolidates the media contents of the internal hard drive, USB drive, and network drives into a database through which you - Western Digital WDBMCE0010HBK | User Manual - Page 173
WD TV Live Hub Media Center User Manual Converting The „ Text-language of the subtitles „ Chapters-number and a list of chapters MediaInfo supports the following formats: „ Video-MKV, OGM, AVI, DivX, WMV, QuickTime, Real . 3. Follow the instructions as prompted. SETUP AND ADVANCED FEATURES - 169 - Western Digital WDBMCE0010HBK | User Manual - Page 174
problems may require contacting your dealer or an authorized service center for assistance. For more information, refer to "WD Service and Support" on page 2. System Firmware Upgrade Firmware is an important set of instructions USB storage device if doing a manual update. Automatic The New Firmware - Western Digital WDBMCE0010HBK | User Manual - Page 175
To update the firmware manually: 1. Go to http://support.wdc.com and download the latest firmware update file for the media center. 2. Click "Downloads," then the product name (or photo). Download the WD TV Live Hub Media Center firmware zip file to your computer. 3. Using an unzip utility, extract - Western Digital WDBMCE0010HBK | User Manual - Page 176
Troubleshooting WD TV Live Hub Media Center User Manual Problem Solution DISPLAY The TV screen is blank 10 minutes, then turn it on again. If the same thing happens, contact WD Technical Support for assistance (see "WD Service and Support" on page 2). • Make sure the TV is turned on. • Make sure - Western Digital WDBMCE0010HBK | User Manual - Page 177
WD TV Live Hub Media Center User Manual Problem Solution FILES File does not play. AUDIO There is no sound. NETWORK USB device is configured as a "mass storage device." • Make sure the USB device's file system is supported (NTFS, FAT/FAT32, or HFS+). • Press only one button at a time. • Make sure - Western Digital WDBMCE0010HBK | User Manual - Page 178
WD TV Live Hub Media Center User Manual Problem Solution FIRMWARE UPGRADE The firmware upgrade recovery splash screen is process failed. • Repeat the firmware upgrade process. Go to page 171 for instructions. • If you are still unable to update the system firmware, perform a system reset. Go to - Western Digital WDBMCE0010HBK | User Manual - Page 179
Common Error Messages WD TV Live Hub Media Center User Manual If this message appears Perform this action model is not supported. Use another USB device. Question XX: WD USB HDD Trouble Shooting This indicates a system diagnostic failure. Contact WD Technical Support for assistance. CONTENT - Western Digital WDBMCE0010HBK | User Manual - Page 180
WD TV Live Hub Media Center User Manual If this message appears Unable to play the selected file. Please see the User Manual for a list of supported file formats. Perform this action 1. Eject and disconnect the USB device from the media center or map a drive to the media center while the file - Western Digital WDBMCE0010HBK | User Manual - Page 181
16 Appendix WD TV Live Hub Media Center User Manual Multiformat Content Playback Multiformat is a file together. The media center is capable of playing several different types of multiformat files. For a detailed list of supported formats, refer to "Supported Formats" on page 178. Audio codec - Western Digital WDBMCE0010HBK | User Manual - Page 182
Supported Formats WD TV Live Hub Media Center User Manual Filename extension Codec .AVI .MPG/.MPEG .MKV .TS/.TP/.M2T VIDEO Video: Xvid AVC MPEG1/2/4 WMV9 VC-1 Audio: MPEG Audio PCM Dolby Digital DTS Video: - Western Digital WDBMCE0010HBK | User Manual - Page 183
WD TV Live Hub Media Center User Manual Filename extension Codec Format/container .MP4/.MOV Video: @L5 Rectangular shape video decoding up to 1280x720p30 resolution, support for B Pictures, data partitioning and error resiliency. No support for global motion compensation (GMC). 3. WMV9/VC-1 - Western Digital WDBMCE0010HBK | User Manual - Page 184
WD TV Live Hub Media Center User Manual File Codec Format/container AUDIO MP1/2/3/a MPEG audio None AAC MPEG 2/4 AAC LC/ jpg JPEG (lossy) (most common) Progressive 4096x4096 1280x720 Not available Multi-page not supported, only shows 1st page Not available Not available For animation, only - Western Digital WDBMCE0010HBK | User Manual - Page 185
User Manual Type File name Codec Resolution Other limitation PHOTOS Compressed RGB JPEG formats only and progressive JPEG up to 2048. Single layer TIFF files only. Uncompressed BMP only. Not available indicates that no other limitations are known at this time. Thumbnail Support Limitation - Western Digital WDBMCE0010HBK | User Manual - Page 186
WD TV Live Hub Media Center User Manual Regulatory Compliance FCC Class B Information This equipment has been tested energy and, if not installed and used in accordance with the manufacturer's instruction manual, may cause interference with radio communications. However, there is no guarantee that - Western Digital WDBMCE0010HBK | User Manual - Page 187
WD TV Live Hub Media Center User Manual Le symbole CE indique que ce système est conforme aux directives du Conseil de l'Union Européenne, notamment à la Directive CEM (2004/108/CE) - Western Digital WDBMCE0010HBK | User Manual - Page 188
Manual Warranty Information Obtaining Service WD values your business and always attempts to provide you the very best of service. If this Product requires maintenance, either contact the dealer from whom you originally purchased the Product or visit our product support Web site at http://support - Western Digital WDBMCE0010HBK | User Manual - Page 189
User Manual purpose, and b) any and all obligations and liabilities of WD for http://www.gnu.org, and may also be found at http://support.wdc.com/ download/gpl. Modification of or tampering with the Software the software's ability to use WMDRM to play or copy protected content. Revocation does not - Western Digital WDBMCE0010HBK | User Manual - Page 190
. For further information, visit http://www.adobe.com/software/flash/about/. WD TV Live Hub Media Center User Manual The wall mount system located at the bottom of the unit is not designed for general usage by the end user. WD respects the rights of copyright owners to control the uses of their - Western Digital WDBMCE0010HBK | User Manual - Page 191
6 supported interfaces 6 Audio/Video menus aspect ratio 146 audio output 147 HDMI deep color mode 146 video output 145 auto play function 86 WD TV Live Hub Media Center User Manual radios 86 search 88 signing in 85 top charts 88 digital camera support 58 disk manager 161 display troubleshooting 172 - Western Digital WDBMCE0010HBK | User Manual - Page 192
new 163 check latest 163 firmware upgrade procedure 170 troubleshooting 174 Flickr 94 exit 100 exploring for contents 94 connection 20 I I/O connectors composite AV 7 HDMI 7 Toslink 7 WD TV Live Hub Media Center User Manual USB ports 7 information panel music 53 photo 62 videos 46 installation - Western Digital WDBMCE0010HBK | User Manual - Page 193
114 new membership 114 network services Web UI 73 Network settings WD TV Live Hub Media Center User Manual O on-screen keyboard 34 operating precautions 1 operating system requirements 10 Operation auto play view 154 thumbnail mode 153 digital camera support 58 display options 60 folder view - Western Digital WDBMCE0010HBK | User Manual - Page 194
123 video player 127 Play To 6 playlist supported formats 177 videos, playback preset 158 layout 9 settings 157 troubleshooting 173 virtual 74 Web UI WD TV Live Hub Media Center User Manual style 150 Search function button 23, 25 procedure 32 security 159 folder lock 160 parental control 160 Services - Western Digital WDBMCE0010HBK | User Manual - Page 195
reporting problems 131 searching 129 sign in 128 signing out 132 TwonkyMedia 75 U USB device WD TV Live Hub Media Center User Manual connection 21 disconnection 22 Eject button 24, 25 error messages 175 media library 168 media library compilation 29 removal 22 supported devices 7 troubleshooting - Western Digital WDBMCE0010HBK | User Manual - Page 196
WD Photos 164 upload content 166 weather 81 change temperature display 81 Web UI 73 launching 73 logout 77 status bar 77 support 76 system 74 TwonkyMedia 75 widescreen setup 147 Windows 7 Play 136 top rated 137 Z zoom options photos 61 videos 45 WD TV Live Hub Media Center User Manual INDEX - 192
-
 1
1 -
 2
2 -
 3
3 -
 4
4 -
 5
5 -
 6
6 -
 7
7 -
8
-
9
-
10
-
11
-
12
-
13
-
14
-
15
-
16
-
17
-
18
-
19
-
20
-
21
-
22
-
23
-
24
-
25
-
26
-
27
-
28
-
29
-
30
-
31
-
32
-
33
-
34
-
35
-
36
-
37
-
38
-
39
-
40
-
41
-
42
-
43
-
44
-
45
-
46
-
47
-
48
-
49
-
50
-
51
-
52
-
53
-
54
-
55
-
56
-
57
-
58
-
59
-
60
-
61
-
62
-
63
-
64
-
65
-
66
-
67
-
68
-
69
-
70
-
71
-
72
-
73
-
74
-
75
-
76
-
77
-
78
-
79
-
80
-
81
-
82
-
83
-
84
-
85
-
86
-
87
-
88
-
89
-
90
-
91
-
92
-
93
-
94
-
95
-
96
-
97
-
98
-
99
-
100
-
101
-
102
-
103
-
104
-
105
-
106
-
107
-
108
-
109
-
110
-
111
-
112
-
113
-
114
-
115
-
116
-
117
-
118
-
119
-
120
-
121
-
122
-
123
-
124
-
125
-
126
-
127
-
128
-
129
-
130
-
131
-
132
-
133
-
134
-
135
-
136
-
137
-
138
-
139
-
140
-
141
-
142
-
143
-
144
-
145
-
146
-
147
-
148
-
149
-
150
-
151
-
152
-
153
-
154
-
155
-
156
-
157
-
158
-
159
-
160
-
161
-
162
-
163
-
164
-
165
-
166
-
167
-
168
-
169
-
170
-
171
-
172
-
173
-
174
-
175
-
176
-
177
-
178
-
179
-
180
-
181
-
182
-
183
-
184
-
185
-
186
-
187
-
188
-
189
-
190
-
191
-
192
-
193
-
194
-
195
-
196
 |
 |
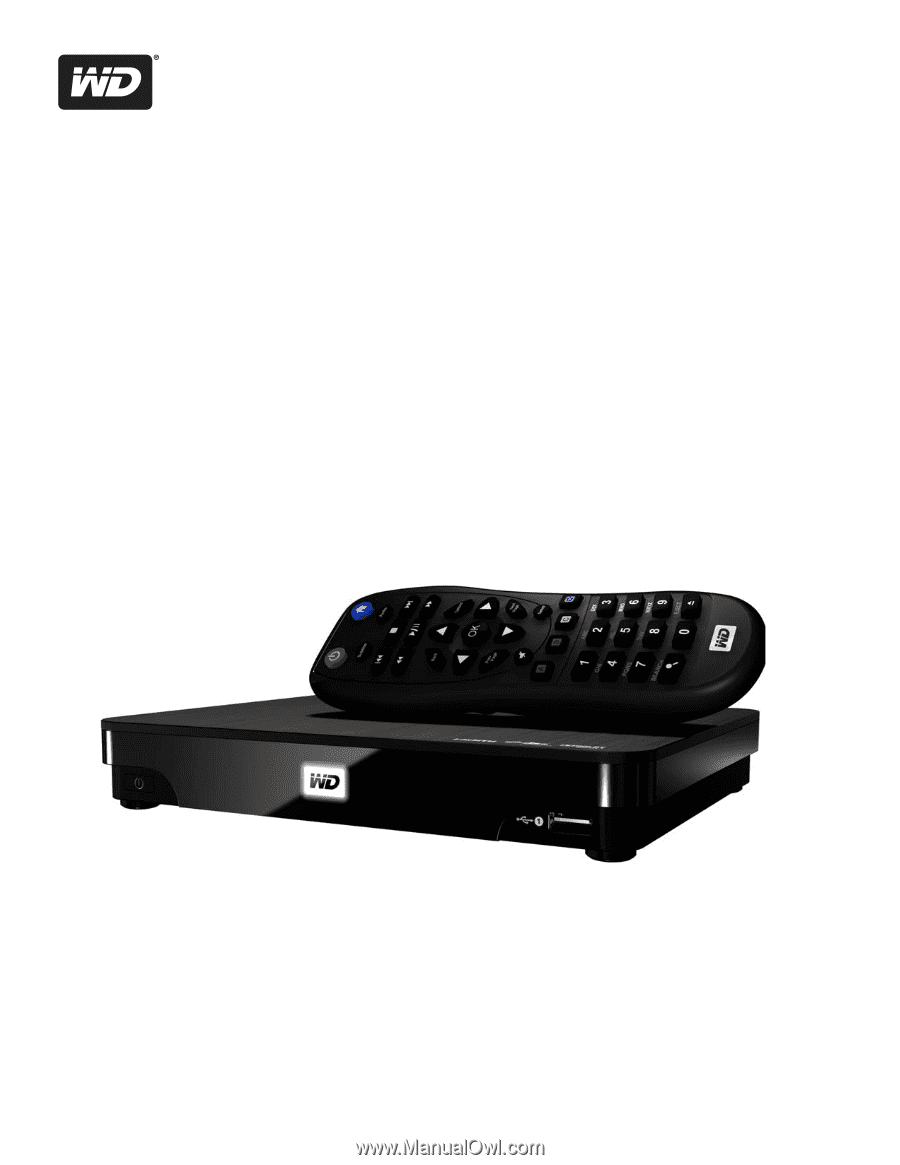
WD TV
®
Live Hub
™
Media Center
User Manual