Western Digital WDH1U10000A Quick Install Guide - Page 5
Step 2: Access My Book World Edition on the Network - pc
 |
View all Western Digital WDH1U10000A manuals
Add to My Manuals
Save this manual to your list of manuals |
Page 5 highlights
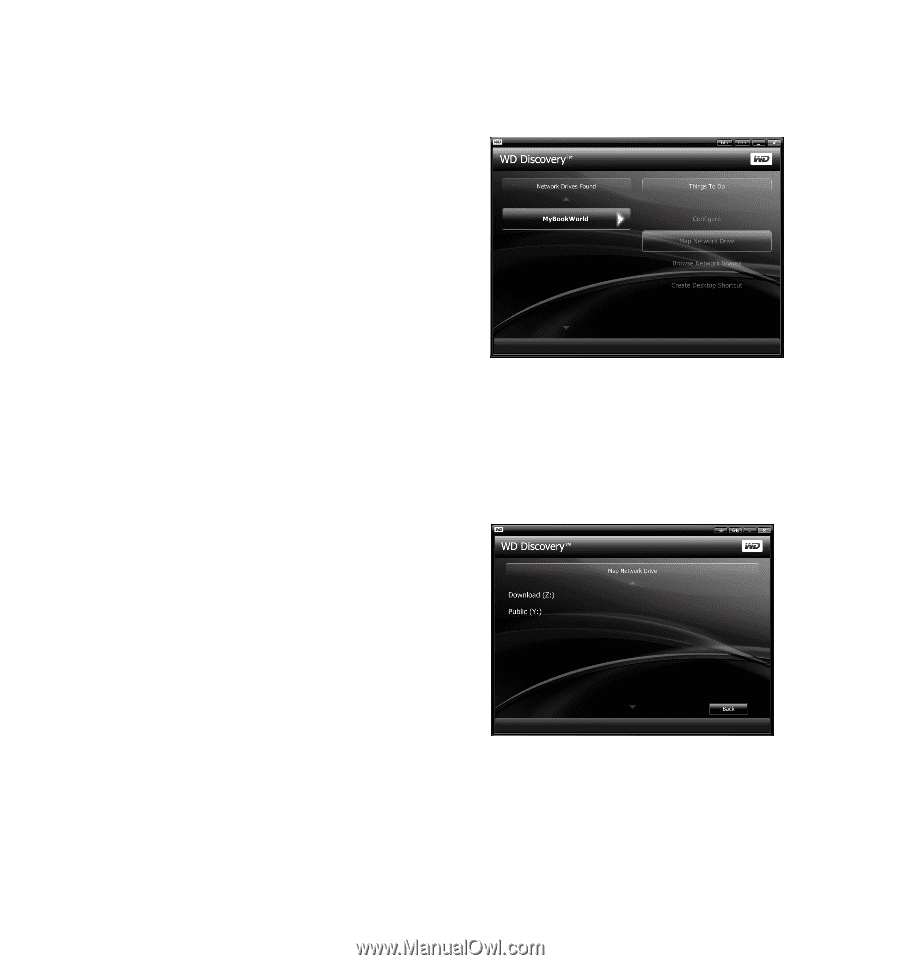
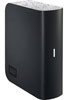
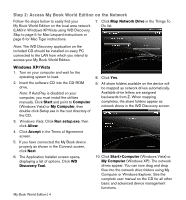
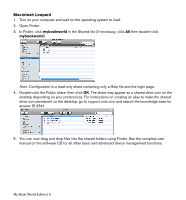
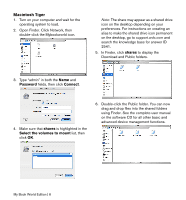
Step 2: Access My Book World Edition on the Network Follow the steps below to easily find your My Book World Edition on the local area network (LAN) in Windows XP/Vista using WD Discovery. Skip to page 5 for Mac Leopard instructions or page 6 for Mac Tiger instructions. 7. Click Map Network Drive in the Things To Do list. Note: The WD Discovery application on the included CD should be installed on every PC connected to the LAN from which you intend to access your My Book World Edition. Windows XP/Vista 1. Turn on your computer and wait for the operating system to load. 2. Insert the software CD into the CD-ROM drive. Note: If AutoPlay is disabled on your computer, you must install the utilities manually. Click Start and point to Computer (Windows Vista) or My Computer, then double-click Setup.exe in the root directory of the CD. 3. Windows Vista: Click Run setup.exe, then click Allow. 4. Click Accept in the Terms of Agreement screen. 5. If you have connected the My Book device properly as shown in the Connect screen, click Next. 6. The Application Installer screen opens, displaying a list of options. Click WD Discovery Tool. 8. Click Yes. 9. All share folders available on the device will be mapped as network drives automatically. Available drive letters are assigned backwards from Z. When mapping completes, the share folders appear as network drives in the WD Discovery screen. 10. Click Start>Computer (Windows Vista) or My Computer (Windows XP). The network drives appear. You can now drag and drop files into the network drive folders using My Computer or Windows Explorer. See the complete user manual on the CD for all other basic and advanced device management functions. My Book World Edition | 4
-
 1
1 -
 2
2 -
 3
3 -
 4
4 -
 5
5 -
 6
6 -
 7
7 -
 8
8
 |
 |