Western Digital WDXF1600JB Quick Install Guide (pdf) - Page 1
Western Digital WDXF1600JB - Dual-Option Manual
 |
View all Western Digital WDXF1600JB manuals
Add to My Manuals
Save this manual to your list of manuals |
Page 1 highlights
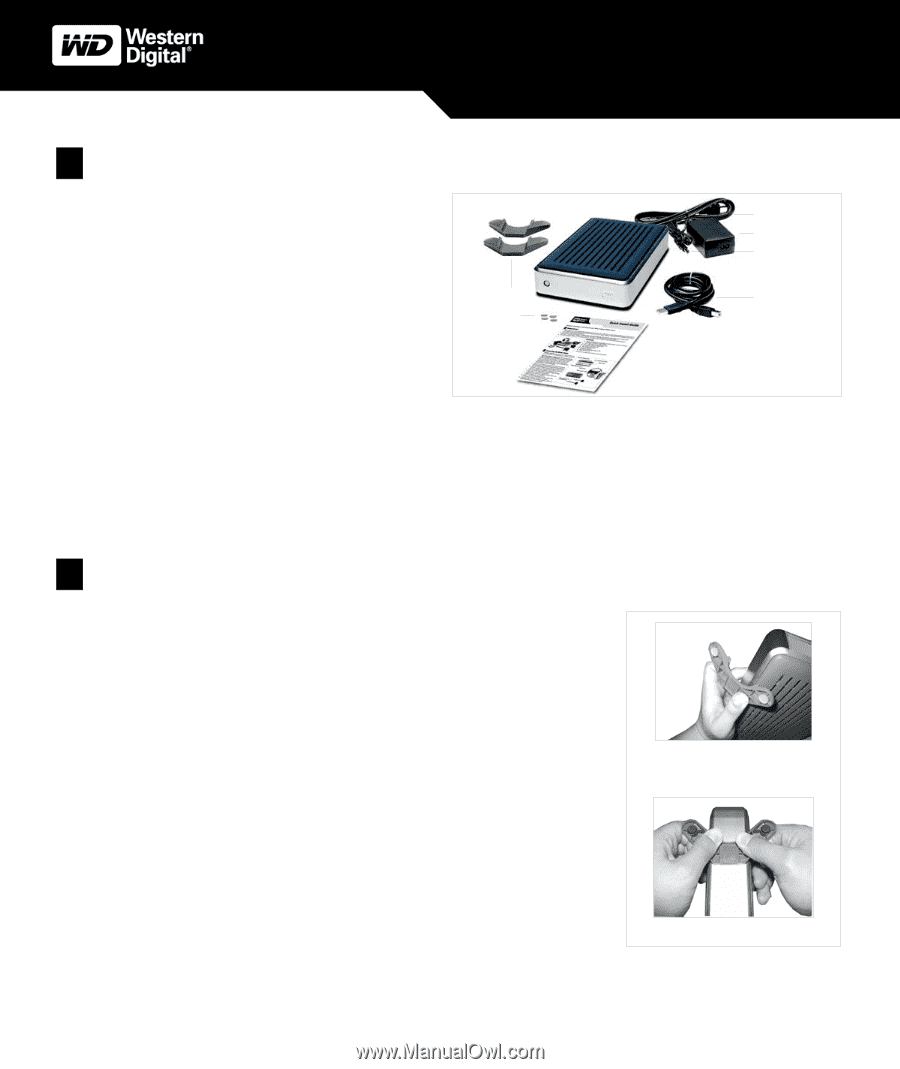
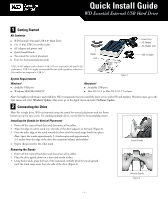
Quick Install Guide WD Essential External USB Hard Drive 1 Getting Started Kit Contents ! WD Essential™ External USB 2.0* Hard Drive ! 6 ft. (1.8m) USB 2.0 certified cable ! AC adapter and power cord ! Quick Install Guide ! Two stands for vertical placement ! Four feet for horizontal placement Stands Feet Power Cord AC Adapter AC Adapter Cord USB 2.0 Cable *USB 2.0 PCI adapter card or built-in USB 2.0 host is required for Hi-Speed USB performance. USB 2.0 is highly recommended because of the significant reduction in file transfer time compared to USB 1.1. System Requirements Figure 1 Windows® ! Available USB port ! Windows 98SE/Me/2000/XP Macintosh® ! Available USB port ! Mac OS 9.2.2 or Mac OS X 10.1.5 or later Note: For highest performance and reliability, WD recommends that you install the latest service pack (SP) and updates. Windows users, go to the Start menu and select Windows Update. Mac users, go to the Apple menu and select Software Update. 2 Connecting the Drive Note: For a single drive, WD recommends using the stands for vertical placement with the Power button on top for easy access. For stacking multiple drives, use the feet for horizontal placement Installing the Stands for Vertical Placement 1. Power off the external hard drive and disconnect all its cables. 2. Align the edge of a drive stand onto the side of the drive adjacent to the back (Figure 2). 3. Press the other edge of the stand toward the drive until the stand snaps firmly into place. Note: Space the stands approximately 3-4 inches apart and approximately 2-3 inches from the edge of the drive for maximum balance and stability. 4. Repeat this process for the other stand. Install Stands Removing the Stands 1. Power off the external hard drive and disconnect all its cables. 2. Place the drive upside down on a clean and steady surface. 3. Using both hands, grasp the base of the stand and carefully bend the stand upward until the stand snaps away from the side of the drive (Figure 2). Remove Stands Figure 2 - 1 -
-
 1
1 -
 2
2 -
 3
3 -
 4
4
 |
 |