Westinghouse SK-32H240S User Manual - Page 19
Turn on your computer - no signal
 |
UPC - 882777050606
View all Westinghouse SK-32H240S manuals
Add to My Manuals
Save this manual to your list of manuals |
Page 19 highlights
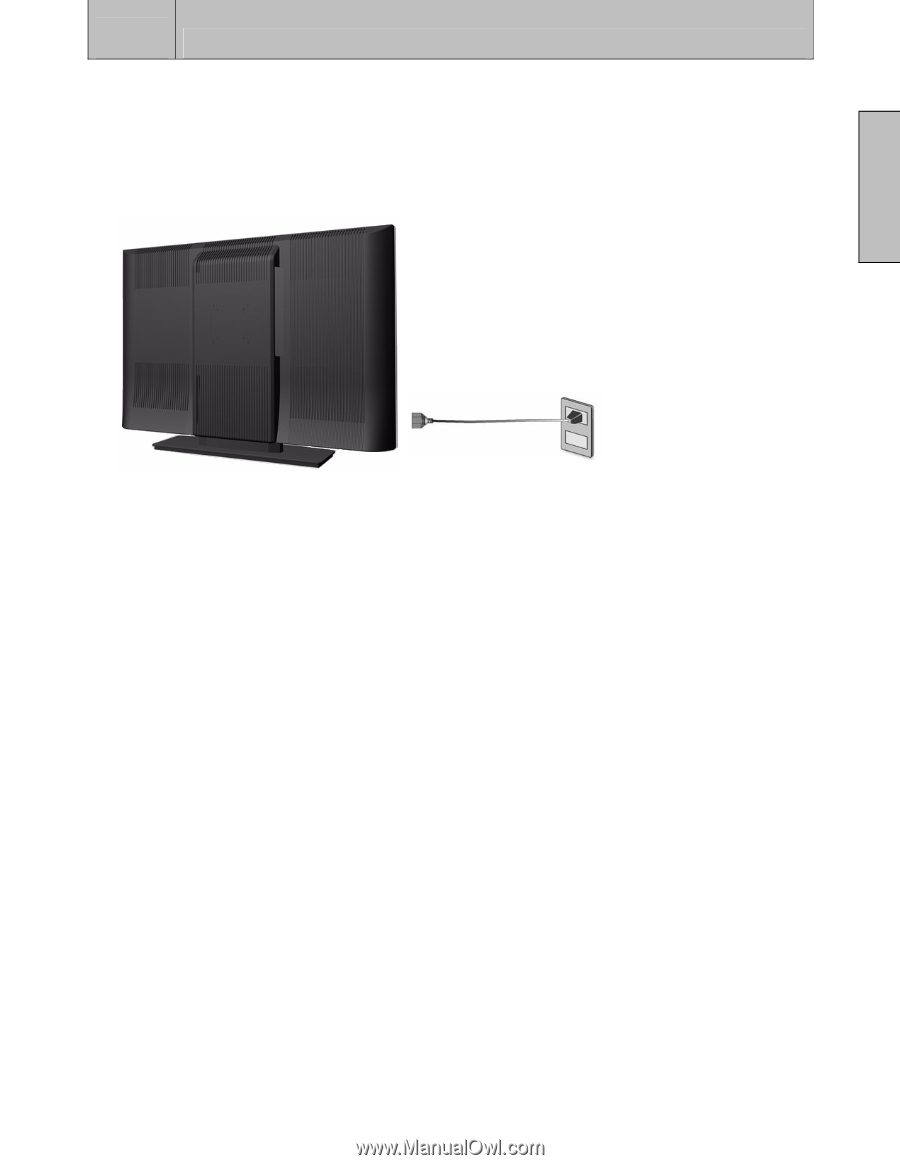
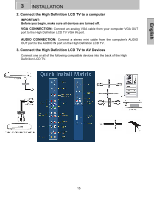
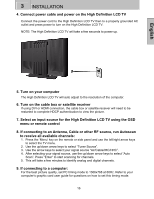
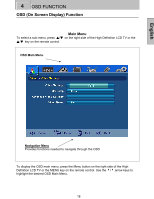
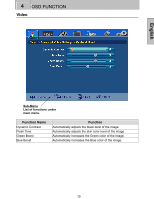
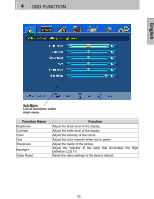
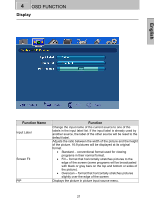
English 3 INSTALLATION 4. Connect power cable and power on the High Definition LCD TV Connect the power cord to the High Definition LCD TV then to a properly grounded AC outlet and press power to turn on the High Definition LCD TV. NOTE: The High Definition LCD TV will take a few seconds to power up. 5. Turn on your computer The High Definition LCD TV will auto adjust to the resolution of the computer. 6. Turn on the cable box or satellite receiver If using DVI or HDMI connection, the cable box or satellite receiver will need to be restarted to complete HDCP authentication to view the picture. 7. Select an input source for the High Definition LCD TV using the OSD menu or remote control 8. If connecting to an Antenna, Cable or other RF source, run Autoscan to receive all available channels: 1. Press the 'Menu' key on the remote or side panel and use the left/right arrow keys to select the TV menu. 2. Use the up/down arrow keys to select "Tuner Source". 3. Use the arrow keys to select your signal source "Air/Cable/IRC/HRC". 4. After selecting your signal source, use the up/down arrow keys to select "Auto Scan". Press "Enter" to start scanning for channels. 5. This will take a few minutes to identify analog and digital channels. 9. If connecting to a computer: For the best picture quality, set PC timing mode to 1366x768 at 60Hz. Refer to your computer's graphic card user guide for questions on how to set this timing mode. 16
-
 1
1 -
2
-
3
-
4
-
5
-
6
-
7
-
8
-
9
-
10
-
11
-
12
-
13
-
 14
14 -
 15
15 -
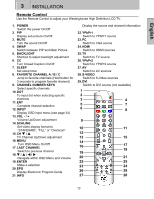 16
16 -
 17
17 -
 18
18 -
 19
19 -
 20
20 -
 21
21 -
 22
22 -
 23
23 -
 24
24 -
25
-
26
-
27
-
28
-
29
-
30
-
31
-
32
-
33
-
34
-
35
-
36
-
37
-
38
-
39
-
40
-
41
-
42
-
43
-
44
-
45
-
46
-
47
 |
 |