Westinghouse TX-52F480S User Manual - Page 21
Determining Available Channels, identification of all, analog, digital, channels, several, minutes,
 |
UPC - 882777051306
View all Westinghouse TX-52F480S manuals
Add to My Manuals
Save this manual to your list of manuals |
Page 21 highlights
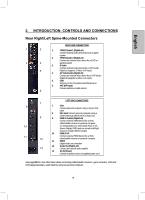
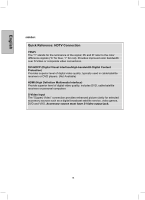
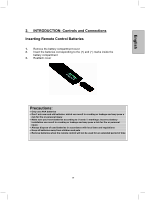
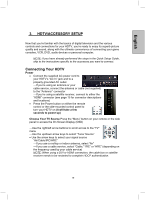
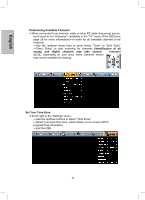
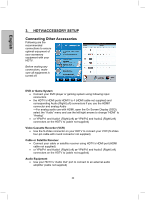
English Determining Available Channels x When connected to an antenna, cable or other RF (radio frequency) source, you'll need to run "Autoscan"-available in the "TV" menu of the OSD (see page 26 for more information)-in order for all available channels to be received -Use the up/down arrow keys to scroll below "Tuner" to "Auto Scan" -Press "Enter" to start scanning for channels (identification of all analog and digital channels may take several minutes) NOTE: Depending on your area, some channels shown may not be available for viewing. Set Your Time Zone x Scroll right to the "Settings" menu -Use the up/down buttons to select "Time Zone" -Select your local time zone, which allows you to receive HDTV programming information -Exit the OSD 20
-
 1
1 -
2
-
3
-
4
-
5
-
6
-
7
-
8
-
9
-
10
-
11
-
12
-
13
-
14
-
15
-
 16
16 -
 17
17 -
 18
18 -
 19
19 -
 20
20 -
 21
21 -
 22
22 -
 23
23 -
 24
24 -
 25
25 -
 26
26 -
27
-
28
-
29
-
30
-
31
-
32
-
33
-
34
-
35
-
36
-
37
-
38
-
39
-
40
-
41
-
42
-
43
-
44
-
45
-
46
-
47
 |
 |