Westinghouse WWEF3002KW Use and Care Guide - Page 6
Setting Surface & Oven Controls, Setting Clock & Minute Timer some models - lighting
 |
View all Westinghouse WWEF3002KW manuals
Add to My Manuals
Save this manual to your list of manuals |
Page 6 highlights
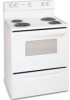
Setting Clock & Minute Timer (some models) To Set the 4 Button Time of Day Clock (some models) When the range is first plugged in, or when the power supply to the range has been interrupted, "12:00" will flash in the display window. 1. Push . 2. Push in and hold or until the correct time appears in the display. Increases time and decreases time. To Set the 4 Button Minute Timer ":" Flashing indicates Minute Timer mode 1. Push , "0:00" will appear in the display window. The timer can be set for any amount of time from 00:01 minute to 12:00 hours. 2. Push in and hold until the correct amount of time appears in the display. Increases time and decreases time. The minute timer will automatically start when the button is released. The ":" will flash to indicate Minute Timer mode. 3. When the set time has passed, the control will display "0:00" and beep three times. The timer will continue to beep until or is pressed at which time the timer will return to the clock mode. Note: Push at any time to cancel the timer and return to the clock operation. Setting Surface & Oven Controls To Operate the Surface Elements 1. Place cooking utensil on the surface element. 2. Push in and turn the surface control knob (See Fig. 1) in either direction to the desired setting. Start most cooking operations on a higher setting and then turn to a lower setting to finish cooking. The control knobs do not have to be set exactly on a particular setting. Use the settings as a guide and adjust the knob as needed. 3. When cooking is completed, turn the surface element off before removing the pan. Note: The Surface or Element On indicator light(s) will glow when one or more surface elements are turned on. A quick glance at this indicator light(s) is an easy check to be sure all surface elements are turned off. The suggested settings found in the chart below are based on cooking in medium-weight aluminum pans with lids. Settings may vary when using other types of pans. STANDARD SURFACE ELEMENTS Setting Type of Cooking HIGH (HI) Start most foods, bring water to a boil, pan broiling MEDIUM HIGH (6) Continue a rapid boil, fry, deep fat fry MEDIUM (4-5) Maintain a slow boil, thicken sauces and gravies, steam vegetables MEDIUM LOW (2 - 3) Keep foods cooking, poach, stew LOW (SIM) Keep warm, melt, simmer Do not place plastic items such as salt and pepper shakers, spoon holders or plastic wrappings on top of the range when it is in use. These items could melt or ignite. Potholders, towels or wooden spoons could catch fire if placed too close to the surface elements. Note: The size and type of utensil used, and the amount and type of food being cooked will influence the setting needed for best cooking results. 6 Fig. 1
-
 1
1 -
 2
2 -
 3
3 -
 4
4 -
 5
5 -
 6
6 -
 7
7 -
 8
8 -
 9
9 -
 10
10 -
 11
11 -
 12
12
 |
 |
