Whirlpool DP840SWSX Use and Care Guide - Page 10
Dishwasher Loading - features
 |
UPC - 883049042909
View all Whirlpool DP840SWSX manuals
Add to My Manuals
Save this manual to your list of manuals |
Page 10 highlights
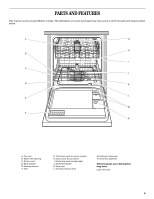
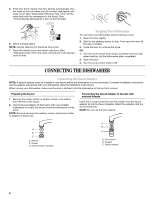
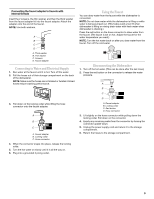
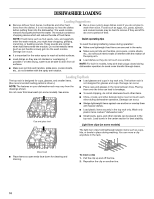
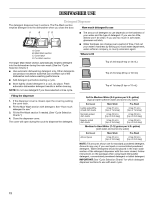
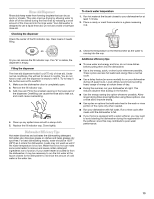
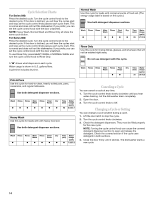
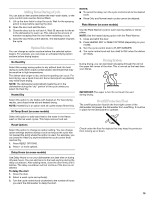
DISHWASHER LOADING Loading Suggestions s Remove leftover food, bones, toothpicks and other hard items from the dishes. It is not necessary to rinse the dishes before putting them into the dishwasher. The wash module removes food particles from the water. The module contains a chopping device which will reduce the size of food items. s Run a rinse cycle to keep dishes moist if you do not plan to wash them soon. Foods such as eggs, rice, pasta, spinach, and cooked cereals may be hard to remove if they are left to dry over a period of time. NOTE: If hard items such as fruit seeds, nuts, and eggshells enter the wash module, you might hear chopping, grinding, crunching, or buzzing sounds. These sounds are normal when hard items enter the module. Do not let metallic items (such as pot handle screws) get into the wash module. Damage can occur. s It is important for the water spray to reach all soiled surfaces. s Load dishes so they are not stacked or overlapping, if possible. For best drying, water must be able to drain from all surfaces. s Make sure pot lids and handles, pizza pans, cookie sheets, etc., do not interfere with the spray arm rotation. Quiet operating tips To avoid thumping/clattering noises during operation: s Make sure lightweight load items are secured in the racks. s Make sure pot lids and handles, pizza pans, cookie sheets, etc., do not touch interior walls or interfere with the rotation of the spray arm. s Load dishes so they do not touch one another. NOTE: For built-in models, keep sink drain plugs closed during dishwasher operation to avoid noise transfer through drains. Loading Top Rack The top rack is designed for cups, glasses, and smaller items. (See recommended loading patterns shown.) s Load glasses and cups in top rack only. The bottom rack is not designed for glasses and cups. Damage can occur. NOTE: The features on your dishwasher rack may vary from the drawings shown. Do not cover third level wash (on some models). See arrow. s Place cups and glasses in the rows between tines. Placing them over the tines can lead to breakage. s To avoid chipping, do not let stemware touch other items. s China, crystal, and other delicate items must not touch each other during dishwasher operation. Damage can occur. s Wedge lightweight items against one another or overlap them with heavier dishes. s Load plastic items securely in the top rack only. Wash only plastic items marked "dishwasher safe." Cup and glass load s Small bowls, pans, and other utensils can be placed in the top rack. Load bowls in the center section for best stability. Light item clips (on some models) The light-item clips hold lightweight plastic items such as cups, lids, or bowls in place during washing. You can move a clip anywhere in the rack. Mixed load s Place items so open ends face down for cleaning and draining. To move a clip 1. Pull the clip up and off the tine. 2. Reposition the clip on another tine. 10
-
 1
1 -
2
-
3
-
4
-
 5
5 -
 6
6 -
 7
7 -
 8
8 -
 9
9 -
 10
10 -
 11
11 -
 12
12 -
 13
13 -
 14
14 -
 15
15 -
16
-
17
-
18
-
19
-
20
-
21
-
22
-
23
-
24
-
25
-
26
-
27
-
28
-
29
-
30
-
31
-
32
-
33
-
34
-
35
-
36
-
37
-
38
-
39
-
40
 |
 |
