Whirlpool GGE388LXB Installation Instructions - Page 7
Install Anti-Tip Bracket
 |
View all Whirlpool GGE388LXB manuals
Add to My Manuals
Save this manual to your list of manuals |
Page 7 highlights
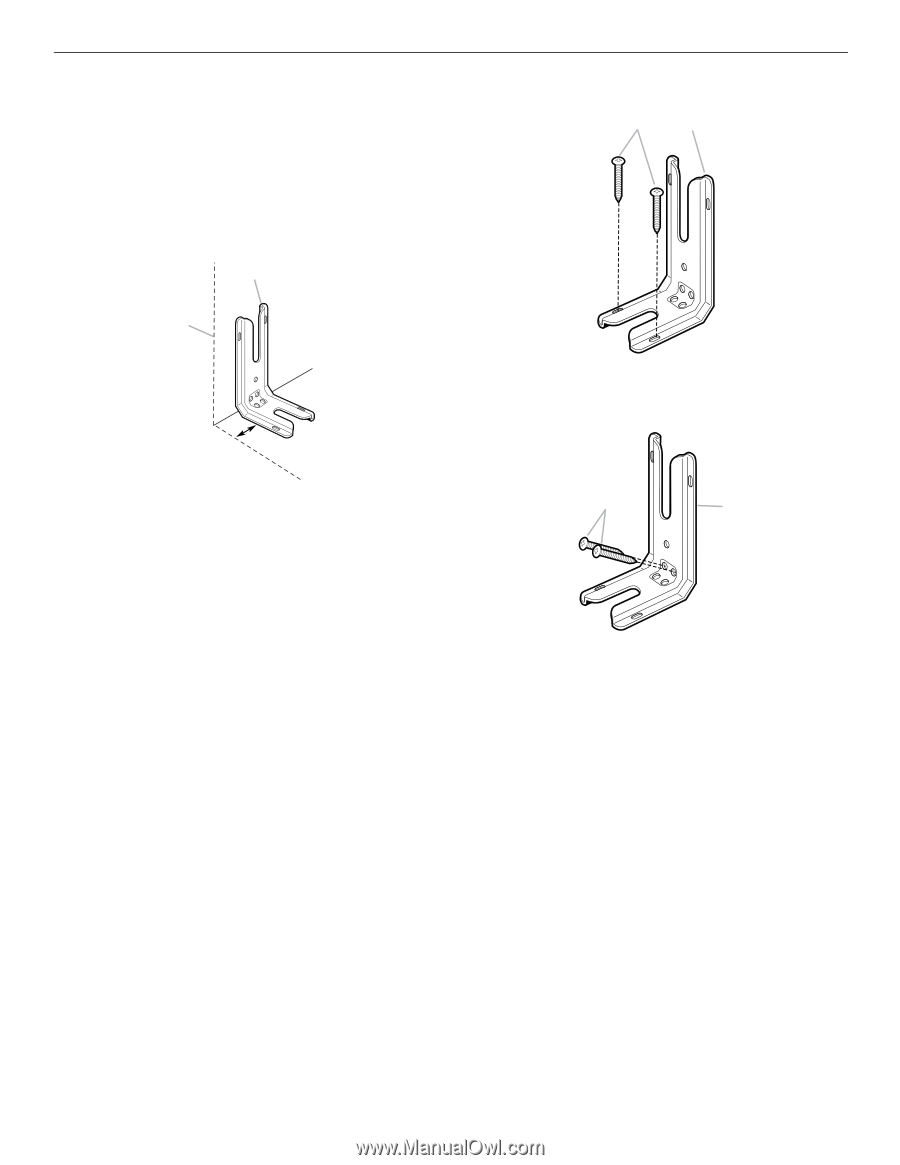
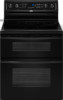
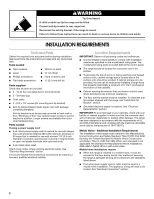
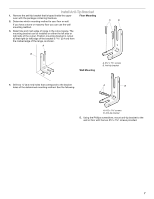
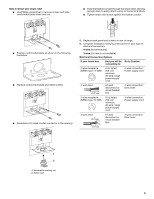
Install Anti-Tip Bracket 1. Remove the anti-tip bracket that is taped inside the upper oven with the package containing literature. Floor Mounting 2. Determine which mounting method to use: floor or wall. If you have a stone or masonry floor you can use the wall mounting method. 3. Determine and mark edge of range in the cutout space. The mounting bracket can be installed on either the left side or right side of the cutout. Position mounting bracket in cutout so that right (or left) edge of the bracket is 2.4 cm) from the marked edge of the range, as shown. A B A B A. #12 x 1⁵⁄₈" screws B. Anti-tip bracket Wall Mounting C 4. Drill two ¹⁄₈" (3.0 mm) holes that correspond to the bracket holes of the determined mounting method. See the following. A B A. #12 x 1⁵⁄₈" screws B. Anti-tip bracket 5. Using the Phillips screwdriver, mount anti-tip bracket to the wall or floor with the two #12 x 1⁵⁄₈" screws provided. 7
-
 1
1 -
 2
2 -
 3
3 -
 4
4 -
 5
5 -
 6
6 -
 7
7 -
 8
8 -
 9
9 -
 10
10 -
 11
11 -
 12
12 -
13
-
14
-
15
-
16
-
17
-
18
-
19
-
20
-
21
-
22
-
23
-
24
 |
 |