Whirlpool GS6NHAXVQ User Instructions - Page 8
To Dispense Water Standard, To Dispense Water Measured Fill
 |
UPC - 883049129174
View all Whirlpool GS6NHAXVQ manuals
Add to My Manuals
Save this manual to your list of manuals |
Page 8 highlights
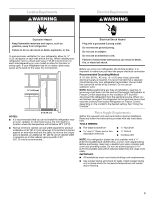
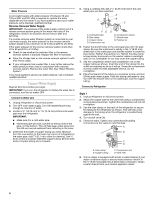
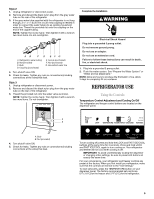
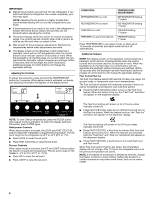
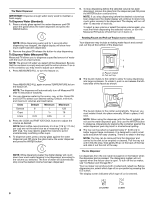
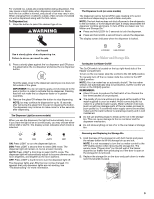
The Water Dispenser IMPORTANT: Dispense enough water every week to maintain a fresh supply. To Dispense Water (Standard): 1. Press a sturdy glass against the water dispenser pad OR place the glass below the water dispenser and press the WATER button. NOTE: While dispensing water and for 5 seconds after dispensing has stopped, the digital display will show how much water has been dispensed. 2. Remove the glass OR release the button to stop dispensing. To Dispense Water (Measured Fill): Measured Fill allows you to dispense a specified amount of water with the touch of a few buttons. NOTE: The amount of water you select will be dispensed. Be sure that the container is empty and can hold the entire volume. If ice is in the container, you may need to adjust your selection. 1. Press MEASURED FILL to turn the feature on. Press MEASURED FILL again or press TEMPERATURE to turn the feature off. NOTE: The dispenser will automatically turn off Measured Fill after 15 seconds of inactivity. 2. You can dispense water by the ounce, cup, or liter. Press ICE and LIGHT to select your desired setting. Default, minimum, and maximum volumes are listed below. Units Default Minimum Maximum Ounces 8 1 128 Cups 1 ¹/₄ 16 Liters 0.25 0.05 4 3. Press the LOCK and FAST ICE/COOL buttons to adjust the volume as desired. NOTE: Most coffee cups (commonly 4 to 6 oz [118 to 177 mL] per cup) are not the same size as a measuring cup (8 oz [237 mL]). You may need to adjust the volume to avoid unintentionally overfilling coffee cups. 4. To dispense water, press a sturdy glass against the water dispenser pad OR place the glass below the water dispenser and press the WATER button. NOTE: While dispensing water, the digital display will count down how much water remains to be dispensed, according to the volume you selected. The flow of water will automatically stop once the desired volume has been dispensed. 5. To stop dispensing before the selected volume has been dispensed, remove the glass from the dispenser pad OR press the WATER button a second time. NOTE: If you stop dispensing before the desired volume has been dispensed, the digital display will continue to show how much water remains to be dispensed. The display will turn off after 15 seconds of inactivity. To select a new volume or select the same volume again, you must first finish dispensing the selected volume, or turn the Measured Fill feature off and then turn it back on. Rotating Faucet and Pull-out Tray (on some models) Your dispenser may include a rotating water faucet and a small pull-out tray at the bottom of the dispenser. A B A. Faucet rotated B. Pull-out tray ■ The faucet rotates to the center to allow for easy dispensing into large containers. To rotate it, push in and release the lefthand side of the faucet as shown. The faucet rotates to the center automatically. However, you must rotate it back into place manually. When in place, it will click. NOTE: When using the dispenser with the faucet rotated, do not use the water dispenser pad. Only use the WATER button to dispense. Dispensing by pressing the container against the water dispenser pad may result in unintentional spilling. ■ The tray can be pulled out approximately 2" (5.08 cm) to better support large containers. It is designed to catch small spills and allow for easy cleaning. There is no drain in the tray. NOTE: The tray can be removed from the dispenser and carried to the sink to be emptied or cleaned. Pull the tray out until it hits the stop, then gently lift up on the back of the tray and slide it out the rest of the way. The Ice Dispenser Ice dispenses from the ice maker storage bin in the freezer when the dispenser pad is pressed. The dispensing system will not operate when the freezer door is open. To turn off the ice maker, see "Ice Maker and Storage Bin." Your ice maker can produce both crushed and cubed ice. Before dispensing ice, select which type of ice you prefer by pressing the ICE button. The display screen indicates which type of ice is selected. CRUSHED CUBED 8
-
 1
1 -
2
-
 3
3 -
 4
4 -
 5
5 -
 6
6 -
 7
7 -
 8
8 -
 9
9 -
 10
10 -
 11
11 -
 12
12 -
 13
13 -
14
-
15
-
16
-
17
-
18
-
19
-
20
-
21
-
22
-
23
-
24
-
25
-
26
-
27
-
28
-
29
-
30
-
31
-
32
 |
 |