Whirlpool RF362LXTB Installation Instructions - Page 4
Installationinstructions
 |
View all Whirlpool RF362LXTB manuals
Add to My Manuals
Save this manual to your list of manuals |
Page 4 highlights
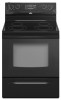
If connectingtoa 4-wiresystem: Thisrangeismanufacturweidththegroundconnectetodthe cabineTt.hegroundmusbt erevisesdothegreengroundwireof the4-wirepowesrupplycordisconnectetodthecabineSt. ee "ElectricCalonnection." Groundinthgrougthheneutraclonductoisrprohibitefdornew branch-circiunist tallatio(n1s996NEC)m; obilehomesa;nd recreationvaelhicleos,ranareawherelocacl odesprohibit groundinthgrougthheneutraclonductor. Whena 4-wirereceptacolefNEMAType14-50Risuseda, matchinUgLlisted4, -wire2,50-vol4t,0-or50-ampra, ngepower supplycord(pigtaiml) ustbeusedT. hiscordcontain4scopper conductowrsithringterminaolsropen-ensdpadeterminawlsith upturneedndst,erminatiningaNEMAType14-50Rplugonthe supplyend. Thefourth(groundincgo)nductomrustbeidentifiebdyagreenor green/yellocwovear ndtheneutraclonductobryawhitecover. CordshouldbeTypeSRDorSRDTwitha ULlistedstrainrelief andbeatleas4t ft (1.22m)long. Theminimumconductosrizedforthecoppe4r -wirepower cordare: 40-amcpircuit 2 No.-8conductors 1 No.-1w0 hiteneutral 1 No.-8greengrounding If connecting to a 3-wire system: Local codes may permit the use of a UL listed, 3-wire, 250-volt, 40- or 50-amp range power supply cord (pigtail). This cord contains 3 copper conductors with ring terminals or open-end spade terminals with upturned ends, terminating in a NEMA Type 10-50P plug on the supply end. Connectors on the appliance end must be provided at the point the power supply cord enters the appliance. This uses a 3-wire receptacle of NEMA Type 10-50R. 3-wire receptacle (10-50R) 4-wire receptacle (14-50R) INSTALLATIONINSTRUCTIONS 1. Remove shipping materials, tape and protective film from range, Remove oven racks and parts package from inside oven. 2. Do not remove the shipping base at this time. A. Shipping base 3, On Ranges Equipped with Storage Drawers: Remove the storage drawer. Use a 3/8"drive ratchet to lower the rear leveling legs one-half turn. Use a wrench or pliers to lower front leveling legs one-half turn. A _ O ,,8/'8/' C B/// A. %" drive ratchet B. Rear levering leg C. Wrench or pliers D. Front levering leg On Ranges Equipped with Warming Drawers: Use a wrench or pliers to lower the front and rear leveling legs one-half turn. AB C A. Rear levering leg B. Front levering leg C. Wrench or pliers
-
 1
1 -
 2
2 -
 3
3 -
 4
4 -
 5
5 -
 6
6 -
 7
7 -
 8
8 -
 9
9 -
 10
10 -
11
-
12
 |
 |
