Whirlpool RY160LXTB Installation Instructions - Page 11
Verify Anti-Tip Bracket Location, Level Range, Complete Installation
 |
UPC - 883049065113
View all Whirlpool RY160LXTB manuals
Add to My Manuals
Save this manual to your list of manuals |
Page 11 highlights
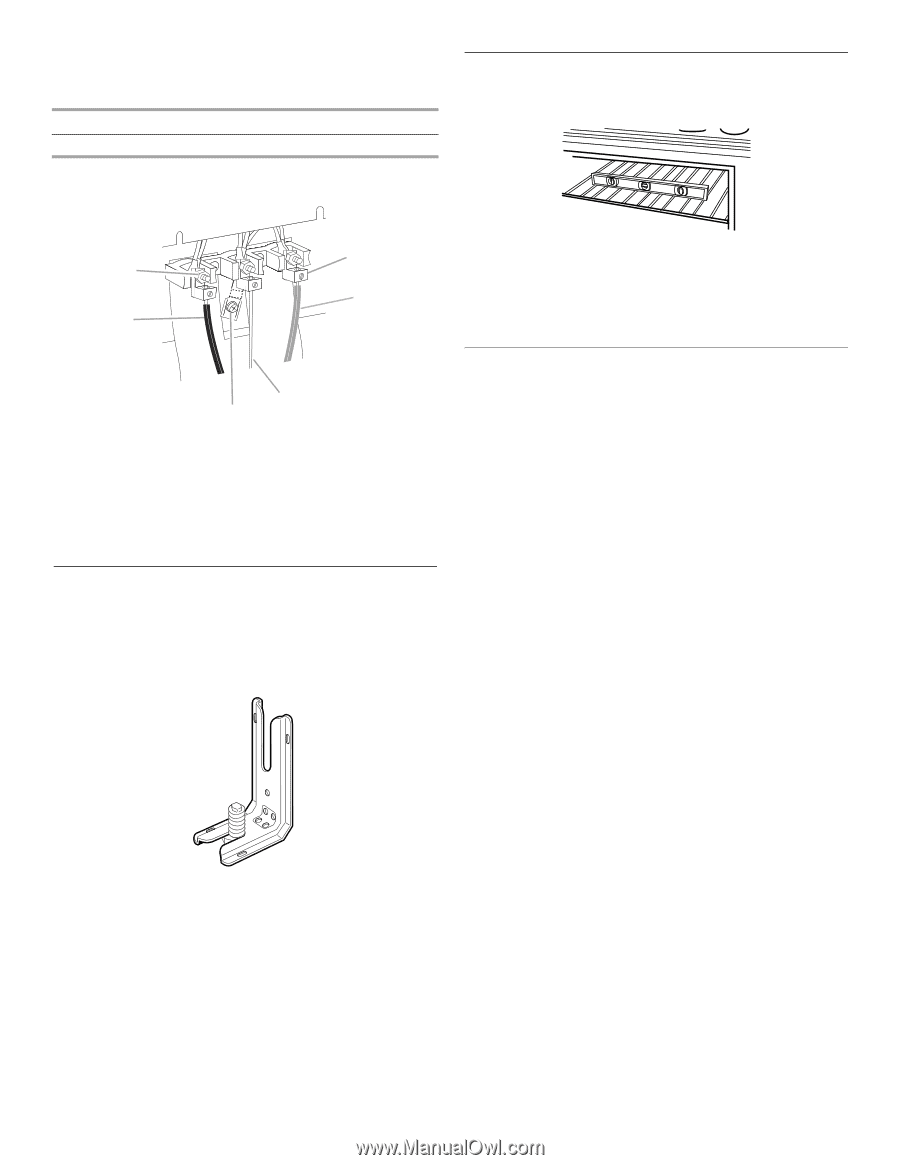
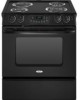
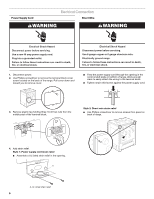
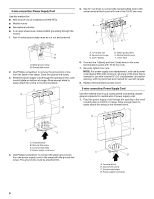
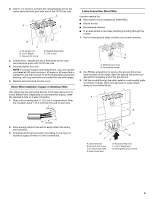
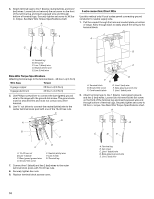
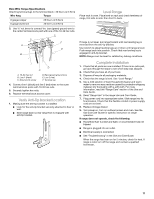
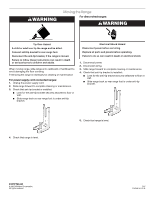
Bare Wire Torque Specifications Attaching terminal lugs to the terminal block - 20 lbs-in. (2.3 N-m) Wire Awg Torque 8 gauge copper 6 gauge aluminum 25 lbs-in. (2.8 N-m) 35 lbs-in. (4.0 N-m) 3. Use ³⁄₈" nut driver to connect the bare (green) ground wire to the center terminal block post with one of the 10-32 hex nuts. Level Range Place rack in oven. Place level on rack and check levelness of range, first side to side; then front to back. F A E B D C A. 10-32 hex nut B. Line 1 (black) C. Ground-link screw D. Bare (green) ground wire E. Line 2 (red) F. Terminal lug 4. Connect line 1 (black) and line 2 (red) wires to the outer terminal block posts with 10-32 hex nuts. 5. Securely tighten hex nuts. 6. Replace terminal block access cover. Verify Anti-Tip Bracket Location 1. Making sure the anti-tip bracket is installed: ■ Look for the anti-tip bracket securely attached to floor or wall. ■ Slide range back so rear range foot is engaged with anti-tip bracket. If range is not level, pull range forward until rear leveling leg is removed from the anti-tip bracket. Use wrench to adjust leveling legs up or down until range is level. Push range back into position. Check that rear leveling leg is engaged in anti-tip bracket. NOTE: Range must be level for satisfactory baking conditions. Complete Installation 1. Check that all parts are now installed. If there is an extra part, go back through the steps to see which step was skipped. 2. Check that you have all of your tools. 3. Dispose of/recycle all packaging materials. 4. Check that the range is level. See "Level Range." 5. Use a mild solution of liquid household cleaner and warm water to remove waxy residue caused by protective shipping material. Dry thoroughly with a soft cloth. For more information, read the "Range Care" section of the Use and Care Guide. 6. Read "Range Use" in the range Use and Care Guide. 7. Plug power cord into appropriate outlet. Slide range into its final location. Check that the flexible conduit or power supply cord are not bent. 8. Replace storage drawer. 9. Turn power on. Turn on surface burners and oven. See the Use and Care Guide for specific instruction on range operation. If range does not operate, check the following: ■ Household fuse is intact and tight; or circuit breaker has not tripped. ■ Range is plugged into an outlet. ■ Electrical supply is connected. ■ See "Troubleshooting" in the Use and Care Guide. When the range has been on for 5 minutes, check for heat. If range is cold, turn off the range and contact a qualified technician. 11
-
 1
1 -
2
-
3
-
4
-
5
-
 6
6 -
 7
7 -
 8
8 -
 9
9 -
 10
10 -
 11
11 -
 12
12
 |
 |