Whirlpool SF265LXTQ Installation Instructions - Page 10
Replace Oven Racks and, Storage or Warming Drawer, Complete Installation
 |
View all Whirlpool SF265LXTQ manuals
Add to My Manuals
Save this manual to your list of manuals |
Page 10 highlights
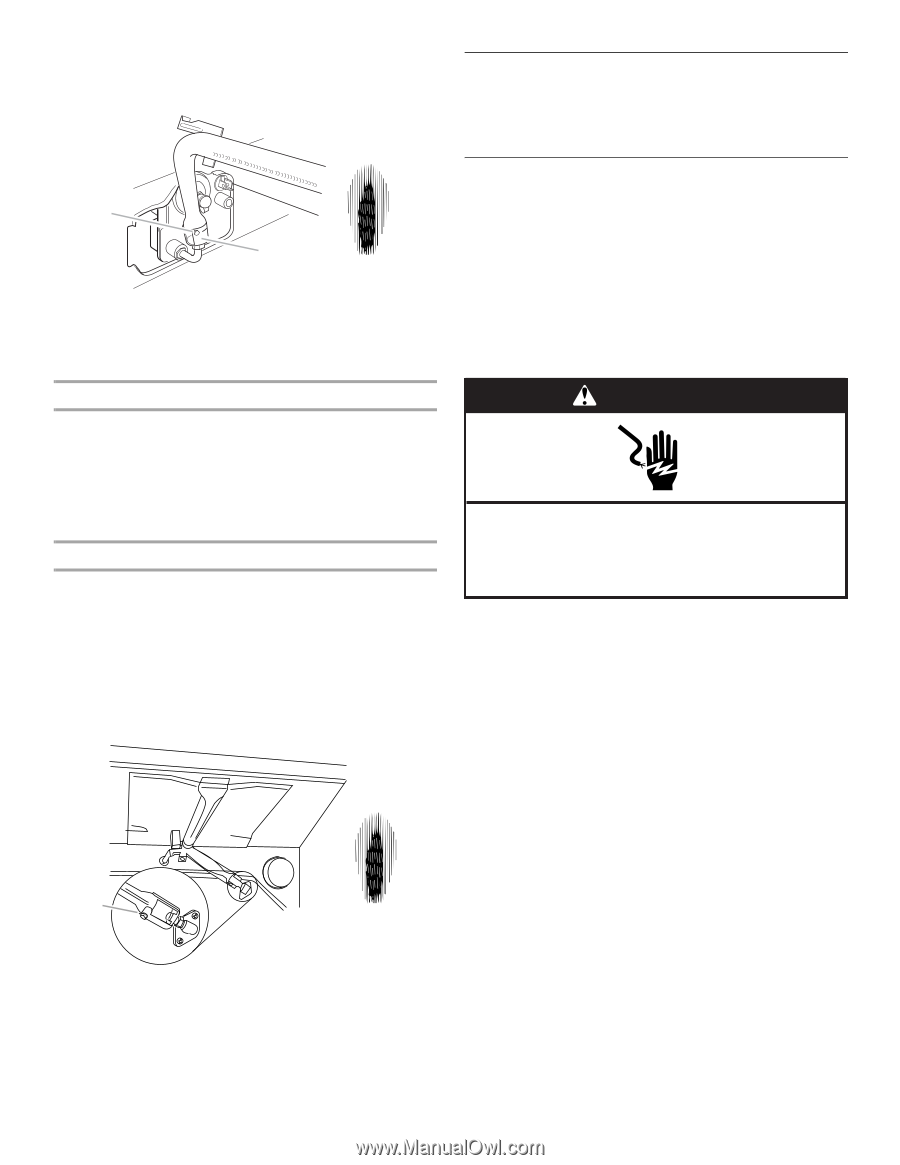
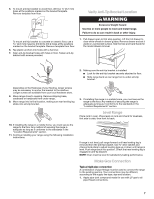
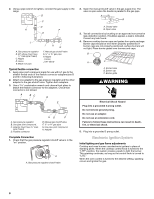
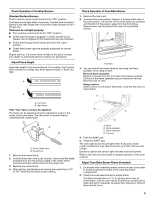
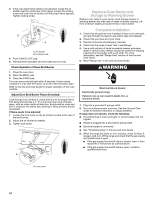
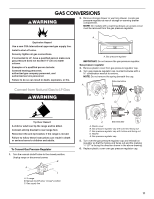
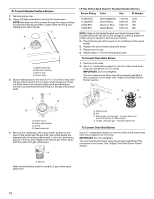
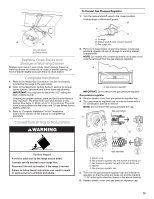
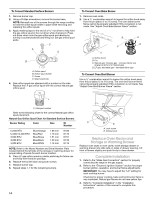
3. If the oven bake flame needs to be adjusted, locate the air shutter near the center rear of the range. Loosen the locking screw and rotate the air shutter until the proper flame appears. Tighten locking screw. B A A. Air shutter B. Locking screw 4. Push CANCEL/OFF pad. 5. Reinstall flame spreader and oven bake burner cover. Check Operation of Oven Broil Burner 1. Close the oven door. 2. Press the BROIL pad. 3. Press the START pad. The oven burner should light within 8 seconds. Under certain conditions it may take the burner up to 50 to 60 seconds to light. Refer to the Use and Care Guide for proper operation of the oven controls. Adjust Oven Broil Burner Flame (if needed) Look through oven window to check broil burner for proper flame. This flame should have a ½" (1.3 cm) long inner cone of bluishgreen, with an outer mantle of dark blue, and should be clean and soft in character. No yellow tips, blowing or lifting of flame should be present. If flame needs to be adjusted: 1. Loosen the lock screw on the air shutter located at the rear of the broil burner. 2. Adjust the air shutter as needed. 3. Tighten lock screw. A Replace Oven Racks and Storage or Warming Drawer Replace oven racks in oven cavity. Insert storage drawer or warming drawer into slide rails on sides of drawer opening. Lift front of drawer slightly and push firmly to close drawer. Complete Installation 1. Check that all parts are now installed. If there is an extra part, go back through the steps to see which step was skipped. 2. Check that you have all of your tools. 3. Dispose of/recycle all packaging materials. 4. Check that the range is level. See "Level Range." 5. Use a mild solution of liquid household cleaner and warm water to remove waxy residue caused by protective shipping material. Dry thoroughly with a soft cloth. For more information, see the "Range Care" section of the Use and Care Guide. 6. Read "Range Use" in the Use and Care Guide. WARNING Electrical Shock Hazard Electrically ground range. Failure to do so can result in death, fire, or electrical shock. 7. Plug into a grounded 3 pronge outlet. 8. Turn on surface burners and oven. See the Use and Care Guide for specific instruction on range operation. If range does not operate, check the following: s Household fuse is intact and tight; or circuit breaker has not tripped. s Range is plugged into a grounded 3 prong outlet. s Electrical supply is connected. s See "Troubleshooting" in the Use and Care Guide. 9. When the range has been on for 5 minutes, check for heat. If range is cold, turn off the range and check that the gas supply line shutoff valve is open. s If the gas supply line shutoff valve is closed, open it, then repeat the 5-minute test as outlined above. s If the gas supply line shutoff valve is open, contact a qualified technician. A. Lock screw 10
-
 1
1 -
2
-
3
-
4
-
 5
5 -
 6
6 -
 7
7 -
 8
8 -
 9
9 -
 10
10 -
 11
11 -
 12
12 -
 13
13 -
 14
14 -
 15
15 -
16
 |
 |