Whirlpool WDF530PLYB Installation Guide - Page 15
Choose Attachment Option
 |
View all Whirlpool WDF530PLYB manuals
Add to My Manuals
Save this manual to your list of manuals |
Page 15 highlights
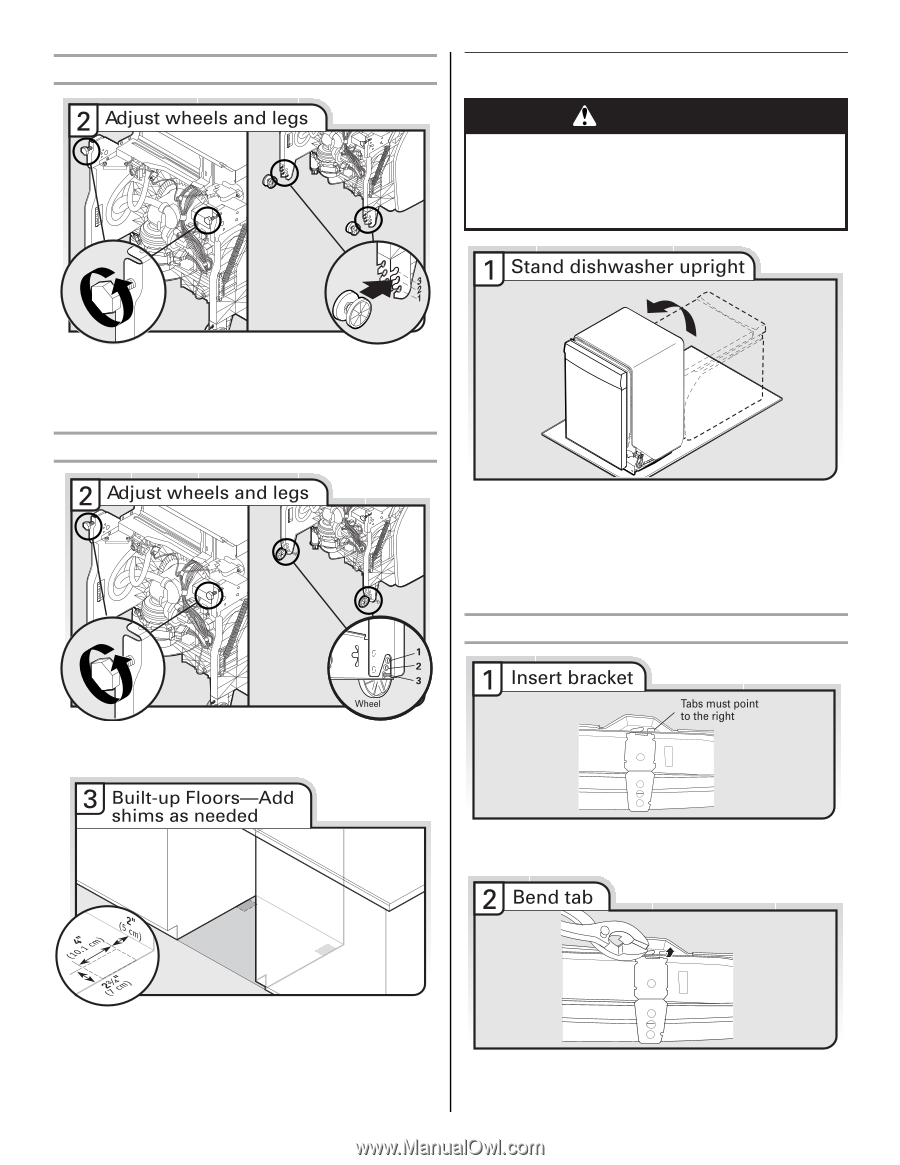
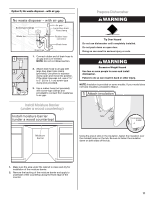
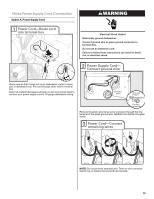
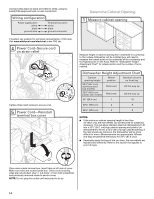
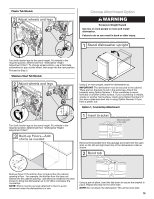
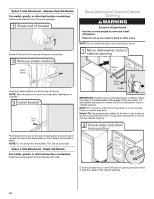
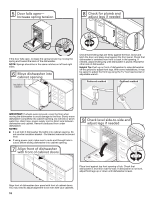
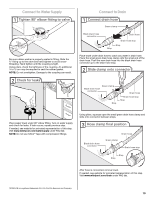
Plastic Tub Models Choose Attachment Option WARNING Excessive Weight Hazard Use two or more people to move and install dishwasher. Failure to do so can result in back or other injury. Turn both leveler legs to the same height. Put wheels in the required position determined from "Dishwasher Height Adjustment Chart." To change wheel position, use a flat-blade screwdriver to pop out the wheel, then snap into the new position. Proceed to Step 3. Stainless Steel Tub Models Using 2 or more people, stand the dishwasher up. IMPORTANT: The dishwasher must be secured to the cabinet. There are two brackets found in the parts bag. Attach the brackets using Option Number 1 if the countertop is wood, laminate or another similar surface. If your countertop is marble, granite or another hard surface, install using Option Number 2 if you have a stainless steel tub or using Option Number 3 if you have a plastic tub. Option 1, Countertop Attachment Turn both leveler legs to the same height. Put wheels in the required position determined from "Dishwasher Height Adjustment Chart." Remove the brackets from the package and insert into the open slots on the left and right-hand top of the dishwasher collar as shown. Built-up floors: If the kitchen floor is higher than the cabinet opening's floor - for example, the kitchen floor tile does not extend into the cabinet opening - add shims as needed in the area shown to bring the dishwasher up to 34" (86.4 cm) below the countertop. NOTE: Shims must be securely attached to floor to avoid movement when the dishwasher is in use. Using a pair of pliers, bend the tab down to secure the bracket in place. Repeat this step for the other side. NOTE: Do not attach the dishwasher. This will be done later. 15
-
 1
1 -
2
-
3
-
4
-
5
-
6
-
7
-
8
-
9
-
 10
10 -
 11
11 -
 12
12 -
 13
13 -
 14
14 -
 15
15 -
 16
16 -
 17
17 -
 18
18 -
 19
19 -
 20
20 -
21
-
22
-
23
-
24
-
25
-
26
-
27
-
28
-
29
-
30
-
31
-
32
-
33
-
34
-
35
-
36
-
37
-
38
-
39
-
40
-
41
-
42
-
43
-
44
-
45
-
46
-
47
-
48
 |
 |