Whirlpool WDPA70SAM Owners Manual - Page 20
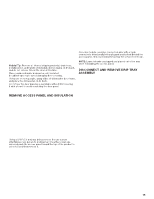
Place Dishwasher In Cabinet
 |
View all Whirlpool WDPA70SAM manuals
Add to My Manuals
Save this manual to your list of manuals |
Page 20 highlights
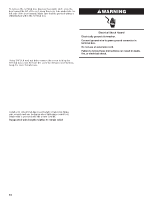
Remove the door handle and hex key from the packaging. Setscrews are already installed in the handle. Place handle on mounting studs with the setscrews facing down. Push the door handle tightly against the door. Insert the short end of the hex key into the setscrews. Tighten the setscrews 1/4 turn past snug. Retain hex key with Installation Instructions. Install Foam Side Shields (on some models) Install the foam side shields on both the right and left sides of the dishwasher. There are three attachment points on each side. ■ Attachment 1: Locate the slit on the side shield and attach it to the hook on the side of the dishwasher. (See figure 1) PLACE DISHWASHER IN CABINET WARNING Excessive Weight Hazard Use two or more people to move and install dishwasher. Failure to do so can result in back or other injury. Figure: 1 ■ Attachment 2: Use the other slit on the side shield and attach it to the hook on the front of the dishwasher. (See figure 2) 26. Stand dishwasher upright Figure: 2 ■ Attachment 3: Align the rectangular hole in the side shield with the toe panel screw hole. Insert the Toe Panel Screw (see figure 3) and Loosely tighten it to hold it in place until the Toe Panel is installed. ■ Tuck the lower ends of the side shields under the dishwasher. (See fugures 4 and 5) Using two or more people, stand the dishwasher up. NOTE: Do not install kick plate until instructed to do so. Dishwasher may fit tightly into cabinet opening. Do not remove insulation blanket-the blanket reduces the sound level. IMPORTANT: Do not kink or pinch water line, drain hose, power cord, or direct wire between dishwasher and cabinet. Remove cardboard from under dishwasher (if used). Figure: 3 Figure: 4 Figure: 5 NOTE: Route water supply, drain hose, and power cord out the rear of the dishwasher. If your product has insulation around the bottom, route these lines through the slits in that insulation in the rear of the product 20
-
 1
1 -
2
-
3
-
4
-
5
-
6
-
7
-
8
-
9
-
10
-
11
-
12
-
13
-
14
-
 15
15 -
 16
16 -
 17
17 -
 18
18 -
 19
19 -
 20
20 -
 21
21 -
 22
22 -
 23
23 -
 24
24 -
 25
25 -
26
-
27
-
28
-
29
-
30
-
31
-
32
-
33
-
34
-
35
-
36
-
37
-
38
-
39
-
40
-
41
-
42
-
43
-
44
-
45
-
46
-
47
-
48
-
49
-
50
-
51
-
52
-
53
-
54
-
55
-
56
-
57
-
58
-
59
-
60
-
61
-
62
-
63
-
64
-
65
-
66
-
67
-
68
-
69
-
70
-
71
-
72
-
73
-
74
-
75
-
76
-
77
-
78
-
79
-
80
-
81
-
82
-
83
-
84
-
85
-
86
-
87
-
88
 |
 |