Whirlpool WED75HEFW Use & Care Guide - Page 12
Additional Features, Cycle Status Indicators - side vent
 |
View all Whirlpool WED75HEFW manuals
Add to My Manuals
Save this manual to your list of manuals |
Page 12 highlights
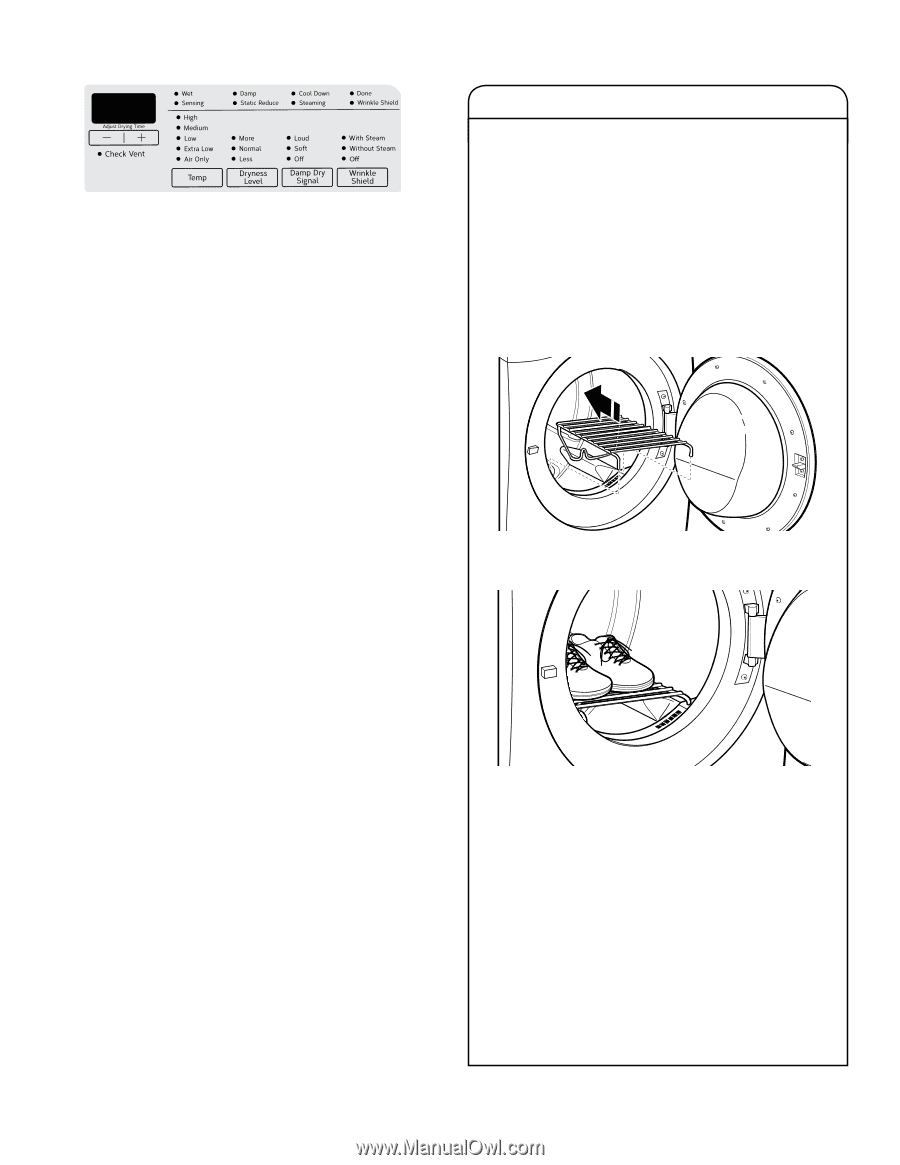
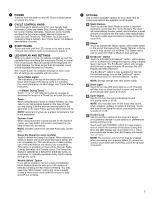
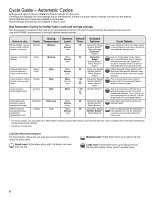
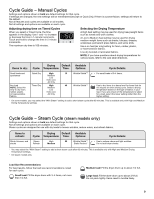
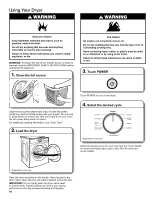
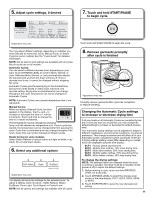
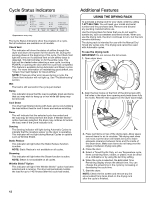
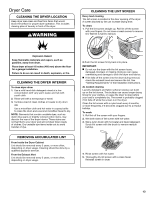
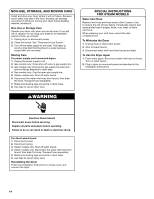
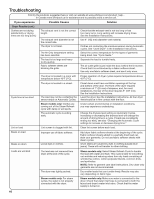
Cycle Status Indicators Appearance may vary. The Cycle Status Indicators show the progress of a cycle. Not all indicators are available on all models. Check Vent This indicator will show the status of airflow through the dryer and dryer vent system for the dryer's life. During the sensing phase at the beginning of the cycle, the Check Vent light will come on if a blocked vent or low airflow issue is detected. This light will stay on for the entire cycle. The light will be cleared when selecting a new cycle, touching POWER, or opening the door after the cycle has completed. This feature is available during Automatic and Steam cycles only. For more information on maintaining good airflow, see "Check Your Vent System for Good Airflow." NOTE: If there are other error issues during a cycle, the Check Vent indicator will not light up. See "Troubleshooting" section. Wet The load is still wet and/or the cycle just started. Damp This indicator shows that the load is partially dried and items that you may wish to hang up or iron while still damp may be removed. Cool Down The dryer has finished drying with heat, and is now tumbling the load without heat to cool it down and reduce wrinkling. Done This will indicate that the selected cycle has ended and the load may be removed from the dryer. If Wrinkle Shield™ option has been selected, the dryer may continue to tumble the load, even if the Done indicator is lit. Sensing The Sensing indicator will light during Automatic Cycles to indicate that the moisture sensor on the dryer is operating. This indicator will not light during Manual Cycles or options such as Wrinkle Shield. Static Reduce This indicator will light when the Static Reduce function is active. NOTE: Static Reduce is not available on all cycles. Steaming This indicator will light when the Steam function is active. NOTE: Steam is not available on all cycles. Wrinkle Shield™ Option This indicator will light if the Wrinkle Shield™ option has been selected and is running. The dryer will periodically tumble the load for up to 140 minutes after the cycle has ended. Additional Features USING THE DRYING RACK To purchase a drying rack for your dryer, order by calling 1-877-944-7566. You will need your model and serial number and the purchase date. Remove and discard any packing material before use. Use the Drying Rack for items that you do not want to tumble dry, such as sweaters and tennis shoes. When you use the drying rack, the drum continues to turn, but the rack remains stationary. The drying rack is intended for use with the Manual Dry/ Timed Dry cycles only. The drying rack cannot be used with Automatic cycles. To use the drying rack: IMPORTANT: Do not remove the lint screen. 1. Open dryer door. 2. Align the two hooks on the front of the drying rack with the holes in the dryer door opening and press down fully into holes. Rest the rear support on the dryer back ledge. 3. Place wet items on top of the drying rack. Allow space around items for air to circulate. The drying rack does not move, but the drum will rotate; be sure to leave adequate clearance between items and the inside of the dryer drum. Make sure items do not hang over the edges or between drying rack grille. 4. Close the door. 5. Select a Timed Dry/Air Only, or Low Temperature cycle. Items containing foam, rubber, or plastic must be dried on a clothesline or by using the Air Only setting. 6. When the cycle is selected, the Estimated Time Remaining display shows the default time. You can change the actual time in the cycle by increasing or decreasing the cycle time. 7. Start the dryer. NOTE: Check the lint screen and remove any lint accumulated from items dried on the drying rack after the cycle is finished. 12
-
 1
1 -
2
-
3
-
4
-
5
-
6
-
 7
7 -
 8
8 -
 9
9 -
 10
10 -
 11
11 -
 12
12 -
 13
13 -
 14
14 -
 15
15 -
 16
16 -
 17
17 -
18
-
19
-
20
-
21
-
22
-
23
-
24
-
25
-
26
-
27
-
28
-
29
-
30
-
31
-
32
-
33
-
34
-
35
-
36
-
37
-
38
-
39
-
40
 |
 |