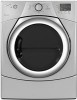
Whirlpool WED9250WL Use and Care Guide - Page 5
Quick Start Guide - lowes
 |
UPC - 883049188201
View all Whirlpool WED9250WL manuals
Add to My Manuals
Save this manual to your list of manuals |
Page 5 highlights
QUICK START GUIDE Estimated Time Remaining Control Lock Sensing Wet High Medium Low Extra Low Air Dry Damp Cool Down More Normal Less Done Wrinkle Shield On WARNING: To reduce the risk of fire electric shock, or injury to persons, read the IMPORTANT SAFETY INSTRUCTIONS before operating this appliance. This Use and Care Guide covers several different models. Your dryer may not have all the cycles and features described. USING AUTOMATIC CYCLES Press POWER. Select the desired AUTOMATIC cycle. Adjust the DRYNESS level, if desired. Select the WRINKLE SHIELD and/or SIGNAL feature, if desired. 7. Press and hold START/PAUSE to begin. To add or remove options during an Automatic Cycle: You may select or deselect the WRINKLE SHIELD and/or SIGNAL feature at any time during the cycle, if desired. USING TIMED CYCLES Use Timed Cycles to set a drying time and temperature. See the Cycles information on the following pages for more information. Press POWER. Select the desired TIMED Cycle. 5. Press More Time or Less time until the desired drying time is displayed. 6. Press TEMP until the desired temperature glows. 7. Select the WRINKLE SHIELD and/or SIGNAL feature, if desired. 8. Press and hold START/PAUSE to begin. To add or remove options during a Timed Cycle: You may select or deselect the WRINKLE SHIELD and/or SIGNAL feature at any time during the cycle, if desired. Press POWER. Open the door or press START/PAUSE once. Close the door and press and hold START/PAUSE. 5
-
 1
1 -
 2
2 -
 3
3 -
 4
4 -
 5
5 -
 6
6 -
 7
7 -
 8
8 -
 9
9 -
 10
10 -
 11
11 -
12
-
13
-
14
-
15
-
16
-
17
-
18
-
19
-
20
-
21
-
22
-
23
-
24
 |
 |
