Whirlpool WFW6620HC Owners Manual 1 - Page 9
Additional Cleaning, Installation Instructions, Requirements, Tools and Parts
 |
View all Whirlpool WFW6620HC manuals
Add to My Manuals
Save this manual to your list of manuals |
Page 9 highlights
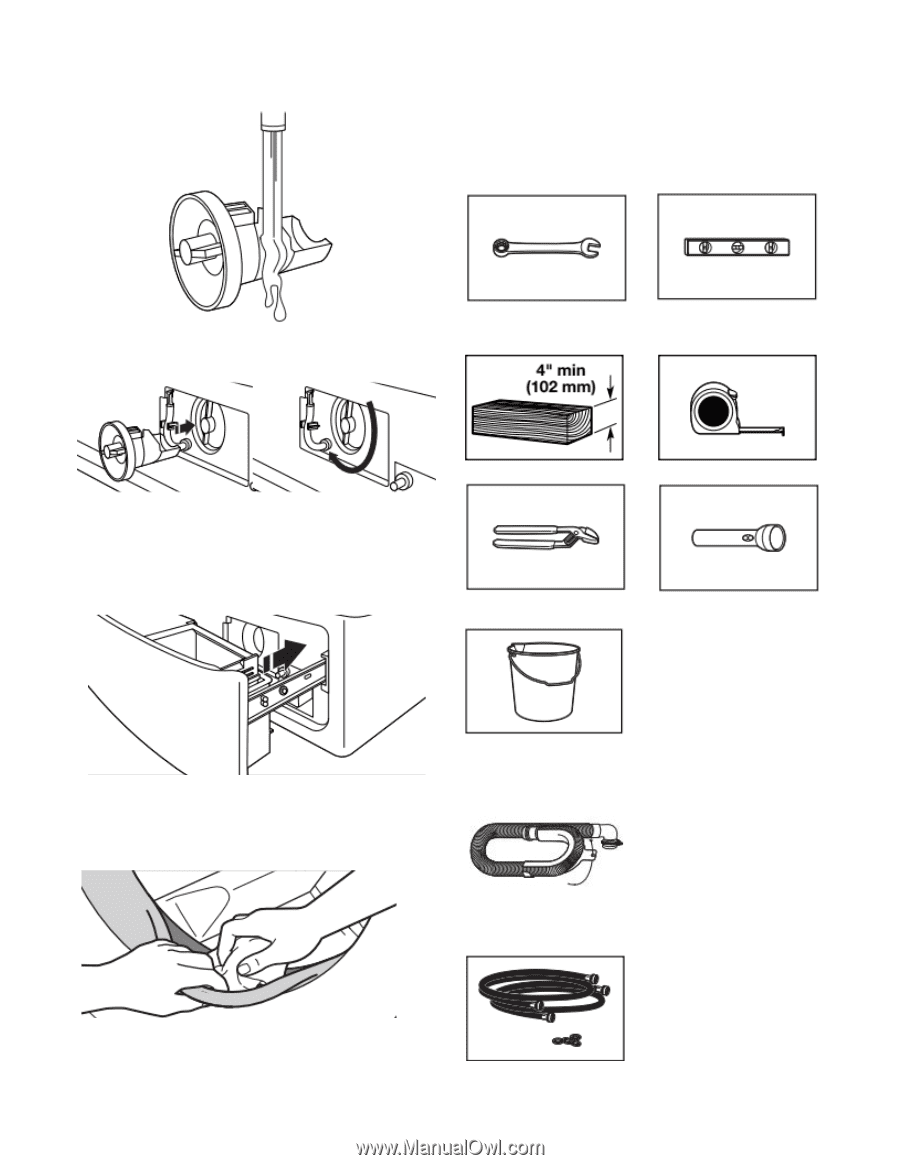
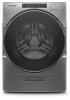
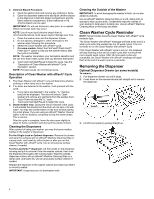
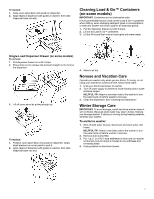
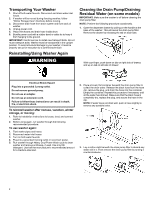
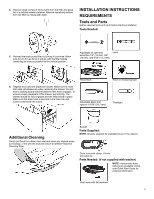
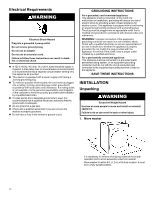
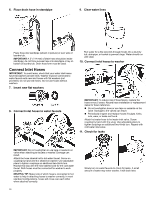
4. Remove large clumps of lint by hand from the filter and place lint in a suitable waste container. Remove remaining residue from the filter by rinsing with water. INSTALLATION INSTRUCTIONS REQUIREMENTS Tools and Parts Gather required tools and parts before starting installation. Tools Needed: 5. Reinsert the drain pump filter by turning it clockwise. Make sure to turn it in as far as it will go, with the filter handle remaining as close as possible to the vertical position. Adjustable or open end Level wrenches 1/2″ (13 mm), 5/8″ (16 mm), and 9/16″ (14.3 mm) Wood block 6. Replace and close the dispenser drawer. Make sure to insert both rails simultaneously when replacing the drawer. You will hear a clicking sound that indicates the rails have engaged. To ensure proper placement of the drawer, pull out fully. The drawer should be fully engaged and the rails locked in place. Make sure the drain hose is secured in the hose clip and tucked underneath the cutout. Adjustable pliers that open to 1 9/16″ (39.7 mm) Ruler or measuring tape Flashlight Additional Cleaning Gently pull back the rubber door seal and clean any stained areas, soil buildup, or lint with the textured side of an affresh® Machine Cleaning Wipe. Bucket Parts Supplied: NOTE: All parts supplied for installations are in the washer. Drain hose with clamp, U-form, and cable tie Parts Needed: (if not supplied with washer) NOTE: Various inlet hose options are available; check your Quick Start Guide for ordering information. Inlet hoses with flat washers 9
-
 1
1 -
2
-
3
-
 4
4 -
 5
5 -
 6
6 -
 7
7 -
 8
8 -
 9
9 -
 10
10 -
 11
11 -
 12
12 -
 13
13 -
 14
14 -
15
-
16
-
17
-
18
-
19
-
20
-
21
-
22
-
23
-
24
-
25
-
26
-
27
-
28
-
29
-
30
-
31
-
32
 |
 |