Whirlpool WGD5000DW Installation Guide - Page 7
Gas Dryer Power Hookup - lp kit
 |
View all Whirlpool WGD5000DW manuals
Add to My Manuals
Save this manual to your list of manuals |
Page 7 highlights
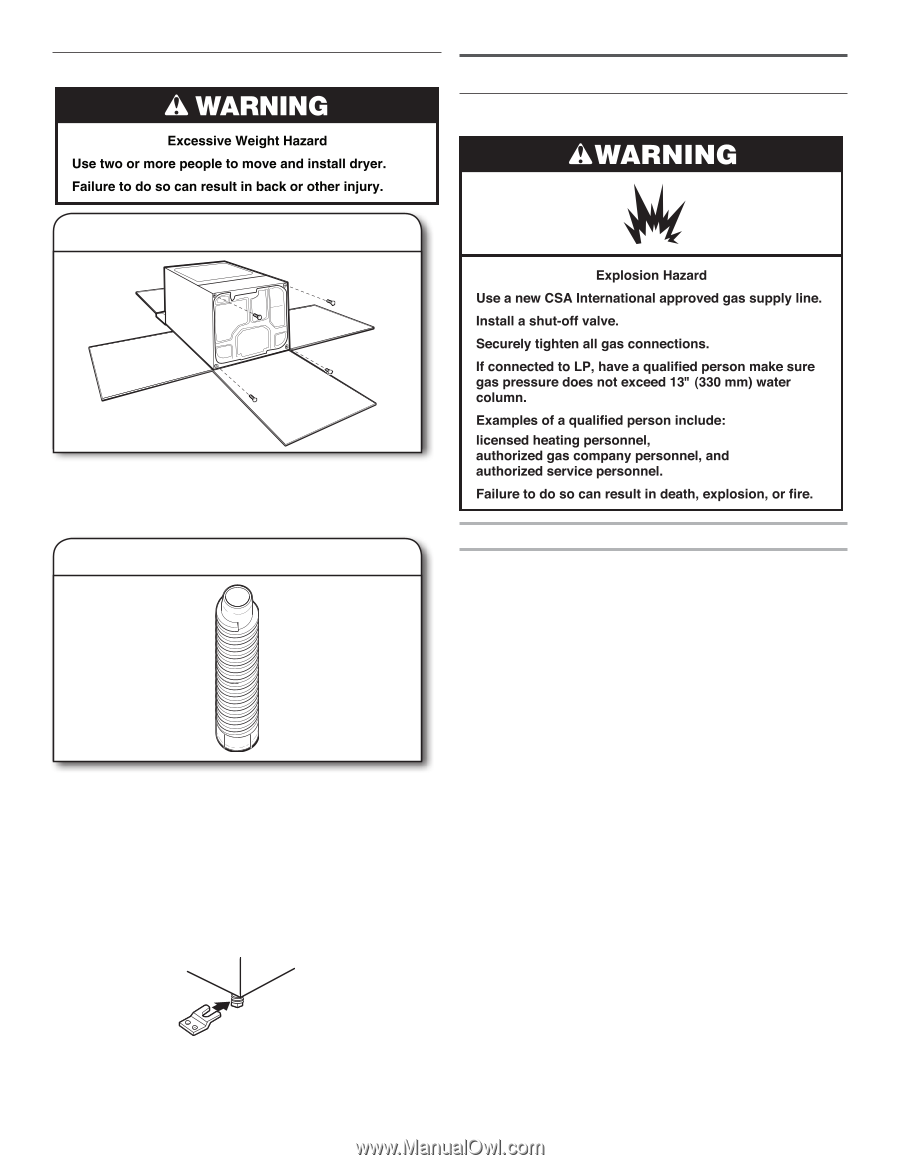
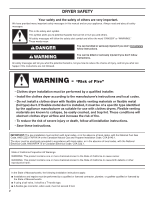
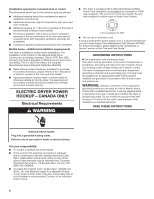
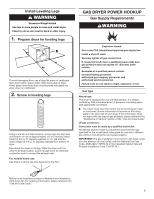
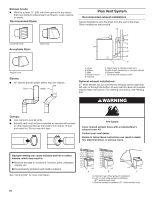
Install Leveling Legs GAS DRYER POWER HOOKUP Gas Supply Requirements 1. Prepare dryer for leveling legs To avoid damaging floor, use a large flat piece of cardboard from dryer carton; place under entire back edge of dryer. Firmly grasp dryer body (not console panel) and gently lay dryer down on cardboard. 2. Screw in leveling legs Using a wrench and tape measure, screw legs into leg holes until bottom of foot is approximately 1/2" (13 mm) (to match height of 3.6 cu. ft. capacity washer) or 1½" (38 mm) (to match height of 3.8 cu. ft. capacity washer) from bottom of dryer. Now stand the dryer on its legs. Slide the dryer until it is close to its final location. Leave enough room for electrical connection and to connect the exhaust vent. For mobile home use Gas dryers must be securely fastened to the floor. Gas type Natural gas: This dryer is equipped for use with Natural Gas. It is designcertified by CSA International for LP (propane or butane) gases with appropriate conversion. ■■ Your dryer must have the correct burner for the type of gas in your home. Burner information is located on the rating plate in the door well of your dryer. If this information does not agree with the type of gas available, please reference the "Assistance or Service" section of the "Use and Care Guide." LP gas conversion: Conversion must be made by a qualified technician. No attempt shall be made to convert the dryer from the gas specified on the model/serial rating plate for use with a different gas without consulting the serving gas supplier. IMPORTANT: The gas installation must conform with local codes, or in the absence of local codes, with the National Fuel Gas Code, ANSI Z223.1/NFPA 54 or the Canadian Natural Gas and Propane Installation Code, CSA B149.1. Mobile home installations require a Mobile Home Installation Hold-down Kit. For ordering information, please reference the "Use and Care Guide." 7
-
 1
1 -
 2
2 -
 3
3 -
 4
4 -
 5
5 -
 6
6 -
 7
7 -
 8
8 -
 9
9 -
 10
10 -
 11
11 -
 12
12 -
13
-
14
-
15
-
16
-
17
-
18
-
19
-
20
-
21
-
22
-
23
-
24
-
25
-
26
-
27
-
28
-
29
-
30
-
31
-
32
-
33
-
34
-
35
-
36
-
37
-
38
-
39
-
40
-
41
-
42
-
43
-
44
 |
 |